
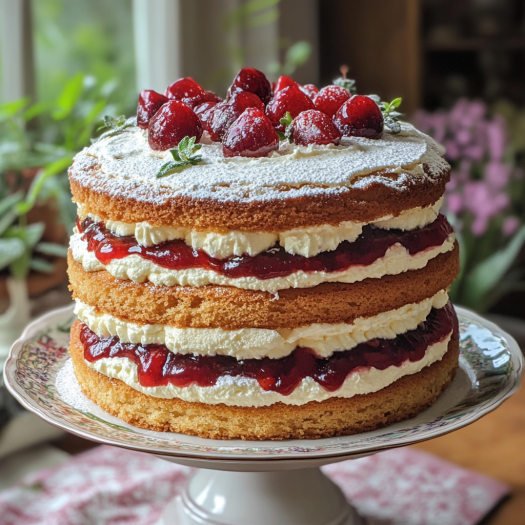
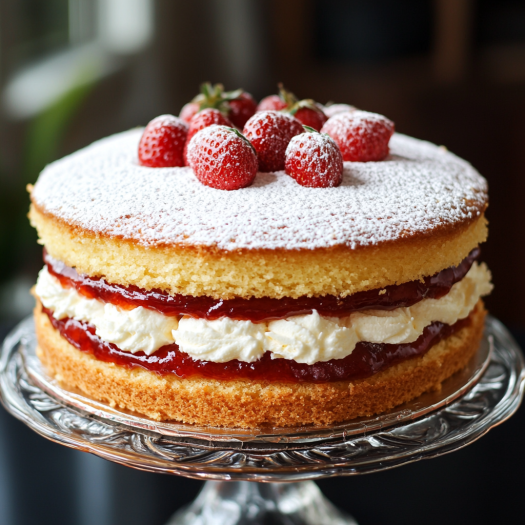
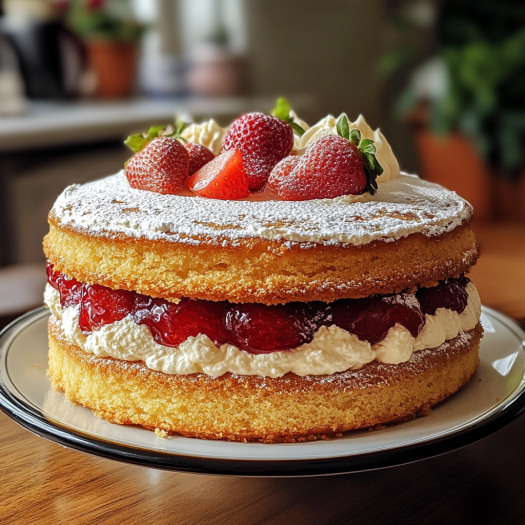
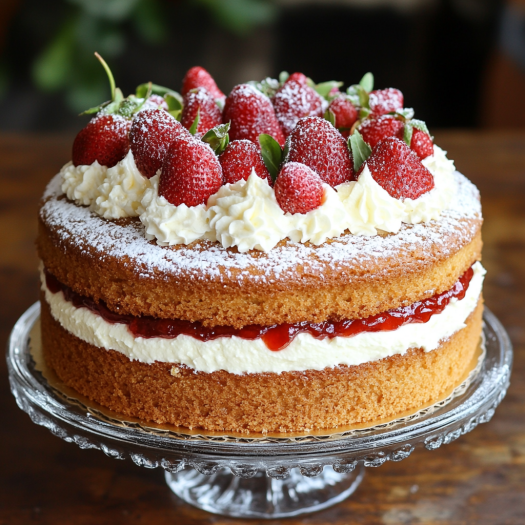
The Victoria sponge cake, named after Queen Victoria herself, is a quintessential British dessert that has stood the test of time. Known for its simplicity and elegance, this classic cake features layers of light, fluffy sponge sandwiched with buttery cream and sweet raspberry jam. It’s a staple at afternoon teas and family gatherings, loved for its timeless appeal and delicate balance of flavors.
In this post, we’ll delve into the art of baking the perfect Victoria sponge cake. Whether you’re a beginner baker or a seasoned pro, these expert tips will help you achieve a beautifully textured, deliciously moist sponge that’s sure to impress.
Achieving the ideal texture, taste, and presentation isn’t just about following a recipe—it’s about understanding the techniques and ingredients that make this cake extraordinary. Let’s explore how to master this iconic dessert step by step.
What Makes a Victoria Sponge Cake Unique?
The History and Tradition Behind Victoria Sponge Cake
The Victoria sponge cake is deeply rooted in British culinary heritage, having earned its name and fame during the Victorian era. Its association with Queen Victoria and afternoon tea has made it an enduring symbol of elegance and tradition.
The Victorian Origins of the Sponge Cake
During the reign of Queen Victoria (1837–1901), afternoon tea became a social custom, introduced by Anna, the Duchess of Bedford, to bridge the gap between lunch and dinner. It was during these tea breaks that the Victoria sponge cake rose to prominence. Queen Victoria, known for her fondness for sweets, reportedly enjoyed a slice of sponge cake with her tea, solidifying its status as a royal favorite.
How Afternoon Tea Shaped British Culinary Traditions
Afternoon tea was not just about refreshment—it was an opportunity to showcase delicate cakes, pastries, and finger sandwiches. The Victoria sponge cake, with its light texture and simple yet flavorful layers, perfectly complemented the sophistication of the occasion.
The Evolution of the Victoria Sponge Recipe
Originally, the Victoria sponge was made using the “pound cake formula,” where equal weights of butter, sugar, eggs, and flour ensured a perfectly balanced sponge. Over time, bakers began incorporating baking powder (a 19th-century innovation) to create an even lighter texture, a hallmark of the modern Victoria sponge.
The Addition of Buttercream and Jam
Traditionally filled with just raspberry jam, the Victoria sponge cake later evolved to include a layer of buttercream. This addition not only enhanced the cake’s richness but also provided a luxurious contrast to the tangy jam, making it even more indulgent.
A Cake That Stands the Test of Time
The Victoria sponge remains a beloved staple of British baking culture. It’s a centerpiece at village fêtes, tea rooms, and baking competitions like The Great British Bake Off. Its timeless appeal lies in its simplicity, making it both a nostalgic treat and a canvas for creativity.
Symbolism in Modern Times
Today, baking a Victoria sponge is more than a culinary activity—it’s a nod to tradition. Whether served at an afternoon tea party or baked as a family treat, it continues to bring people together, reflecting the warmth and hospitality of British culture.
By exploring the history and evolution of this iconic dessert, you’re connecting with a piece of culinary history that has delighted generations.
Key Characteristics: Light, Fluffy, and Balanced Sweetness
The Victoria sponge cake is celebrated for its simple yet exceptional qualities that set it apart from other cakes. Achieving the perfect balance of lightness, fluffiness, and sweetness is what makes this cake so iconic and universally loved. Let’s break down these key characteristics:
Lightness – The Foundation of a Great Sponge Cake
One of the defining features of a Victoria sponge is its light texture. This is achieved by carefully aerating the batter during the mixing process. Creaming the butter and sugar together until pale and fluffy incorporates air, creating the foundation for a cake that is soft and delicate.
The eggs also play a critical role in creating lightness. Whisked to the right consistency, they further aerate the batter, contributing to the cake’s airy structure. Using self-raising flour or adding baking powder ensures the batter rises evenly during baking, resulting in a sponge that feels almost weightless on the palate.
Fluffiness – A Delicate Structure That Holds Together
Fluffiness is what makes the Victoria sponge so satisfying to eat. It is the result of a balanced batter and the right baking technique. Overmixing can lead to a dense cake, while undermixing might leave lumps or an uneven texture.
To achieve a fluffy consistency, precision is key:
- Sift the flour to remove any lumps and ensure a smooth batter.
- Incorporate the flour gently into the mixture to preserve the air bubbles already created.
During baking, the oven’s heat causes these air bubbles to expand, giving the cake its characteristic rise and soft crumb. Using the correct size cake tins also ensures the batter cooks evenly, promoting a fluffy texture throughout.
Balanced Sweetness – A Perfectly Harmonized Flavor
A Victoria sponge cake is neither overly sweet nor bland—it strikes the perfect balance. The subtle sweetness comes primarily from the caster sugar used in the batter and is complemented by the tangy raspberry jam and the creamy richness of the buttercream filling.
Choosing high-quality ingredients is crucial for achieving this balance. Caster sugar dissolves more easily in the batter, ensuring an even sweetness without any grittiness. Similarly, using unsalted butter allows bakers to control the salt content and enhance the cake’s overall flavor profile without overpowering its delicate sweetness.
The combination of flavors in the filling also contributes to the cake’s balanced sweetness. The jam adds a fruity tang, while the buttercream introduces a creamy, slightly indulgent note. Together, they create a perfect harmony that enhances the cake’s light and fluffy base.
Why These Characteristics Matter
A Victoria sponge cake is a study in balance and refinement. Its lightness and fluffiness make it a pleasure to eat, while its restrained sweetness ensures it doesn’t overwhelm the palate. These qualities make it versatile enough to serve as an elegant centerpiece for afternoon tea or a comforting treat for any occasion.
Mastering these key characteristics requires attention to detail and a touch of patience, but the reward is a cake that embodies the very essence of timeless baking perfection.
How It Stands Out from Other Sponge Cakes
The Victoria sponge cake holds a special place in the world of desserts, thanks to its distinctive qualities and cultural significance. While there are many types of sponge cakes across different cuisines, the Victoria sponge sets itself apart in several key ways.
A Perfect Balance of Simplicity and Elegance
Unlike other sponge cakes that may rely on elaborate decorations, syrups, or multiple flavorings, the Victoria sponge cake is a testament to the beauty of simplicity. Its straightforward composition—a soft sponge, a layer of raspberry jam, and a rich buttercream filling—embodies elegance without excessive adornment.
Other sponge cakes, such as chiffon or génoise, often incorporate additional techniques or ingredients, like oil or whipped egg whites, to achieve their textures. The Victoria sponge, by contrast, relies on a traditional “pound cake” ratio of ingredients and minimalistic layering, making it approachable yet sophisticated.
A Denser Yet Delicate Texture
The Victoria sponge has a unique texture that is denser than some sponge cakes, like chiffon or angel food cake, yet still incredibly light and moist. This balance is achieved by creaming butter and sugar together, a method that differs from other sponge cakes, which may rely solely on egg aeration or oil for their structure.
Its slightly firmer crumb makes it ideal for layering with fillings like jam and buttercream, as it holds its shape without crumbling. This is particularly important for presentation, as the Victoria sponge is often served as a showpiece at tea parties and celebrations.
A Distinctively British Heritage
While many cultures have their own variations of sponge cakes, the Victoria sponge is quintessentially British, steeped in tradition and history. Its association with Queen Victoria and the ritual of afternoon tea sets it apart as more than just a dessert—it’s a symbol of refinement and hospitality.
Other sponge cakes, like the French génoise or Italian pan di Spagna, are often used as bases for more elaborate desserts like tortes or layer cakes. The Victoria sponge, on the other hand, is celebrated as a standalone cake, with its unpretentious charm and timeless appeal.
Signature Flavors and Pairings
The classic pairing of raspberry jam and buttercream gives the Victoria sponge its signature flavor profile. This combination creates a harmonious balance of fruity tanginess, creamy richness, and subtly sweet sponge. While other sponge cakes may include syrups, fruits, or custards, the Victoria sponge remains true to its original flavors, emphasizing quality ingredients over complexity.
Pairing the cake with a cup of tea is another hallmark of its uniqueness. Unlike other sponge cakes that might be served as dessert after a meal, the Victoria sponge is traditionally enjoyed as part of an afternoon tea, reinforcing its role as a cultural and culinary icon.
Why the Victoria Sponge Stands Out
The Victoria sponge’s enduring appeal lies in its simplicity, cultural significance, and unique texture. It doesn’t rely on fancy techniques or ingredients to shine; instead, it showcases how perfectly balanced flavors and textures can create a truly memorable cake.
Whether served at a family gathering, a village fête, or an elegant tea party, the Victoria sponge cake continues to stand out as a timeless classic that represents the very best of British baking.
Popular Fillings: Buttercream and Raspberry Jam
One of the defining features of a Victoria sponge cake is its signature filling: a luscious layer of raspberry jam paired with rich buttercream. These two ingredients are not only traditional but also essential to the cake’s flavor and texture. Together, they transform a simple sponge into a dessert that is both indulgent and perfectly balanced.
The Role of Raspberry Jam
Raspberry jam is the star of the Victoria sponge filling, offering a fruity tang that cuts through the sweetness of the cake and buttercream. Its vibrant red hue also adds a visual appeal that contrasts beautifully with the pale sponge layers.
- Why Raspberry?
- Raspberry jam was historically chosen because of its availability and rich flavor. The tartness of the raspberries complements the sweetness of the sponge, making it a refreshing addition.
- Other jams, such as strawberry or apricot, can be used as alternatives, but raspberry remains the classic choice for its slightly tangy profile.
- Choosing the Right Jam
- For an authentic Victoria sponge, opt for a high-quality raspberry jam or make your own at home for a more personal touch. Avoid jams with too much added sugar, as they can overpower the delicate balance of flavors.
- Spreading It Evenly
- The jam should be spread in an even layer to ensure each bite includes its fruity flavor. A thin, uniform coating prevents the cake from becoming too sweet or overly sticky.
Buttercream – The Rich Counterpart
The buttercream filling adds a creamy, luxurious texture to the Victoria sponge, balancing the tartness of the raspberry jam and enhancing the overall indulgence.
- Classic Buttercream Recipe
- Traditional buttercream is made with unsalted butter and powdered sugar, whipped together until light and airy. A splash of milk or vanilla extract can be added for extra flavor.
- The buttercream should be smooth and easy to spread, creating a uniform layer that complements the sponge.
- Achieving the Right Consistency
- The buttercream should be soft enough to spread easily but firm enough to hold its shape between the layers. Overly stiff buttercream can make the cake difficult to slice, while overly soft buttercream may seep out of the sides.
- Variations for Buttercream
- For a modern twist, flavored buttercreams such as vanilla bean, lemon, or almond can be used. However, it’s essential to ensure the flavors don’t overpower the simplicity of the traditional recipe.
The Balance Between Jam and Buttercream
The true magic of a Victoria sponge lies in the balance between the jam and buttercream. Neither should dominate the other; instead, they should work in harmony to enhance the cake’s flavor and texture.
- Layering Technique
- Spread the jam on one sponge layer and the buttercream on the other to avoid mixing them prematurely. This also ensures that each layer retains its distinct flavor and texture.
- Proportions Matter
- The layers of jam and buttercream should be thin yet noticeable. Too much filling can overwhelm the light sponge, while too little can make the cake feel dry or underwhelming.
Alternatives and Additions
While buttercream and raspberry jam are traditional, there’s room for experimentation:
- Fruit Variations: Try strawberry, blackcurrant, or apricot jams for a subtle twist.
- Whipped Cream: Some prefer replacing buttercream with lightly sweetened whipped cream for a lighter filling.
- Fresh Fruit: Add fresh raspberries or sliced strawberries alongside the jam for a burst of freshness.
Why These Fillings Matter
The combination of raspberry jam and buttercream is what gives the Victoria sponge its distinctive flavor profile. The tartness of the jam, paired with the creaminess of the buttercream, complements the light sponge, creating a dessert that’s rich yet refreshing. This balance is why the Victoria sponge has remained a beloved classic for generations.
By mastering these fillings, you can elevate your Victoria sponge to new levels of perfection, whether you’re sticking to tradition or adding your personal touch.
Essential Ingredients for the Perfect Sponge Cake
Flour: Why Self-Raising Flour is a Must for Lightness
When it comes to baking the perfect Victoria sponge, the choice of flour plays a crucial role in achieving the desired lightness and airy texture. Self-raising flour is a staple ingredient in this classic cake, and for good reason. Let’s explore why it’s essential for creating the perfect sponge and how it contributes to the cake’s structure and texture.
What is Self-Raising Flour?
Self-raising flour is a type of flour that has a leavening agent (typically baking powder) already incorporated into it. This makes it different from plain or all-purpose flour, which requires the addition of baking powder separately. The leavening agent in self-raising flour helps the cake rise during baking, resulting in a light and fluffy texture.
- Composition of Self-Raising Flour
- Self-raising flour is made by combining plain flour with a specific amount of baking powder. The exact proportion of baking powder to flour is typically 1 to 1.5 teaspoons per cup of flour, though this can vary slightly depending on the brand.
- The presence of baking powder ensures that the cake rises evenly and doesn’t become dense or heavy, which is a common issue when plain flour is used without the right amount of leavening.
The Role of Self-Raising Flour in Creating Lightness
The key to a perfect Victoria sponge lies in achieving a cake that’s light, soft, and airy. Self-raising flour plays a vital role in making this possible by providing consistent lift during baking. Without it, your sponge might turn out dense or too heavy, lacking the delicate crumb that defines a well-made Victoria sponge.
- How It Works
- The baking powder in self-raising flour releases carbon dioxide when it comes into contact with moisture and heat. This process creates air bubbles that expand during baking, causing the cake to rise and become light and fluffy.
- This reaction is particularly important in sponge cakes, where the texture is just as crucial as the flavor. Self-raising flour ensures that your cake will have that delicate, airy crumb that’s so desirable in a Victoria sponge.
- Consistency in Texture
- Using self-raising flour ensures that each batch of Victoria sponge will have the same texture. The incorporation of the leavening agent is consistent, preventing variations in rise and texture that could occur when using plain flour with inconsistent amounts of baking powder.
Why Self-Raising Flour is Preferred Over Plain Flour
Many bakers are tempted to use plain flour with an added teaspoon or two of baking powder as a substitute for self-raising flour, but this method doesn’t always guarantee the same results. The precision and consistency of self-raising flour offer distinct advantages that make it the preferred choice in recipes like the Victoria sponge.
- No Guesswork Involved
- With self-raising flour, there’s no need to measure or calculate the amount of baking powder you need to add. It’s already done for you, ensuring a more reliable outcome. This is especially important in recipes like the Victoria sponge, where achieving the right texture is key.
- Even Rise
- The leavening agent in self-raising flour is evenly distributed, ensuring a uniform rise. Using plain flour with added baking powder may result in uneven distribution, causing parts of the cake to rise more than others and leading to a less-than-perfect texture.
Alternatives to Self-Raising Flour
If you don’t have self-raising flour on hand, there are some alternatives you can use, but they require careful attention.
- Plain Flour with Baking Powder
- If you’re using plain or all-purpose flour, you’ll need to add baking powder yourself. The typical substitution ratio is 1 cup of plain flour to 1 ½ teaspoons of baking powder. Make sure to sift the flour and baking powder together to ensure even distribution before using.
- Plain Flour with Baking Soda
- In some recipes, you can also substitute baking soda for baking powder. However, this requires careful adjustment of the other ingredients, as baking soda requires an acid (like vinegar or lemon juice) to activate it. It’s often not a direct one-to-one substitution and may slightly alter the flavor.
How to Choose the Right Self-Raising Flour
While self-raising flour is a must for making a light Victoria sponge, it’s important to choose the right brand and type. Not all self-raising flours are created equal, and their baking powder content can vary.
- Check the Leavening Agent
- Some self-raising flours use a stronger or weaker leavening agent, which can affect the rise and texture of your cake. Look for one that offers a consistent and reliable result, preferably one with a moderate amount of baking powder.
- Consider the Protein Content
- The protein content of self-raising flour can vary between brands. A lower protein content tends to yield a softer, lighter cake, which is perfect for a Victoria sponge. Higher-protein flours may give a denser texture, which isn’t ideal for this delicate cake.
Why It’s a Must for Your Victoria Sponge
The light and airy texture of a perfect Victoria sponge cake hinges on the right flour. Self-raising flour not only ensures that your sponge rises perfectly but also contributes to the overall structure, making it soft and fluffy without being too crumbly. Its use in the Victoria sponge is part of what makes this classic cake so iconic, with its airy, delicate crumb and moist, tender layers.
Eggs: Room Temperature Eggs for Better Whisking and Volume
Eggs are a fundamental ingredient in any sponge cake, and in the case of a Victoria sponge, they play a crucial role in achieving that light, airy texture. The key to perfecting your Victoria sponge lies in how the eggs are handled, particularly their temperature. Using room temperature eggs can significantly improve the structure, volume, and overall texture of the cake.
Why Room Temperature Eggs Matter
When eggs are used at room temperature, they incorporate air more easily when whisked, which is essential for achieving the light, fluffy texture characteristic of a Victoria sponge. Cold eggs, on the other hand, tend to resist aeration, resulting in a denser cake with less rise.
- Better Whisking Action
- Room temperature eggs whisk more easily than cold eggs. The proteins in eggs are more pliable at room temperature, making it easier for them to form the bubbles needed to create a light structure. Cold eggs can cause the batter to become too thick and difficult to incorporate air, limiting the cake’s ability to rise during baking.
- Improved Volume
- Using eggs at room temperature allows the batter to expand more effectively during the whisking process, creating a larger volume of batter. This increased volume is critical for achieving the airy, sponge-like texture of the Victoria sponge. Cold eggs can impede this process, leading to a flatter, denser cake.
How to Bring Eggs to Room Temperature
If you’ve forgotten to take your eggs out in advance, there are a few simple ways to bring them to room temperature without compromising the batter.
- Warm Water Method
- If you’re in a hurry, place cold eggs in a bowl of warm (not hot) water for about 10–15 minutes. The warmth of the water will gently bring the eggs to room temperature without cooking them.
- Avoid using boiling water, as this can cause the eggs to cook or become unevenly warmed.
- Leave Them on the Counter
- The simplest method is to let your eggs sit on the counter for 30 minutes to an hour before baking. If you plan ahead, this will ensure that your eggs are at the optimal temperature for whisking.
- Avoid Microwaving Eggs
- Some bakers may consider microwaving eggs to bring them to room temperature quickly, but this is not recommended. Microwaving eggs can lead to uneven heating, which could cause the eggs to cook in parts or create an undesirable texture.
The Role of Eggs in Sponge Cake Structure
In addition to aiding in volume and texture, eggs also contribute to the overall structure of the Victoria sponge. They help to bind the ingredients together and provide moisture, ensuring the cake remains tender without being too crumbly.
- Binding Agent
- Eggs act as a binding agent in the batter, helping to hold the flour, sugar, and butter together in a cohesive structure. This ensures that the batter doesn’t separate or become too loose, which could lead to an uneven rise.
- Moisture and Tenderness
- The yolks of the eggs provide fat, which adds moisture and richness to the cake, while the whites contribute to the cake’s structure by forming delicate air pockets. This balance of fat and structure is what gives the Victoria sponge its signature soft, yet slightly firm texture.
- Natural Leavening
- Eggs, especially when beaten, help the batter rise. The air that is trapped in the egg whites when they are whisked expands during baking, giving the sponge its characteristic lift and fluffiness.
The Correct Whisking Technique
Proper whisking of eggs is essential to maximizing their aeration and achieving the desired volume in your sponge. Overwhisking or underwhisking can lead to uneven results.
- Whisking by Hand vs. Electric Mixer
- While you can whisk eggs by hand, an electric mixer (or stand mixer) is more efficient, especially for the volume needed in a Victoria sponge. Start at a low speed to gently break up the eggs, then gradually increase the speed to create more air.
- Whisk until the eggs become pale, fluffy, and have increased in volume. The mixture should form soft peaks when you lift the whisk out.
- Avoid Overbeating
- Be careful not to overbeat the eggs, as this can lead to a grainy texture and cause the batter to lose its stability. Stop whisking once the mixture reaches soft peaks, where the egg foam holds its shape but is still soft and shiny.
The Impact of Egg Size
The size of the eggs used can also influence the texture of your Victoria sponge. Most recipes are written with large eggs in mind, so it’s important to use the size specified in the recipe to ensure the right balance of wet to dry ingredients.
- Too Small Eggs
- If the eggs are too small, the batter may end up too thick, which could prevent the sponge from rising correctly. This can lead to a denser, flatter cake.
- Too Large Eggs
- Using larger eggs can introduce too much liquid into the batter, making it too runny. This can cause the cake to collapse during baking and may result in uneven texture.
How to Troubleshoot Egg-Related Issues
If you accidentally use cold eggs or overbeat them, it’s not the end of the world, but you may need to make adjustments to your method.
- For Cold Eggs: Warm them up as quickly as possible before incorporating them into the batter. If they’re already in the batter, gently warm the mixture over a double boiler while whisking to help bring the temperature up.
- For Overbeaten Eggs: If you’ve overwhisked the eggs, the batter may become too stiff. You can try gently folding in a little extra milk or water to loosen the mixture, but it’s best to avoid overbeating from the start.
Why Room Temperature Eggs Are Essential for Your Victoria Sponge
Room temperature eggs are essential for achieving the perfect Victoria sponge. By incorporating more air into the batter and increasing volume, they help create that signature light and fluffy texture. The eggs also serve to bind the cake together, adding moisture and structure. Ultimately, room temperature eggs are a small but powerful detail that ensures your sponge rises beautifully and bakes to perfection.
Sugar and Butter: Choosing Caster Sugar and Unsalted Butter for the Best Results
When it comes to baking the perfect Victoria sponge, the choice of sugar and butter plays a crucial role in achieving the ideal texture, flavor, and overall quality of the cake. The combination of caster sugar and unsalted butter is essential for creating a light, tender crumb and a rich, balanced flavor. Let’s take a closer look at why these ingredients are preferred and how they contribute to the success of your Victoria sponge.
Why Caster Sugar is Essential for a Light Texture
Caster sugar, also known as superfine sugar, is the key to achieving a smooth, delicate texture in a Victoria sponge. Its fine granules allow it to dissolve more easily into the butter, which creates a smoother batter and helps the cake rise evenly.
- Finer Granules for Better Dissolution
- The fine texture of caster sugar ensures that it dissolves quickly when creamed with butter. This process, known as “creaming,” is crucial for incorporating air into the mixture, which gives the Victoria sponge its light and fluffy texture. If you were to use regular granulated sugar, the larger crystals would take longer to dissolve and may cause a grainy texture in the cake.
- Even Distribution of Sweetness
- Because caster sugar dissolves more efficiently, it ensures that the sweetness is evenly distributed throughout the batter. This helps create a balanced flavor, without pockets of undissolved sugar, which can lead to uneven sweetness in the finished cake.
- Lightness and Airiness
- The air trapped in the butter during the creaming process, combined with the quick dissolution of the caster sugar, results in a batter that is light and airy. This contributes to the Victoria sponge’s signature soft crumb and prevents the cake from becoming dense or overly heavy.
The Importance of Unsalted Butter
Unsalted butter is the preferred choice for baking a Victoria sponge, and for good reason. The absence of salt allows the natural flavors of the cake to shine through, and it also gives you more control over the seasoning of the cake.
- Control Over Salt Levels
- By using unsalted butter, you can control the exact amount of salt in your recipe. If you were to use salted butter, the cake may end up too salty, which could overwhelm the delicate sweetness of the sponge. For a balanced flavor, it’s always best to use unsalted butter and add salt separately, if needed, in small amounts.
- Flavor Profile
- Unsalted butter has a cleaner, purer flavor that enhances the other ingredients in the Victoria sponge. This is especially important for a simple cake like the Victoria sponge, where the natural flavors of the butter, eggs, and flour are meant to shine without being masked by salt.
- Texture and Consistency
- Unsalted butter, when used at the correct temperature (room temperature), creams perfectly with caster sugar to create a smooth, fluffy batter. This is essential for achieving the light, airy texture of the Victoria sponge. Salted butter may not cream as smoothly, and its slightly grainy texture could affect the overall consistency of the batter.
How Butter and Sugar Work Together in the Creaming Process
The creaming method is a critical step in making a Victoria sponge, and it involves beating the butter and sugar together until they are light and fluffy. This process incorporates air into the batter, which is key for achieving the cake’s lightness.
- Creaming Butter and Sugar Properly
- To achieve the best results, both the butter and sugar need to be at room temperature. Cold butter will not cream properly with the sugar, leading to a lumpy, uneven batter. If the butter is too warm or melted, the mixture will be too runny, which can result in a flat cake.
- Using a stand mixer or hand mixer on medium speed, cream the butter and sugar together until the mixture turns pale and fluffy. This process should take about 3-5 minutes, and it’s important not to rush it. The more air you can incorporate, the lighter your cake will be.
- Texture and Volume
- The creaming method, aided by caster sugar, creates an emulsion of fat and air. This emulsion forms a delicate network that traps air in the batter, contributing to a cake that rises beautifully and has a light, open crumb. The sugar helps to dissolve the butter evenly, creating a smooth, homogenous mixture that sets the stage for a perfect Victoria sponge.
Why You Shouldn’t Substitute with Other Sugars or Butter
While it might be tempting to experiment with other types of sugars or butter, such as brown sugar or margarine, these substitutions can impact both the texture and flavor of your Victoria sponge.
- Brown Sugar vs. Caster Sugar
- Brown sugar has molasses content, which can add moisture to the cake, but it will also result in a denser, slightly more caramel-flavored sponge. While it might work in certain cakes, it’s not ideal for the delicate texture you’re aiming for in a Victoria sponge.
- Additionally, brown sugar has larger crystals than caster sugar, meaning it won’t dissolve as easily, potentially leading to a grittier texture. For the best Victoria sponge, stick with caster sugar for that smooth, light crumb.
- Margarine vs. Unsalted Butter
- Margarine is often used as a substitute for butter, but it doesn’t have the same rich, creamy flavor. It may also contain more water and less fat than butter, which can alter the cake’s texture, making it less tender and less likely to rise as well. For the most authentic, flavorful Victoria sponge, opt for unsalted butter.
- Unsalted butter also has a higher fat content than margarine, which helps with the tenderization of the sponge. Fat is crucial in creating the crumb’s texture, so using margarine can compromise the desired lightness and richness of the cake.
Key Takeaways for Perfecting Your Victoria Sponge
The combination of caster sugar and unsalted butter is essential for achieving a light, airy, and flavorful Victoria sponge. Caster sugar ensures smooth dissolution, better aeration, and a balanced sweetness, while unsalted butter allows for better control over the flavor and ensures a smoother, creamier batter. By using these two ingredients at the correct temperature and in the right proportions, you set the stage for a Victoria sponge that has the perfect texture, flavor, and rise—every time.
Optional Extras: Adding Vanilla Essence or Experimenting with Zesty Flavors
While the traditional Victoria sponge is delicious in its simplest form, there are plenty of ways to elevate its flavor profile by adding optional extras. Two of the most popular options for flavoring a Victoria sponge are vanilla essence and zesty citrus flavors. These additions can enhance the overall taste of the cake, offering subtle complexities or bright, refreshing notes that complement the richness of the butter and sweetness of the sugar. Let’s explore how each of these optional extras can be incorporated into your Victoria sponge recipe.
Why Vanilla Essence is a Classic Addition
Vanilla essence (or extract) is a time-honored addition to many cakes, including the Victoria sponge. It imparts a warm, aromatic flavor that enhances the other ingredients in the cake, complementing the sweetness of the sugar and the richness of the butter.
- Flavor Depth
- Vanilla has a natural sweetness and complex flavor profile that makes it a perfect match for the subtle taste of the Victoria sponge. It works in harmony with the eggs, sugar, and butter to elevate the cake without overpowering it. When you add vanilla essence to your batter, it deepens the cake’s flavor and gives it a comforting, aromatic quality.
- Vanilla vs. Artificial Flavoring
- Vanilla extract is made from real vanilla beans, while vanilla essence is often an artificially flavored product. For the best flavor, it’s recommended to use pure vanilla extract, as it provides a richer, more authentic taste. However, if you only have vanilla essence, it can still be used in a pinch. The result will be a slightly less complex flavor, but it will still enhance the cake in a satisfying way.
- How Much to Use
- A few drops (around 1 teaspoon) of vanilla essence or extract is generally sufficient to impart a noticeable but not overpowering flavor. Be cautious not to add too much, as it can become overly fragrant and mask the delicate balance of the other ingredients.
Experimenting with Zesty Flavors for a Refreshing Twist
If you’re looking to add a bit of brightness or freshness to your Victoria sponge, experimenting with zesty citrus flavors is a great option. Citrus zest, whether from lemons, oranges, or limes, can add a refreshing, tangy contrast to the rich butter and sweet cake. These zesty flavors can work wonderfully as a contrast to the jam and buttercream filling, giving the cake an unexpected lift.
- Lemon Zest for a Tangy Kick
- Adding lemon zest to your batter brings a sharp, tangy note that pairs perfectly with the richness of the butter. Lemon zest is the outer peel of the lemon, packed with aromatic oils that release a bright citrus fragrance when grated. This small addition can make a big difference, infusing the cake with a vibrant, citrusy flavor.
- Lemon zest works especially well with the traditional raspberry jam filling in a Victoria sponge, as the sweet-tart jam complements the zesty brightness of the lemon. If you’re using lemon zest in the batter, you might also consider adding a little lemon juice to the filling for a seamless flavor combination.
Orange Zest for a Mellow, Sweet Flavor
- If you prefer a more mellow citrus flavor, orange zest is a fantastic option. It provides a subtle sweetness, less sharp than lemon, and gives the cake a warm, fragrant citrus undertone. Orange zest pairs beautifully with the buttery texture of the sponge, creating a soft, balanced flavor.
- You can also experiment with a spoonful of orange juice in the filling or drizzle it over the cake for extra citrusy goodness. This can add a touch of moisture while enhancing the citrus profile of the cake.
- Lime Zest for a Bold, Exotic Twist
- For a more exotic twist, lime zest adds a lively, tangy flavor that works particularly well if you want a cake that’s both fresh and a bit unique. Lime zest is bold and zesty, making it an excellent choice for those who enjoy a more intense citrus flavor.
- Lime zest can be paired with coconut in the filling for a tropical variation of the Victoria sponge, or you can combine it with a mango or passionfruit jam for a refreshing, summery alternative to traditional raspberry.
How to Incorporate Flavors into the Victoria Sponge Batter
Adding flavoring to your Victoria sponge is straightforward, but it’s important to do so in a way that allows the flavors to meld into the batter without overpowering it.
- Add Flavoring to the Butter and Sugar Mixture
- The best time to add vanilla essence, citrus zest, or any other flavoring is when you’re creaming the butter and sugar together. This ensures that the flavoring is evenly distributed throughout the batter, allowing the flavor to infuse into the cake right from the start.
- If you’re using citrus zest, make sure to add it to the butter-sugar mixture, as this will release the aromatic oils in the zest and help the flavor permeate the cake batter. The zest will mix with the fat in the butter, creating a smooth incorporation.
- Adjust Quantities Based on Strength of Flavor
- Citrus zest can vary in strength depending on the type of fruit and how finely it’s grated. Start with about one teaspoon of zest per sponge layer, and adjust according to your taste. For vanilla essence, 1 teaspoon should be enough for a subtle but noticeable flavor.
- If you want a stronger flavor, feel free to add a little more, but be mindful not to overwhelm the delicate balance of the other ingredients in the cake. Less is often more when it comes to flavoring a Victoria sponge.
Pairing Flavor Variations with Fillings and Decorations
Once you’ve added flavor to your sponge cake, think about how you can complement these flavors with your filling and decorations. This is an opportunity to enhance the overall flavor experience and make your Victoria sponge more memorable.
- Vanilla Sponge with Buttercream and Jam
- A traditional vanilla Victoria sponge pairs wonderfully with classic fillings such as buttercream and raspberry jam. The sweetness of the vanilla sponge complements the rich buttercream, while the tartness of the raspberry jam cuts through the sweetness, creating a well-balanced bite.
- You can add a few drops of vanilla extract to the buttercream for consistency in flavor or experiment with adding a touch of lemon zest for a bright twist.
- Citrus-Spiked Sponge with Fruity Jam and Cream
- If you’ve added lemon, lime, or orange zest to the cake, consider pairing it with a fruity jam that complements the citrusy notes. For instance, a lemon zest sponge would pair beautifully with a lemon curd or raspberry jam, and a lime-flavored sponge works well with a mango jam or passionfruit curd.
- For a luxurious touch, you can substitute some of the buttercream with whipped cream for a lighter filling, or even mascarpone for a rich, creamy alternative that pairs well with citrus flavors.
Summary: Flavoring Your Victoria Sponge for a Personal Touch
Adding vanilla essence or experimenting with zesty citrus flavors is a wonderful way to put a personal twist on your Victoria sponge. Vanilla essence enhances the overall flavor with a rich, aromatic sweetness, while citrus zest—whether lemon, lime, or orange—adds refreshing, zesty notes that brighten up the cake. By thoughtfully choosing your flavoring and combining it with complementary fillings, you can create a Victoria sponge that’s uniquely yours, offering both the classic charm and an exciting twist.
Step-by-Step Guide to Baking the Perfect Victoria Sponge Cake
Preparing Your Ingredients: Weighing Accurately and Sifting Flour
The foundation of a perfect Victoria sponge lies in how well you prepare your ingredients. Attention to detail in this step can make all the difference in achieving the ideal texture and rise. Two of the most crucial aspects of ingredient preparation are weighing accurately and sifting flour. These seemingly small steps ensure that your ingredients are used in the right proportions and that the flour is properly aerated, both of which contribute to a lighter, fluffier sponge.
Why Accurate Weighing is Crucial for Success
One of the key principles of baking is accuracy. Unlike cooking, where you can be more flexible with measurements, baking requires precision to achieve the right balance of ingredients. Weighing your ingredients rather than measuring them by volume ensures consistency and prevents errors in your cake’s texture and structure.
- Consistent Results Every Time
Weighing ingredients removes the guesswork and ensures that the proportions of flour, butter, sugar, and eggs are exactly as they should be. Using a digital kitchen scale is the best way to measure your ingredients accurately. A scale will ensure that you’re using the right amount of each ingredient, which is essential for consistent results. - Avoiding Overloading on Flour
Flour can easily be over-measured if you use a measuring cup, which might lead to a dry, dense sponge. By weighing, you ensure the correct flour-to-liquid ratio, which affects how the cake will rise and how light and fluffy it will turn out. - Better Texture and Structure
Accurate measurements directly influence the chemical reactions that occur during baking. If you add too much or too little of a key ingredient (like sugar or flour), it could result in a cake that’s either too dense, too dry, or lacking in rise.
The Importance of Sifting Flour for a Lighter, Fluffier Cake
Flour, when scooped directly from the container, can become packed and dense. Sifting flour is an essential step to prevent this, as it aerates the flour, breaking up any clumps and ensuring an even distribution of the flour throughout the cake batter. This results in a lighter, fluffier texture and helps prevent lumps from forming during mixing.
- Aerating the Flour
Sifting helps introduce air into the flour, which is vital for achieving a light, fluffy sponge. The process of sifting not only lightens the flour but also ensures that it mixes more easily into the batter, avoiding clumps and giving the cake an even texture. - Breaking Up Clumps and Impurities
Sometimes, flour can develop small clumps or even contain impurities (like bits of bran or particles from the milling process). Sifting removes any of these unwanted elements, ensuring that only fine, smooth flour is used in your cake batter. - Helping Flour Combine with Other Dry Ingredients
In many baking recipes, you may need to combine flour with other dry ingredients, like baking powder or bicarbonate of soda. Sifting these ingredients together ensures that they are evenly distributed throughout the flour, so that the raising agents can work effectively when mixed with the wet ingredients.
How to Weigh and Sift Your Ingredients for Maximum Effectiveness
To achieve the best results, it’s essential to properly weigh and sift your ingredients. Below are some practical tips to help you master this process.
- Weighing Ingredients
For accurate measurements, always use a digital kitchen scale. Start by placing your mixing bowl on the scale and setting it to zero (known as tare). Add your ingredients one by one, ensuring that you weigh each separately. It’s helpful to double-check the amounts specified in your recipe to avoid over- or under-measuring. - Sifting the Flour
To sift the flour, place a fine mesh sieve over a bowl or directly into your mixing bowl, and add the measured amount of flour. Gently tap the side of the sieve or use a spoon to help the flour pass through. You can sift the flour multiple times for a lighter texture, especially when baking lighter cakes like the Victoria sponge. - Sifting Flour with Other Dry Ingredients
If your recipe calls for baking powder, baking soda, or any other dry ingredients, it’s a good idea to sift these with the flour. This helps evenly distribute the raising agents throughout the flour and ensures they are properly mixed into the batter.
The Impact on Cake Texture and Consistency
When you weigh and sift your ingredients correctly, you lay the groundwork for a superior Victoria sponge. These steps impact the texture, rise, and consistency of the cake.
- Lightness and Fluffiness
Accurate weighing and sifting contribute directly to the cake’s lightness and fluffiness. By avoiding excess flour and ensuring the flour is aerated, you create a batter that can rise properly without being weighed down. - Even Texture Throughout the Cake
Sifting flour also prevents the formation of lumps in the batter, ensuring that the cake has an even crumb. Without sifting, you may encounter patches where the flour hasn’t fully incorporated, which could cause uneven texture or even clumps in the final cake. - Control Over Moisture Balance
The proper weighing and sifting process help you control the cake’s moisture balance. If the flour is overmeasured or poorly sifted, it can result in a dry cake that lacks the soft, tender crumb typical of a Victoria sponge.
Key Takeaways for Preparing Ingredients
To make a Victoria sponge that stands out, it’s essential to weigh your ingredients with precision and sift the flour to ensure a light, fluffy texture. These preparatory steps set the stage for a sponge that rises beautifully, has a light texture, and delivers a satisfying bite every time. Taking the time to measure and sift properly will pay off in the final result, elevating your cake to a professional level.
Mixing Techniques: Creaming Butter and Sugar Until Fluffy
One of the most important steps in baking a Victoria sponge cake is the process of creaming butter and sugar. This technique plays a crucial role in achieving the light, airy texture that makes the sponge cake so beloved. Properly creaming the butter and sugar creates a smooth and fluffy mixture that traps air, which expands as the cake bakes, leading to a light and tender crumb. Let’s dive deeper into why this step matters and how to do it perfectly.
The Science Behind Creaming Butter and Sugar
Creaming butter and sugar isn’t just a step in the recipe; it’s a chemical process that sets the foundation for your cake’s structure. When you cream butter and sugar, you’re incorporating air into the mixture. This air acts as a natural leavening agent, helping your cake rise during baking and contributing to its fluffy texture.
- Trapping Air for a Lighter Texture
- As you mix butter and sugar together, the granulated sugar crystals cut into the butter, creating tiny air pockets. This process is called aeration. The air trapped in the butter mixture causes it to expand, making the batter light and fluffy. The more air you incorporate, the lighter and more delicate your sponge will be. It is essential to cream the butter and sugar properly to achieve this lightness.
- Creating a Stable Structure
- The creaming process also helps create the structure of your sponge. The aerated butter mixture acts as a framework to hold the other ingredients (like eggs and flour) together. This stable structure ensures that the cake doesn’t collapse during baking and has an even, well-formed crumb.
- Distributing Fat Evenly
- Proper creaming also helps distribute the butter evenly throughout the batter. Butter acts as a fat in the mixture, and evenly distributing it ensures the cake has a uniform texture and moistness throughout. Without this step, the cake could end up with pockets of grease or uneven moisture distribution.
The Role of Room Temperature Butter
For successful creaming, room temperature butter is a must. Cold butter is too firm to blend properly with the sugar, and warm or melted butter doesn’t aerate as effectively. Room temperature butter, on the other hand, is soft enough to allow the sugar to break into it and incorporate air, but still firm enough to create structure.
- Optimal Softness
- Room temperature butter should be soft but not melted. A good test is to press your finger gently into the butter—if it leaves a slight indentation but doesn’t sink all the way through, it’s the right temperature. If the butter is too soft or melted, you may not achieve the necessary aeration, and the batter might turn out dense.
- Why Cold Butter Doesn’t Work
- If the butter is too cold, it will be difficult to break down, and the creaming process will take much longer. This can result in a batter that is not as fluffy and smooth, affecting the texture of the final cake. Using room temperature butter helps ensure smooth mixing, which contributes to the lightness of the sponge.
Creaming Butter and Sugar: The Right Technique
While it might seem simple, there’s an art to creaming butter and sugar. Following the right technique is key to getting the perfect texture in your batter. Here’s how to do it properly:
- Start Slowly and Gradually Increase Speed
- Begin by adding the butter and sugar to the mixing bowl and mixing on a low speed to combine them. If you start on high, the sugar might fly out of the bowl, creating a mess. Once the mixture starts to come together, gradually increase the speed to medium or high. The goal is to work the ingredients together until the mixture becomes smooth and light in color.
- Mixing Time
- It’s important to cream the butter and sugar for about 3 to 5 minutes if using an electric mixer or 5 to 8 minutes by hand. You want to see the color change from pale yellow to almost white, and the mixture should look fluffy and airy. The longer you cream, the more air you incorporate into the batter, which leads to a lighter texture in the finished cake.
- Scrape Down the Sides
- Throughout the process, scrape down the sides of the bowl to ensure that all the butter and sugar are getting properly mixed. This prevents any bits from being left behind, which can create uneven textures in your cake batter.
- Signs of Proper Creaming
- The mixture should be light and fluffy, with the sugar fully dissolved into the butter. There shouldn’t be any graininess from the sugar, and the mixture should look smooth and creamy. At this point, you’re ready to move on to adding eggs and other ingredients.
The Importance of Not Overmixing
While creaming butter and sugar is essential, it’s just as important not to overmix. Overmixing the batter after adding the eggs and flour can cause the cake to be tough and dense. This happens because the gluten in the flour begins to form too much, leading to a less delicate crumb.
- Avoiding Dense Cake
- Once the butter and sugar are creamed, stop mixing to prevent overworking the batter. Once the eggs are added, mix gently just until the ingredients are combined. Overmixing can lead to an overly firm cake that doesn’t rise as well.
- Gentle Folding When Adding Flour
- When incorporating the flour, fold it in gently with a spatula instead of mixing vigorously. This helps preserve the lightness you achieved while creaming the butter and sugar, ensuring that the cake remains tender.
Key Takeaways for Perfect Mixing
- Properly creaming butter and sugar is essential for a light, airy Victoria sponge. This technique ensures that air is incorporated into the batter, contributing to the cake’s fluffy texture and stable structure.
- Room temperature butter is key to achieving the best results. It’s soft enough to blend with sugar while still holding structure, enabling effective aeration.
- Mixing time matters—cream the butter and sugar for about 3 to 5 minutes to get the desired fluffy consistency.
- Don’t overmix after adding the flour and eggs to avoid developing too much gluten, which would result in a dense, tough cake.
By following these techniques, you’ll be well on your way to mastering the art of creaming butter and sugar, ensuring your Victoria sponge comes out light, tender, and perfectly risen.
Baking Process: Ideal Oven Temperature and Timing for Even Baking
The baking process is where all of your careful preparation and mixing finally come together. Getting the oven temperature and baking time right is crucial for ensuring that your Victoria sponge cake bakes evenly, rises properly, and develops that perfect golden color and light texture. In this section, we’ll explore how to set your oven up for success, the importance of choosing the right temperature, and how timing plays a vital role in achieving an ideal bake.
The Ideal Oven Temperature for Victoria Sponge Cake
The temperature at which you bake your Victoria sponge directly impacts how the cake rises and how evenly it cooks. Too high, and the cake might rise too quickly, creating cracks or a domed shape; too low, and it could take longer to cook, resulting in a dense, uneven texture.
- Recommended Temperature: 180°C (350°F) for Conventional Ovens
- For most Victoria sponge recipes, the ideal temperature is 180°C (350°F) in a conventional oven, or 160°C (320°F) for a fan-assisted oven. This is the sweet spot where the cake will cook evenly, rise gradually, and develop that light, airy crumb.
- Why Not Higher or Lower?
- Too High: Baking at a temperature higher than 180°C (350°F) may cause the cake to cook too quickly on the outside, leaving the inside undercooked. This could result in an uneven texture or raw batter in the center.
- Too Low: Baking at a lower temperature could lead to a cake that takes too long to bake, losing its fluffiness and becoming dense.
- Preheating the Oven
- Always preheat your oven before placing your cake inside. This ensures the cake starts baking immediately at the right temperature, which is critical for achieving the perfect rise. If the oven is not preheated, the cake might take longer to cook and could end up unevenly baked.
The Role of Oven Rack Positioning
Where you place the cake in the oven can also influence the way it bakes. The wrong rack position can lead to uneven heat distribution, causing parts of the cake to cook faster than others.
- Middle Rack for Even Heat Distribution
- The best place for baking a Victoria sponge cake is on the middle rack. This position allows the cake to be exposed to even heat from both the top and bottom of the oven, ensuring that it bakes evenly.
- Avoiding the Top or Bottom Racks
- Top Rack: Placing your cake on the top rack can cause the top of the cake to brown too quickly while the center remains raw. The heat from the top element can be too intense, resulting in an uneven bake.
- Bottom Rack: Placing the cake too close to the bottom can cause the bottom to burn or cook too quickly, while the top and center may not be done yet.
How Long to Bake: Timing for the Perfect Sponge
Baking time is crucial for achieving a perfect Victoria sponge. While the oven temperature is a key factor, the exact baking time can vary slightly based on the size of your cake pan, the specific recipe, and your oven’s performance. However, a general guideline is about 20-25 minutes for an 8-inch round Victoria sponge.
- Signs That Your Cake Is Ready
- The most reliable way to check if your cake is baked is to insert a skewer or toothpick into the center of the cake. If it comes out clean (or with just a few crumbs), the cake is done.
- Golden Brown Color: The top of the cake should be golden brown, and it should feel firm to the touch. If the top springs back when gently pressed, it’s likely baked through.
- Don’t Open the Oven Door Too Soon
- It’s tempting to check on the cake, but resist opening the oven door during the first 15-20 minutes of baking. Opening the door too early can cause a sudden temperature drop, which can lead to the cake sinking in the center or not rising properly.
- Timing Based on Cake Size
- If you’re making a larger or smaller cake, the baking time will adjust accordingly. Larger cakes may need a little more time (up to 30 minutes), while smaller ones could bake in as little as 15 minutes. Always check with a skewer to ensure the cake is done.
Avoiding Overbaking: The Key to a Moist and Fluffy Cake
Overbaking your Victoria sponge cake will result in a dry, crumbly texture that’s not ideal for a perfect sponge. It’s important to monitor the cake closely toward the end of the baking time to ensure it doesn’t bake for too long.
- How to Avoid Overbaking
- As the cake nears the end of the recommended baking time, check it regularly, especially after the 20-minute mark. Once you see that the cake is golden brown and the skewer comes out clean, it’s time to remove it from the oven.
- Cooling After Baking
- Let the cake cool in the pan for about 10 minutes before turning it out onto a wire rack. If you attempt to remove it from the pan too soon, it may break or become misshapen. Cooling the cake in the pan allows it to firm up slightly and makes it easier to handle without losing its shape.
Using an Oven Thermometer for Accuracy
Even if you follow the recommended oven settings, ovens can vary in their actual temperature, sometimes being hotter or cooler than the temperature shown on the dial. This discrepancy can affect the outcome of your bake.
- Invest in an Oven Thermometer
- If you’re consistently struggling with uneven baking or over- or under-cooked cakes, consider using an oven thermometer. This simple tool can help you ensure that your oven is actually heating to the correct temperature, allowing you to adjust as needed.
- Adjusting Oven Temperature
- If you find that your cakes are consistently browning too quickly or not rising properly, you may need to adjust your oven temperature. A thermometer can help you determine if your oven needs recalibration.
Key Takeaways for Successful Baking
- Set the oven to 180°C (350°F) for conventional ovens (or 160°C/320°F for fan-assisted) for the perfect Victoria sponge.
- Always preheat your oven to ensure your cake starts baking immediately and evenly.
- Position the cake in the middle of the oven to allow for even heat distribution from both top and bottom.
- Bake for 20-25 minutes, but check doneness with a skewer. The cake should be golden brown and spring back when pressed.
- Avoid overbaking, as this can lead to a dry, crumbly texture. Check the cake regularly towards the end of the baking time.
- Use an oven thermometer to ensure accurate oven temperature, especially if you’ve had issues with uneven baking in the past.
By understanding and applying these oven temperature and timing guidelines, you’ll be able to bake a Victoria sponge that’s perfectly risen, golden brown, and light and fluffy every time.
Cooling and Assembling: Avoiding Soggy Layers and Ensuring a Neat Finish
Once your Victoria sponge cake has been baked to perfection, the next crucial steps are cooling and assembling. These steps play a significant role in preserving the texture and appearance of the cake. Improper cooling or assembly can result in soggy layers, a collapsing cake, or uneven frosting. In this section, we will explore the best practices for cooling your sponge, assembling it with fillings, and ensuring a flawless finish for your Victoria sponge.
Cooling the Cake: Why It’s Crucial
Proper cooling is a key part of the baking process that should not be rushed. Cooling too quickly or improperly can cause the cake to lose moisture and structure, leading to a dense or soggy cake when assembled.
- Why Let the Cake Cool in the Pan First?
- Initial Cooling: After removing the cake from the oven, it’s important to let it cool in the pan for about 10 minutes. This short period allows the cake to set, preventing it from breaking or becoming misshapen when removed from the pan.
- Structure Support: While the cake is still warm and in the pan, the structure of the sponge is relatively fragile. Allowing it to cool in the pan briefly helps stabilize the sponge and ensures it doesn’t fall apart when you attempt to turn it out.
- Turning the Cake Out
- After the initial cooling time, turn the cake out onto a wire rack for further cooling. This ensures even air circulation around the cake, preventing it from becoming soggy on the bottom.
- Use a Cooling Rack: If you place the cake directly on a flat surface, it can trap moisture underneath, leading to a soggy bottom. A wire cooling rack elevates the cake, allowing it to cool evenly and keeping the texture light and fluffy.
- Avoiding Overcooling
- While it’s important to let the cake cool enough to handle, don’t let it sit for too long. If the cake cools completely, the buttercream or jam filling could be harder to spread, and the layers might be more difficult to assemble.
Assembling the Cake: Layering and Filling Without Sogginess
Once the cake is cooled, it’s time to assemble your Victoria sponge. The filling choices, such as buttercream and jam, can add moisture, so it’s important to layer the cake carefully to avoid soggy spots. Here are the best practices for creating neat, stable layers.
- Ensure the Cake Layers Are Level
- Before adding your filling, level the cake layers with a serrated knife. This step ensures that both layers sit evenly and helps avoid a slanted cake when assembled. If the top layer is uneven or domed, slicing it off will create a smooth surface for the fillings.
- Trim the Tops: If the cakes have risen unevenly or if the center is higher than the edges, gently slice off the domed part with a serrated knife to create a flat surface.
Choosing and Preparing Fillings
- Buttercream: Ensure your buttercream is smooth and at a spreadable consistency. If it’s too stiff, it can tear the cake as you try to spread it, and if it’s too runny, it could lead to a soggy texture. You can adjust the consistency by adding a little more powdered sugar if it’s too soft or a tiny bit of milk to thin it out if it’s too stiff.
- Jam: Opt for seedless raspberry jam or strawberry jam, both of which work beautifully with Victoria sponge cakes. To prevent the jam from soaking into the sponge, spread a thin layer of buttercream on the bottom layer of the cake before adding the jam. This helps act as a barrier and keeps the sponge from becoming soggy.
- Spread Fillings Generously but Evenly
- When spreading the buttercream or jam, use an offset spatula or a flat knife to distribute the filling in an even, smooth layer. Avoid overloading the cake with too much filling, as it can ooze out from the sides during assembly and make a mess.
Assembling Layers: Layering Cake and Ensuring Neatness
Once your cake layers are leveled and your fillings are ready, it’s time to assemble the sponge. The way you stack the layers will ensure the cake stays upright, neat, and easy to cut. Here are the essential steps for a smooth assembly process.
- Place the First Layer
- Start by placing the first cake layer on a serving plate or cake stand. Press down gently to ensure it sits evenly. The flat side should be facing up, providing a stable base for your filling.
- If you’re using a cake ring or springform pan, you can leave the cake in the ring until it’s fully assembled to ensure the layers don’t shift.
- Add a Thin Layer of Jam
- Spread a generous but thin layer of jam over the top of the first cake layer. Be careful not to add too much jam, as it can overflow when you add the second layer.
- Buttercream on Top of the Jam
- Apply a layer of buttercream on top of the jam. The buttercream will help to seal the jam and act as a barrier to prevent any moisture from soaking into the cake. Ensure the buttercream is spread smoothly and evenly over the jam.
- Place the Second Cake Layer
- Gently place the second cake layer on top of the filled first layer, ensuring it is centered. If the top layer has a dome, place the flat side down to create a stable base and allow the cake to stand upright.
Decorating the Cake: Finishing Touches for a Professional Look
Once your cake is assembled, it’s time to finish it with a neat and elegant touch. Victoria sponge cakes are traditionally simple, but you can still add a few final details to make it look polished and appetizing.
- Dusting with Powdered Sugar
- A traditional finishing touch for a Victoria sponge is a dusting of powdered sugar over the top layer. This light dusting enhances the cake’s aesthetic and provides a sweet touch without overwhelming the flavor. Use a fine-mesh sieve to evenly dust the sugar, avoiding clumps.
- Optional Decorations
- You can also add some fresh berries on top, such as raspberries or strawberries, to complement the flavors of the jam. Alternatively, a few edible flowers can add a delicate, elegant look to your cake.
- For a slightly fancier finish, you can pipe additional buttercream around the edges or in decorative patterns on top.
Storing and Serving the Cake: Keeping It Fresh and Neat
After assembling and decorating your Victoria sponge, you want to ensure it stays fresh and maintains its texture until it’s time to serve.
- Storing the Cake
- If you’re not serving the cake immediately, store it in an airtight container at room temperature for up to 2-3 days. This helps preserve the softness and moisture of the cake layers.
- Avoid refrigerating the cake, as it can dry out. However, if it contains cream or other perishable fillings, refrigeration may be necessary for food safety.
- Serving the Cake Neatly
- When it’s time to cut and serve the cake, use a serrated knife to slice through the layers cleanly. A serrated knife will help prevent the layers from squashing or tearing, maintaining the neat appearance of the cake.
Key Takeaways for Cooling and Assembling
- Cool your cake properly by allowing it to rest in the pan for 10 minutes before turning it out onto a wire rack for even cooling.
- Level your cake layers before assembling to ensure a stable, even stack.
- Spread fillings evenly and use a layer of buttercream to prevent jam from soaking into the cake.
- Decorate with a light dusting of powdered sugar and fresh berries for an elegant finish.
- Store the cake properly in an airtight container to keep it fresh, and use a serrated knife for clean slices when serving.
By following these tips for cooling and assembling, you’ll be able to create a neat, beautiful Victoria sponge cake that is perfectly balanced, both in flavor and presentation.
Common Mistakes to Avoid When Baking Sponge Cakes
Overmixing or Undermixing the Batter
When it comes to making a perfect Victoria sponge cake, achieving the right consistency of the batter is crucial for a light and airy texture. One of the most common issues bakers face is overmixing or undermixing the batter, both of which can lead to undesirable results in the final cake. Understanding the balance and the impact of mixing is essential for ensuring a successful bake. Let’s dive deeper into the importance of proper mixing and how both overmixing and undermixing can affect your cake.
Overmixing the Batter: The Dangers of Too Much Mixing
Overmixing refers to stirring or beating the batter for too long, causing it to become excessively aerated and overworked. While it might seem like mixing the batter more would help incorporate air and create a fluffier cake, the opposite is often true. Here’s how overmixing can affect your Victoria sponge:
- Developing Too Much Gluten
- What Happens: Overmixing the batter, especially when adding flour, can activate the gluten in the flour. Gluten is responsible for the structure and elasticity of baked goods, but in sponge cakes, too much gluten results in a tough, chewy texture rather than the light and airy crumb you’re aiming for.
- Why It Matters: A Victoria sponge should have a delicate, tender crumb. If you overmix, the resulting cake will be dense, dry, and tough, with a rubbery texture that’s far from ideal.
Trapping Too Much Air
- What Happens: When you mix the batter too vigorously, it can trap excess air within the mixture. This air may create bubbles that cause the cake to rise unevenly during baking.
- Why It Matters: These large air pockets can lead to an uneven bake, causing parts of the cake to collapse or sink in the middle while others over-rise. The result is a spongy, uneven texture.
- Overheating the Butter
- What Happens: Overmixing, particularly when creaming butter and sugar, can lead to the butter becoming too warm and greasy. When this happens, the batter may lose its smoothness and become too loose.
- Why It Matters: If the butter is too soft, it may not emulsify properly with the sugar, leading to a batter that separates or has an uneven consistency. This can affect the cake’s final texture, making it greasy or unevenly baked.
- Signs of Overmixing
- How to Spot It: If the batter begins to look smooth but slightly shiny or overly stiff, this can be an indication of overmixing. The texture may also feel dense or clumpy when you try to scoop it out of the bowl.
Undermixing the Batter: The Risks of Insufficient Mixing
On the other end of the spectrum, undermixing refers to not mixing the batter enough to fully combine the ingredients. While it might seem like a simple fix to skip mixing, undermixing can lead to several issues that affect the cake’s texture and rise.
- Incomplete Incorporation of Ingredients
- What Happens: If the ingredients, especially the dry ingredients like flour and baking powder, aren’t fully incorporated into the wet ingredients (butter, eggs, and sugar), there will be pockets of flour or unmixed butter in the batter.
- Why It Matters: These lumps or pockets can lead to an uneven rise during baking, resulting in a cake that has holes or dry, floury patches. It also affects the overall flavor, as areas with more butter or sugar may taste differently from the rest of the cake.
- Underdeveloped Air Structure
- What Happens: When the batter isn’t mixed enough, the sugar and butter may not fully cream together, which means there will be insufficient air incorporated into the batter. This prevents the cake from rising as much as it should during baking.
- Why It Matters: Without adequate air, the cake may be dense, flat, or overly moist and sticky, lacking the fluffiness and lightness that a well-mixed batter provides.
Difficulty with Rising
- What Happens: The absence of proper mixing can also affect the distribution of leavening agents like baking powder or baking soda. If these agents aren’t evenly dispersed, some areas of the batter will rise more than others, causing an uneven texture.
- Why It Matters: Inconsistent rise can lead to a lopsided or uneven cake, which will look and taste unappealing.
- Signs of Undermixing
- How to Spot It: Undermixed batter will often appear streaky or lumpy, with visible clumps of butter, flour, or sugar. The batter may feel grainy or uneven, and you may see visible bits of unmixed ingredients.
Achieving the Perfect Mix: The Right Balance
The key to a perfect Victoria sponge cake lies in achieving the right balance of mixing—enough to fully combine the ingredients, but not so much that you overwork the batter. Here’s how to get it just right:
- Mix Until Just Combined
- When adding the flour, sugar, and eggs, mix until the ingredients are just combined. It’s okay if the batter still looks a little rough or slightly lumpy, as long as there are no large pockets of unmixed flour or butter. The batter should be smooth but not overworked.
- Cream Butter and Sugar Properly
- During the creaming process, make sure to beat the butter and sugar together until light and fluffy. This step is crucial for incorporating air into the batter, which helps the cake rise during baking. Avoid overmixing after this step to maintain a smooth, airy texture.
Use a Gentle Folding Method
- When folding in the flour, do so gently. Use a spatula or a large spoon to fold the flour into the butter and sugar mixture rather than beating it. This technique ensures that you don’t lose the air you’ve already incorporated while also ensuring the flour is fully mixed into the batter.
- Mixing by Hand or Electric Mixer
- Hand Mixing: If you’re mixing by hand, be sure to mix gently and stop as soon as everything is incorporated.
- Electric Mixer: If using an electric mixer, mix on low speed to prevent overmixing and to keep control over the batter’s texture. It’s best to mix on a low to medium setting, gradually increasing speed only when necessary.
- Test the Consistency
- After mixing, the batter should have a smooth, spreadable consistency. If you lift a spoon or spatula from the batter, it should slowly fall back in ribbons without sinking immediately. If it’s too thick, it may need a little more mixing; if it’s too runny, you may have overmixed it.
Tips for Perfect Mixing Every Time
- Don’t Rush the Process
- Mixing should be done at a steady pace. Rushing through the mixing process can lead to inconsistencies in the batter.
- Use the Right Tools
- Invest in a good quality electric mixer or stand mixer for consistent and smooth results. If mixing by hand, a spatula or wooden spoon can help control the mixing process more effectively than a whisk.
- Follow Recipe Instructions
- Be sure to follow the mixing instructions in your Victoria sponge recipe closely. Recipes are written to help you achieve the right balance of ingredients and mixing time, so deviating from them can lead to undesirable results.
Key Takeaways for Mixing the Batter
- Avoid overmixing to prevent a dense, tough cake with an uneven texture.
- Don’t undermix—ensure all ingredients are fully incorporated, especially the flour and leavening agents.
- Cream butter and sugar properly to ensure enough air is incorporated into the batter.
- Use a gentle folding technique when adding flour to prevent deflating the batter.
- Mix until smooth but not too long; stop as soon as the ingredients are just combined.
By carefully balancing the mixing process, you’ll avoid the pitfalls of overmixing or undermixing, ensuring a light, fluffy, and perfectly textured Victoria sponge cake every time.
Incorrect Oven Temperature Leading to Uneven Baking
Achieving the perfect Victoria sponge cake isn’t just about getting the ingredients right; oven temperature plays a critical role in ensuring your cake bakes evenly and reaches its full potential. Baking at an incorrect temperature, whether too high or too low, can result in an uneven bake, affecting the texture, rise, and appearance of your cake. In this section, we’ll explore the effects of incorrect oven temperature on baking, how to avoid these issues, and tips for achieving optimal baking conditions.
The Importance of Correct Oven Temperature for Even Baking
Victoria sponge cakes require a moderate and steady oven temperature for the batter to bake evenly and rise to perfection. If the temperature is too high or too low, your cake might not bake uniformly, leading to problems that can negatively affect its appearance and texture.
- How Oven Temperature Affects the Cake’s Rise
- The heat in the oven causes the cake to rise by activating the baking powder (or any other leavening agents) and allowing air bubbles trapped in the batter to expand. An incorrect temperature can hinder this process.
- If the oven is too hot, the cake will rise too quickly on the outside while the center remains raw. This can cause the cake to crack or form an uneven dome.
- If the temperature is too low, the cake will rise too slowly or may not rise at all, leading to a dense, flat cake.
- Creating the Ideal Crust
- An ideal Victoria sponge cake should have a golden brown, slightly crisp crust. This is only achievable when the oven is at the correct temperature. If the oven is too hot, the cake’s outer layers will brown too quickly, possibly burning, while the inside remains undercooked. Conversely, too low a temperature will result in a pale, undercooked exterior with a soggy texture.
- Even Baking and Texture: A stable temperature ensures that the cake bakes evenly, resulting in a uniform texture throughout. It allows the cake to rise properly without collapsing and gives the crumb its characteristic lightness.
Common Problems Caused by Incorrect Oven Temperature
Incorrect oven temperature can lead to several issues during baking, each of which impacts the appearance and texture of your cake:
- Cake Too Dense or Flat (Low Temperature)
- What Happens: When the oven is too cool, the cake will not rise properly, and the batter will remain dense throughout. The cake may appear flat or undercooked even if it has been in the oven for the recommended amount of time.
- Why It Matters: A flat, dense cake will lack the lightness and fluffy texture typical of a Victoria sponge. The cake may also be wet or sticky in the center, despite the outer layers appearing done.
- Cake Sinks in the Middle (High Temperature)
- What Happens: If the oven is too hot, the outside of the cake will set too quickly, creating a crust while the interior is still undercooked. The center will rise quickly, but as it continues to bake, the pressure from the undercooked interior can cause the cake to collapse or sink in the middle.
- Why It Matters: A collapsed center creates an unappealing presentation and an uneven texture. The cake may also have a chewy or rubbery texture around the edges while remaining raw or gooey in the center.
Burnt or Overbrowned Edges (Too High Temperature)
- What Happens: When the oven temperature is too high, the edges of the cake can brown too quickly while the center stays raw. This often results in a dark, overbrowned crust that’s difficult to remove, with the interior underbaked.
- Why It Matters: The burnt edges create an unpleasant flavor and texture contrast to the delicate, soft interior of the cake. It’s difficult to salvage this once it happens without compromising the overall quality.
- Pale or Undercooked Cake (Too Low Temperature)
- What Happens: When the oven temperature is too low, the cake may bake more slowly, leaving the cake too pale or undercooked. The surface may not firm up, and the cake may lack the golden, slightly crisp crust that defines a Victoria sponge.
- Why It Matters: An underbaked cake results in an unappealing texture, with the center potentially remaining raw or overly moist. This can make the cake difficult to slice or frost, as it won’t hold its shape.
How to Avoid Incorrect Oven Temperature
To ensure your Victoria sponge cake bakes evenly, there are a few essential steps and tools you can use to manage and maintain the correct oven temperature.
- Use an Oven Thermometer
- Why It Helps: Oven temperatures can vary significantly between different models, and many ovens may not heat to the exact temperature indicated on the dial. Using an oven thermometer helps you confirm the actual temperature inside your oven and ensure it matches the one specified in the recipe.
- How to Use It: Place the oven thermometer on the middle rack of the oven for accurate readings. Adjust the temperature setting accordingly to match the desired baking temperature.
- Preheat the Oven Properly
- Always preheat the oven to the correct temperature before placing your cake inside. This allows the cake to start baking immediately and evenly. Preheating also ensures that the oven’s internal temperature stabilizes, reducing the risk of temperature fluctuations during the baking process.
- Preheat for 10–15 minutes: Depending on your oven, it may take 10 to 15 minutes for the oven to reach the proper temperature. Use an oven thermometer to confirm this before baking.
Avoid Opening the Oven Door Too Early
- Why It’s Important: Opening the oven door prematurely can cause a sudden drop in temperature, leading to an uneven rise and potentially affecting the texture of the cake.
- When to Check: Wait until the cake is nearly finished baking before opening the oven to check. This will prevent disrupting the temperature balance and allow the cake to rise steadily without sudden temperature changes.
- Baking on the Middle Rack
- Why It Helps: The middle rack of the oven ensures that the cake receives even heat from all sides. The top and bottom racks can cause uneven heat distribution, leading to uneven baking. Placing the cake on the middle rack allows for optimal air circulation and even heat exposure, promoting a consistent rise.
- Adjusting for Fan-Assisted Ovens
- Fan-Assisted Ovens: If you have a fan-assisted or convection oven, you’ll need to reduce the temperature by about 20°C (or 25°F) compared to conventional baking temperatures. The fan circulates air and helps bake the cake faster and more evenly, so adjusting the temperature ensures the cake doesn’t bake too quickly on the outside while remaining raw inside.
Signs of an Uneven Bake and How to Fix It
If you suspect that the oven temperature wasn’t optimal, there are a few signs to watch out for during baking and after the cake has cooled:
- Cracked or Uneven Dome
- If your cake has developed a large crack or an uneven dome, it may be an indicator that the oven was too hot. The outside of the cake likely set too quickly, causing the center to over-expand and crack.
- Solution: Next time, reduce the oven temperature slightly and try placing the cake on the middle rack for more even heat distribution.
- Wet or Sticky Center
- A wet or sticky center, even after the recommended baking time, suggests that the oven wasn’t hot enough. The cake didn’t rise and bake through properly.
- Solution: Increase the oven temperature by 10–20°C (or 20–30°F) next time and check for doneness by inserting a toothpick or skewer into the center of the cake. If it comes out clean, the cake is fully baked.
- Unevenly Baked Crust
- If the cake has a dark, overbrowned crust while the center is raw, your oven was likely too hot.
- Solution: Lower the temperature next time and bake the cake at a more moderate heat, checking the internal temperature with an oven thermometer.
Ideal Oven Temperature for Victoria Sponge Cake
For a Victoria sponge cake, the ideal oven temperature is typically around 180°C (350°F) for a conventional oven or 160°C (320°F) for a fan-assisted oven. This temperature allows the cake to bake evenly, rise properly, and achieve that beautiful, golden-brown crust.
- Conventional oven: 180°C (350°F)
- Fan-assisted oven: 160°C (320°F)
- Baking time: Typically 20–25 minutes, but this can vary depending on your oven and the size of the cake.
Key Takeaways for Correct Oven Temperature
- Use an oven thermometer to ensure the temperature is accurate.
- Preheat the oven properly to avoid temperature fluctuations.
- Place the cake on the middle rack to allow for even baking.
- Adjust for fan-assisted ovens by lowering the temperature.
- Avoid opening the oven door during the first 15–20 minutes of baking.
- If your cake exhibits uneven baking, adjust the temperature accordingly next time.
By maintaining the correct oven temperature and following these tips, you’ll ensure that your Victoria sponge bakes evenly, rises beautifully, and achieves the perfect texture every time.
Using the Wrong Size Cake Tins and Its Impact
The size and shape of your cake tin play a significant role in determining the outcome of your Victoria sponge cake. Even if you have the right ingredients and follow the correct mixing and baking techniques, using the wrong cake tin can lead to a variety of issues that affect the texture, rise, and overall appearance of the cake. In this section, we will explore the impact of using incorrect-sized cake tins and offer guidance on how to choose the right tin for your Victoria sponge.
The Role of the Cake Tin in Baking
A cake tin is not just a vessel for holding your batter—its size, shape, and material all influence how the cake bakes, how it rises, and the final texture. Victoria sponge cakes typically need a tin that’s the right size to allow for an even rise and a light, fluffy texture. If the tin is too large or too small, you might end up with a cake that’s underbaked, overbaked, or unevenly risen.
- Correct Tin Size for Even Rise and Proper Baking
- For a standard Victoria sponge cake, the ideal tin size is usually around 20 cm (8 inches) in diameter, although this can vary based on recipe preferences. This size allows the cake to rise evenly and bake through properly without being too thick or too thin.
- When you use the correct-sized tin, the batter has enough space to rise and expand while being held in place by the sides of the tin. This leads to an even texture, a consistent crumb, and a well-baked finish.
Impact of the Wrong Size Tin on Texture and Consistency
- Too Large a Tin: If your cake tin is too large, the batter will spread out too thin, resulting in a shorter and denser cake. The cake may cook too quickly on the outside, while the inside may remain undercooked. This can lead to a dry texture around the edges and a soggy center.
- Too Small a Tin: On the other hand, if the cake tin is too small, the batter will be too deep, and the cake may struggle to bake through properly. The center may remain raw, while the edges may burn or overbake. A cake baked in a smaller tin might also rise unevenly, creating a lopsided or cracked appearance.
- Impact on the Cake’s Height and Presentation
- The height of your cake is directly influenced by the size of the tin. Too large a tin results in a flatter cake, while too small a tin can cause an overly tall cake with a dense, undercooked center. For a well-proportioned Victoria sponge, you need a tin size that allows for a balanced rise and a cake height that is neither too thin nor too thick.
Different Tin Sizes and Their Impact on Baking
Let’s explore how different tin sizes can affect your cake and the outcome of your bake:
- 20 cm (8-inch) Round Cake Tin (Standard Size)
- Ideal for Victoria Sponge: This is the most common size used for a traditional Victoria sponge cake. A 20 cm (8-inch) tin provides the perfect balance between height and width, allowing the cake to rise evenly and bake through without drying out or underbaking.
- Baking Time: With this size, baking typically takes between 20 to 25 minutes at 180°C (350°F) in a conventional oven. The batter will rise evenly, and the result will be a cake that has the ideal height and consistency.
Larger Cake Tins (23 cm or 25 cm)
- Impact on Rise and Texture: If you use a tin that is larger than the recommended size, say a 23 cm (9-inch) or 25 cm (10-inch) tin, the batter will spread out more thinly, resulting in a shorter cake that may be overbaked on the edges while remaining raw in the center.
- Baking Time: The larger surface area means the cake will bake faster, so you may need to reduce the baking time or adjust the oven temperature to prevent overbaking. A larger tin also tends to create a flatter, less light cake.
- Smaller Cake Tins (18 cm or 6-inch)
- Impact on Rise and Texture: If the tin is too small, the batter will be too thick and may struggle to cook evenly. The cake might rise too high in the center and crack or collapse as it bakes. Additionally, the thicker batter may cause the outer layers to cook too quickly, resulting in an underbaked center.
- Baking Time: With smaller tins, the cake will likely need longer baking time to ensure the center is properly cooked. You’ll also need to lower the temperature slightly to ensure the cake doesn’t burn on the outside before baking through the middle.
Choosing the Right Cake Tin for Victoria Sponge
To achieve the perfect Victoria sponge, it’s essential to choose the correct size and shape of the tin. Here are some guidelines to help you make the best choice for your bake:
- Stick to the Recommended Size
- Always follow the recipe’s recommendations for tin size. If the recipe calls for a 20 cm (8-inch) round tin, using this size ensures the batter will be the right depth and will rise evenly. Deviating too far from this size can cause issues with baking time and texture.
- Check the Tin’s Depth
- The depth of the tin matters just as much as the diameter. A shallow tin (less than 5 cm deep) will cause the cake to rise too quickly and may cause cracks. A deeper tin can result in uneven baking. Most standard cake tins have a depth of around 5 to 7 cm, which is ideal for a Victoria sponge cake.
- Consider Your Oven Size and Rack Placement
- Ensure that the cake tin fits well inside your oven. A tin that’s too large for the oven will prevent proper air circulation, which can result in uneven baking. Always place the tin on the middle rack to allow for even heat distribution, regardless of the tin’s size.
- Adjusting for Multiple Tiers
- If you plan on making a multi-tier Victoria sponge, it’s important to use cake tins that are of the same size and depth. This ensures each layer bakes uniformly and you achieve even height for stacking. Additionally, adjust the baking times accordingly for multiple layers in the oven.
Tips for Using Cake Tins Properly
To get the best results with your cake tin, here are a few practical tips:
- Line the Tin
- Even if your cake tin is non-stick, it’s a good idea to line the bottom with parchment paper and grease the sides to prevent the cake from sticking. This will also help ensure that the cake releases smoothly after baking.
- Avoid Overfilling the Tin
- Don’t fill the cake tin more than halfway to two-thirds full. Overfilling the tin can cause the batter to spill over during baking, while also resulting in an uneven rise. Make sure there’s enough room for the cake to expand evenly.
- Rotate the Tin
- If your oven has hot spots, it may be helpful to rotate the tin halfway through the baking time. This can help achieve a more even bake and prevent one side of the cake from being overcooked while the other is undercooked.
- Use a Springform Tin for Easy Removal
- A springform tin allows for easy removal of the cake once it has cooled, which is particularly helpful when handling delicate sponges. Just be sure to line the base and sides properly to prevent the cake from sticking.
Troubleshooting Common Cake Tin Issues
- Cakes Sticking to the Tin
- If your cake sticks to the tin despite greasing it, it might be due to not using enough grease or parchment paper. Make sure the entire surface of the tin is properly greased or lined, especially the edges.
- Uneven Cake Surface
- If the top of the cake is uneven, it could be due to an incorrect oven temperature or a poorly placed tin. Ensure the cake tin is centered on the middle rack for consistent heat distribution.
Key Takeaways for Choosing the Right Cake Tin
- Always use the correct tin size specified in your recipe for the best results.
- The ideal size for a Victoria sponge cake is typically 20 cm (8 inches) in diameter.
- Avoid using too large or too small a tin, as it can lead to uneven baking and poor texture.
- Line the tin with parchment paper and grease the sides to prevent sticking.
- Fill the tin only halfway to two-thirds full to allow room for the cake to rise evenly.
By selecting the correct cake tin and using it properly, you’ll give your Victoria sponge cake the best chance of rising evenly, baking through properly, and achieving the perfect texture.
Skipping the Cooling Step Before Adding Fillings
Cooling your Victoria sponge cake before adding fillings like buttercream or jam is a crucial step in achieving the best possible outcome in both texture and presentation. Skipping this cooling step can lead to a number of issues that not only affect the taste and appearance of your cake but also compromise the integrity of the layers. In this section, we’ll explore the importance of cooling, the potential consequences of not allowing the cake to cool properly, and tips for getting this step right.
Why Cooling Is Crucial Before Adding Fillings
The cooling process is essential for several reasons, primarily to ensure that your cake maintains its structure, texture, and flavor when layered and filled. Let’s break down the primary reasons why you should allow your cake to cool completely before filling it:
- Prevents Soggy Layers
- When a cake is still warm, any fillings, especially jam or buttercream, can melt or become runny upon contact with the hot sponge. This results in soggy layers that make the cake difficult to slice and serve.
- The filling may soak into the cake, causing the layers to become moist and heavy, rather than light and airy. This soggy texture is far from the delicate crumb that a Victoria sponge is known for.
- Ensures the Filling Stays in Place
- Adding fillings like buttercream or jam to a warm cake can cause them to spread unevenly, resulting in uneven layers. The heat from the cake can also cause the filling to soften or run, causing the filling to ooze out when you cut the cake.
- Cooling allows the cake to firm up, providing a stable base for the filling, which helps the filling remain neatly in place. This is especially important if you plan to stack the layers.
Preserves the Structural Integrity of the Cake
- A freshly baked cake is delicate, and when it’s warm, it is more prone to breaking apart or becoming misshapen when you try to assemble it. Cooling the cake gives it time to set, allowing it to firm up and hold its shape as you add fillings and assemble the layers.
- If you attempt to fill a warm cake, the filling can destabilize the structure, causing the layers to slip or slide out of alignment, resulting in a messy presentation.
- Improves Flavor and Texture
- As the cake cools, the flavors continue to develop and settle. Adding fillings to a hot cake can distort the delicate balance of flavors because the warmth may alter the taste or texture of the filling.
- Cooling allows both the cake and the filling to blend better when you assemble the cake, as they will be at similar temperatures, resulting in a more cohesive flavor profile.
How Long Should You Cool Your Victoria Sponge Cake?
To prevent any of the issues mentioned above, it’s important to give your cake enough time to cool before adding any fillings. The exact cooling time will depend on a few factors, but here’s a general guideline:
- Cooling on a Wire Rack
- Why It Helps: A wire rack is the best tool for cooling because it allows air to circulate around the cake, cooling it evenly from all sides and preventing the bottom from becoming soggy. The cake can cool more quickly on a wire rack than if it were left in the tin or on a flat surface.
- How Long to Cool: After removing the cake from the oven, let it rest in the tin for 10–15 minutes to firm up slightly and make it easier to remove. Then, transfer it to a wire rack and allow it to cool completely. Depending on the size and thickness of the cake, this could take anywhere from 30 minutes to 1 hour. It’s important that the cake is completely cool to the touch before adding the filling.
- Room Temperature
- The cake should cool to room temperature before any fillings are applied. If you’re in a hurry and don’t have the luxury of waiting for an hour, you can speed up the cooling process by placing the cake in a cooler room or near a fan, but avoid refrigerating it as that can cause condensation and moisture buildup on the cake’s surface.
The Consequences of Skipping the Cooling Step
If you choose to skip the cooling step, you might face a variety of unwanted outcomes:
- Buttercream Melting
- Buttercream is a popular filling for Victoria sponge cakes because of its smooth, creamy texture. However, if you add buttercream to a warm cake, it can melt and become runny. This will cause it to ooze out of the layers, making a mess as the cake is sliced and served.
- A warm cake can also cause the buttercream to lose its structure, leading to a filling that doesn’t hold up well. This is especially problematic if you want a neat finish for decorating or stacking multiple layers.
Jam Soaking into the Cake
- Jam, whether raspberry or strawberry, is a classic filling for Victoria sponge cake. However, if you add jam to a warm cake, the heat can cause the jam to seep into the sponge, making it soggy and soft. This compromises the texture of the cake and results in a filling that becomes difficult to spread evenly.
- Additionally, the sticky nature of jam may cause it to spill over when you slice the cake, leading to a messy appearance and a less enjoyable eating experience.
- Cracking or Breaking During Assembly
- As mentioned earlier, a warm cake is more fragile and prone to cracking or breaking during assembly. If you attempt to add fillings before the cake has cooled, the cake’s layers may break apart or crumble, making the assembly process frustrating and time-consuming.
- Unstable Cake Layers
- Filling a warm cake can cause the layers to slide apart due to the combination of warmth and a soft, unstable filling. This results in uneven layers that affect the overall structure and presentation of the cake.
- Furthermore, adding a filling to a warm cake can cause it to shift or lose its shape, making the final product look sloppy or poorly assembled.
Tips for Successful Cooling Before Adding Fillings
Here are a few additional tips to ensure that your cake cools properly and that you can add your fillings with ease:
- Allow Cooling in the Tin First
- After removing the cake from the oven, let it rest in the tin for 10–15 minutes. This will allow the edges of the cake to set and firm up slightly, making it easier to remove from the tin without causing it to break or collapse.
- Be sure to gently loosen the sides of the cake with a butter knife if necessary, and then transfer it to a wire rack to cool completely.
- Don’t Rush the Cooling Process
- While it can be tempting to speed up the cooling process, especially if you’re in a hurry to assemble the cake, rushing the cooling time can lead to the issues discussed above. If necessary, plan ahead and give your cake plenty of time to cool to room temperature before proceeding.
- Consider Using a Fan
- If you’re short on time, you can speed up the cooling process by placing the cake near a fan or in a cooler room, but avoid placing it in the fridge as this can cause the cake to become too damp. A fan will circulate air around the cake and help it cool evenly without the risk of condensation.
When Can You Add Fillings to Your Victoria Sponge?
Once your cake has cooled completely, it’s time to add your fillings. Here are a few signs that indicate the cake is ready:
- Cake Is Cool to the Touch
- Gently touch the top and sides of the cake. If it feels cool and not warm or even slightly hot, the cake is ready to be filled.
- Firmness
- The cake should feel firm but springy to the touch. This indicates that it has set properly and is stable enough to handle fillings and layers without falling apart.
Key Takeaways on Cooling Before Adding Fillings
- Always cool your cake completely before adding any fillings to prevent soggy layers and ensure stable assembly.
- Place the cake on a wire rack for even cooling, allowing air to circulate around the cake.
- Give the cake time to set; cooling for 30 minutes to 1 hour is generally sufficient.
- Skipping the cooling step can result in runny fillings, soggy layers, and unstable cake layers, affecting both texture and presentation.
By giving your Victoria sponge cake the necessary time to cool before adding fillings, you’ll ensure that your layers stay intact, your cake looks beautiful, and your flavor remains balanced.
Pro Tips for Elevating Your Victoria Sponge Cake
Creating Professional-Level Buttercream with Silky Smooth Texture
Buttercream is an essential component of the Victoria sponge cake. It provides not only a rich, creamy flavor but also contributes to the overall texture, structure, and aesthetic of the cake. Creating buttercream with a silky smooth texture is crucial for achieving a professional-looking and tasting cake. The right technique and ingredients can make all the difference in ensuring that your buttercream is smooth, fluffy, and perfectly spreadable. In this section, we’ll explore the steps involved in creating professional-level buttercream, the key techniques, and tips for achieving that silky smooth texture that elevates your Victoria sponge cake to the next level.
Key Ingredients for Perfect Buttercream
To achieve a smooth and creamy buttercream, selecting the right ingredients is paramount. Here are the core ingredients you’ll need for making buttercream:
- Unsalted Butter
- Why Unsalted Butter?: Always opt for unsalted butter in buttercream, as this gives you control over the amount of salt in the final product. The butter should be at room temperature to ensure it mixes smoothly and easily. Softened butter allows for better incorporation of other ingredients, resulting in a smooth and creamy texture.
- Butter Quality: The higher the quality of the butter, the richer and more flavorful your buttercream will be. Consider using European-style butter for an even creamier texture and a more luxurious taste.
Icing Sugar (Powdered Sugar)
- Icing sugar is the main sweetener in buttercream. It dissolves easily into the butter and helps create the smooth, creamy texture that is characteristic of good buttercream. Make sure to sift the icing sugar before using it to remove any lumps that could result in a grainy texture.
- The ratio of butter to icing sugar is crucial in determining the consistency of your buttercream. A higher proportion of butter to sugar results in a fluffier, softer buttercream, while more sugar creates a firmer, more structured frosting.
- A Splash of Milk or Cream
- Adding a little milk or cream helps loosen the buttercream and make it more spreadable, creating that silky-smooth finish. The type of dairy you use will affect the texture: cream adds a richer, more luxurious feel, while milk will give you a lighter, slightly less indulgent texture.
- You can adjust the consistency by adding small amounts of liquid until you achieve the desired smoothness. Room-temperature liquid is important to avoid curdling the buttercream.
- Vanilla Extract (or Other Flavorings)
- Vanilla extract is a classic flavoring for buttercream, adding a warm and sweet undertone that complements the rich, buttery base. For a more unique flavor, you can experiment with different extracts (like almond, lemon, or hazelnut), but vanilla is the most common choice for a traditional Victoria sponge.
- If you’re using flavorings like citrus zest or chocolate, make sure they are finely ground or mixed in thoroughly to maintain that smooth, silky texture.
The Mixing Technique for Silky Smooth Buttercream
The way you mix your buttercream can have a significant impact on its texture. If you don’t mix it properly, the buttercream could end up too thick, too grainy, or overly runny. Here are the essential steps to create the perfect buttercream:
- Cream the Butter First
- Start by creaming the softened butter using an electric mixer or stand mixer. Mix on medium-high speed for 4–5 minutes until the butter becomes light and fluffy. This initial creaming stage is critical because it aerates the butter and creates a soft, smooth base for the buttercream.
- The butter should lighten in color and have a smooth, spreadable consistency by the end of this step.
Gradually Add the Icing Sugar
- Once the butter is creamed, start adding the sifted icing sugar in small batches. Adding the sugar slowly prevents it from flying out of the bowl and ensures it incorporates smoothly into the butter.
- Mix on a lower speed at first, then gradually increase the speed as the sugar begins to mix in. Continue mixing until the butter and sugar form a thick, creamy mixture.
- Add the Liquid (Milk or Cream)
- After the icing sugar is fully incorporated, add a small amount of milk or cream (typically 1–2 tablespoons) to loosen the mixture. Mix on low speed to prevent splattering, and gradually increase the speed to medium.
- The liquid should be added little by little to avoid making the buttercream too runny. Keep adding until you reach your desired consistency: the buttercream should be smooth, spreadable, and hold its shape without being too stiff or too loose.
- Mix at High Speed for Fluffiness
- To achieve that fluffy, airy texture, increase the speed of the mixer and beat the buttercream on high for 2–3 minutes. This step incorporates more air into the buttercream, giving it the light, silky texture that’s perfect for spreading on cakes.
- Be sure to scrape down the sides of the bowl occasionally to ensure that all the ingredients are evenly incorporated.
Tips for Achieving the Silkiest Buttercream
Achieving that perfect, silky smooth texture requires attention to detail and a few additional techniques that can help elevate your buttercream game:
- Use Room Temperature Ingredients
- Always ensure that both your butter and milk or cream are at room temperature before you begin. Cold butter will cause the sugar to clump and make it difficult to achieve a smooth texture. Likewise, using cold milk or cream will cause the butter to firm up and create an uneven, lumpy consistency.
- Room temperature ingredients emulsify better, resulting in a smooth, uniform buttercream.
- Sift Your Icing Sugar
- Sift the icing sugar before adding it to the butter. This eliminates any lumps or impurities, ensuring that your buttercream remains free of graininess. Sifting also helps incorporate the sugar more easily into the butter, preventing a gritty texture.
- Don’t Overbeat
- While it’s important to beat your buttercream to achieve fluffiness, overbeating can lead to an overly soft, runny texture that’s difficult to work with. If your buttercream becomes too loose, you can correct this by adding more icing sugar to thicken it. If it becomes too stiff, add more milk or cream to loosen it up.
- Flavor Variations and Add-Ins
- Vanilla buttercream is classic, but you can add other flavors to elevate your cake. Consider adding citrus zest (lemon, orange), or a splash of almond extract for a nutty flavor. For a chocolate version, melted chocolate or cocoa powder can be mixed in for a rich, indulgent twist.
- Coloring: If you want colored buttercream, use gel food coloring rather than liquid coloring. Gel food coloring is more concentrated and won’t affect the texture of your buttercream as much as liquid food coloring might.
Troubleshooting Common Buttercream Issues
Despite your best efforts, sometimes things can go wrong with buttercream. Here’s how to troubleshoot some common issues:
- Grainy Texture
- If your buttercream is grainy, it may be due to improperly sifted icing sugar or underbeaten butter. To fix it, continue mixing at high speed for an additional minute or two. If the texture doesn’t improve, adding a tablespoon of boiling water or extra cream can help dissolve the sugar and smooth it out.
- Buttercream Too Soft or Runny
- If your buttercream is too soft, it could be because you’ve added too much liquid or haven’t used enough icing sugar. To fix this, add more sifted icing sugar to thicken it. If it’s a hot day, try placing the buttercream in the fridge for 10–15 minutes before working with it.
- Buttercream Too Stiff
- If your buttercream is too stiff, it may have too much icing sugar or not enough liquid. To loosen it, add small amounts of milk or cream, one teaspoon at a time, until the desired consistency is achieved.
Using Buttercream for Decoration
Once you’ve created that silky smooth buttercream, you can use it for a variety of decorating techniques:
- Spreading
- Smooth the buttercream evenly onto the cake with an offset spatula for a neat, professional look. Ensure the layers are uniform in thickness and finish by smoothing out any peaks.
- Piping
- For piped designs, make sure your buttercream is slightly firmer. Use a piping bag with your preferred nozzle to create beautiful rosettes, swirls, or intricate designs on top of the cake.
Key Takeaways for Professional-Level Buttercream
- Use unsalted butter at room temperature for a smooth base.
- Sift the icing sugar to remove lumps and prevent graininess.
- Gradually add milk or cream to achieve a smooth, spreadable consistency.
- Beat the buttercream on high speed for fluffiness and airiness.
- Experiment with flavors and colors to enhance the overall presentation and taste.
By following these techniques, you’ll be able to create a silky smooth, professional-level buttercream that enhances the texture, appearance, and taste of your Victoria sponge cake.
Choosing High-Quality Raspberry Jam or Homemade Alternatives
The filling of a Victoria sponge cake is just as important as the sponge itself, and one of the most iconic fillings is raspberry jam. Whether you opt for a store-bought jam or decide to make your own, the choice of jam significantly impacts the flavor and overall experience of the cake. A high-quality raspberry jam enhances the natural sweetness of the cake, provides a tangy contrast to the buttery layers, and adds a beautiful pop of color. In this section, we’ll discuss how to choose the best raspberry jam or explore homemade alternatives that can elevate your Victoria sponge to the next level.
Why the Quality of Raspberry Jam Matters
- Flavor Balance
- The quality of the raspberry jam directly affects the balance of flavors in your Victoria sponge cake. A high-quality jam will have a natural, fresh raspberry flavor that complements the light, airy sponge. On the other hand, a low-quality jam may taste overly sweet, artificial, or too sugary, which can overshadow the delicate taste of the cake.
- A good raspberry jam should have a balance between sweetness and tartness, with the natural acidity of raspberries providing a pleasant contrast to the richness of the sponge and buttercream. Opting for a jam with a higher fruit content and lower added sugar can enhance the overall flavor of the cake.
- Texture and Consistency
- The consistency of the jam plays a critical role in how it interacts with the sponge cake. High-quality jams often have a thicker texture, which makes it easier to spread without soaking into the cake or becoming runny. Thin or overly watery jam can make the layers soggy, impacting the cake’s structural integrity and making it difficult to achieve clean slices.
- A well-made raspberry jam will have a smooth yet slightly chunky texture, with visible fruit pieces, giving the cake an added burst of flavor and color. It should hold its place when spread between the cake layers, contributing to a neat, beautiful finish.
- Appearance
- Raspberry jam also adds a visual appeal to your Victoria sponge cake. Its rich, vibrant color contrasts beautifully with the pale golden layers of the sponge. A high-quality jam will have a deep, glossy red hue, which not only adds to the cake’s aesthetic but also enhances the overall presentation.
- Avoid jams that appear dull or overly gelatinous. Opt for jams with a natural sheen that looks fresh and appealing.
What to Look for When Buying Store-Bought Raspberry Jam
If you decide to go the route of store-bought jam, here are some key factors to consider when choosing a high-quality option:
- Ingredients List
- Always read the ingredients list carefully. High-quality raspberry jam will contain minimal ingredients: raspberries, sugar, and possibly pectin (a natural gelling agent). Avoid jams that contain artificial flavors, colors, or preservatives.
- Opt for jams that contain at least 60% fruit or more for a rich, fruity flavor that will shine through in your cake.
- Fruit Content
- Look for jams that have a high fruit content, preferably above 50%, as this indicates a more authentic, natural taste. Jams with lower fruit content tend to be more syrupy, with less fruit flavor, making them less ideal for a cake filling.
- No Added High-Fructose Corn Syrup
- Some commercial jams use high-fructose corn syrup as a sweetener, which can make the jam overly sweet and less fruity. Avoid jams with added artificial sweeteners and opt for those sweetened only with natural sugars like cane sugar or fruit-based sweeteners.
- Organic Options
- If you prefer organic options, many brands offer organic raspberry jams made without pesticides or synthetic fertilizers. Organic jams often have a fresher, more natural taste, and can be a great option if you are looking for health-conscious alternatives without compromising on flavor.
Homemade Raspberry Jam Alternatives
For the ultimate in flavor and control over the ingredients, consider making your own homemade raspberry jam. Not only will you know exactly what goes into the jam, but you can also customize it to your liking. Homemade jam allows you to adjust the sweetness, tartness, and consistency, resulting in a more personalized filling for your Victoria sponge cake.
Here are some options for creating homemade raspberry jam or alternatives:
Classic Homemade Raspberry Jam
Making homemade jam is a simple process that only requires a few ingredients: fresh raspberries, sugar, and pectin (if needed). The key is to use ripe, fresh raspberries for the best flavor. Here’s a basic recipe for a classic jam:
- Ingredients:
- 1 kg of fresh raspberries
- 800g of sugar
- 2 tbsp of lemon juice
- 1-2 tsp of pectin (optional)
- Method:
- Combine the raspberries and sugar in a large saucepan, and heat over medium heat until the sugar dissolves.
- Stir in the lemon juice and bring the mixture to a boil. If using, add the pectin at this point to help the jam set.
- Continue boiling for around 10-15 minutes, stirring occasionally, until the jam thickens.
- Test the consistency by placing a spoonful on a cold plate. If it wrinkles when you run your finger through it, it’s ready.
- Pour into sterilized jars and seal.
- Homemade jam tends to have a richer, more natural flavor and a texture that’s perfect for layering between cake layers.
Low-Sugar Raspberry Jam
- For a healthier version, you can make low-sugar raspberry jam. By reducing the amount of sugar or using a sugar substitute like honey, maple syrup, or agave nectar, you can create a jam that’s less sweet but still full of fruity flavor.
- The process is the same as the classic recipe, but use about half the amount of sugar, or replace it with a natural sweetener that suits your taste.
Raspberry Coulis or Puree
- If you prefer a smoother filling with less texture, you can use raspberry coulis or puree instead of traditional jam. Raspberry coulis is simply pureed raspberries with a touch of sugar and sometimes a squeeze of lemon juice. It’s thinner than jam but still delivers that tart, fruity raspberry flavor.
- To make the coulis:
- Ingredients:
- 250g of fresh raspberries
- 50g of sugar (adjust to taste)
- 1 tbsp of lemon juice
- Method:
- Blend the raspberries into a smooth puree.
- Strain to remove the seeds (optional).
- Heat the puree with sugar and lemon juice until it thickens slightly, then cool it before using it as a filling.
- Ingredients:
Tips for Using Jam in Your Victoria Sponge Cake
- Let the Jam Cool
- Whether you’re using store-bought or homemade jam, always allow it to cool to room temperature before spreading it on your cake. Hot jam can melt the buttercream and cause the layers to become soggy.
- Spread Evenly
- Use an offset spatula or the back of a spoon to spread the jam evenly on one layer of the cake. Don’t overfill the layers, as too much jam can cause it to seep out when the top layer is placed on top.
- Layering with Buttercream
- For best results, spread a thin layer of buttercream before adding the raspberry jam. This acts as a barrier that prevents the jam from soaking into the cake and helps the layers stay intact.
- Balance Sweetness
- Remember, your Victoria sponge cake will already have buttercream, so adjust the sweetness of the jam accordingly. A slightly tangy, tart raspberry jam balances the richness of the sponge and buttercream, creating a harmonious flavor profile.
Key Takeaways for Choosing and Using Raspberry Jam
- Choose high-quality jam with a high fruit content and natural ingredients for the best flavor.
- If you prefer a personalized touch, make your own homemade raspberry jam or explore low-sugar or liqueur-infused versions.
- Always cool the jam before using it in your cake to avoid soggy layers and to achieve a clean, neat finish.
- For a professional touch, layer buttercream before spreading the jam, ensuring a smooth, stable filling.
With the right choice of raspberry jam or a homemade alternative, your Victoria sponge cake will have a burst of flavor, color, and texture that’s simply irresistible.
Achieving a Perfectly Level Cake with Even Layers
One of the hallmarks of a well-made Victoria sponge cake is a smooth, level surface with even layers. Achieving this is essential for both the appearance and structural integrity of your cake. Uneven layers can lead to a crooked cake or one that’s difficult to frost and assemble. Whether you’re a beginner or a seasoned baker, there are several techniques to ensure your sponge cake bakes evenly and remains level. This section covers the tips and tricks for ensuring a perfectly level cake with even layers every time.
Use of Proper Cake Tins
- Choose the Right Size Cake Tin
- The size of your cake tins plays a significant role in ensuring your layers bake evenly. For a traditional Victoria sponge, it’s common to use two 8-inch round cake tins. If the tins are too small, the batter will rise too high in the center, resulting in uneven layers. Conversely, using larger tins may cause the cake to spread too thin, leading to dry edges.
- Ensure the cake tins are the same size and the batter is distributed equally between them to promote even baking. Non-stick or light-colored cake pans tend to promote more even heat distribution than dark-colored ones, which can cause the edges to brown too quickly.
- Prepare the Cake Tin Properly
- To prevent the cake from sticking and to promote even baking, grease and line your cake tins with parchment paper. You can also use a layer of baking spray for easy release. Make sure the paper extends above the rim of the tin slightly so that it doesn’t interfere with the cake’s rise during baking.
- Lightly dust the tins with flour after greasing, or use a baking release spray that combines both greasing and flouring for convenience.
Proper Batter Distribution
- Evenly Divide the Batter
- The key to even layers starts with evenly distributing the batter into your cake tins. After mixing the batter, use a kitchen scale to ensure equal portions in each tin, aiming for the same weight in both. This helps the cakes bake to the same height.
- If you don’t have a kitchen scale, use a measuring cup to scoop out the batter and ensure the amount is consistent for each tin. Once the batter is in the tins, smooth it out with a spatula to ensure even coverage.
- Tap the Tins to Remove Air Bubbles
- After placing the batter in the tins, gently tap the base of the tins on the countertop a few times. This will help settle the batter and release any air bubbles, which can cause uneven spots or holes in the cake as it bakes.
Leveling the Cake After Baking
- Check for Evenness After Baking
- Once your cakes are baked, allow them to cool in their tins for about 10 minutes. During this time, check the tops of the cakes. If you notice that one layer has risen higher than the other, you can level them.
- To do this, use a serrated knife or a cake leveler to trim off any domed tops. You want the top of the cake to be flat and even, which will make it easier to layer and frost.
- Cut with Gentle, Even Pressure
- When leveling the cake, use gentle, even pressure to avoid tearing the sponge. Cut a thin layer off the top of the cake. If you accidentally cut too much, you can always cut a small piece off the other layer to match.
- To ensure even cutting, rotate the cake slowly as you cut, keeping the knife as level as possible. Rotate the cake in small increments, making sure the knife follows a straight path through the center.
Proper Cooling Techniques for Flat Layers
- Cool the Cake on a Wire Rack
- After leveling, allow your cakes to cool completely on a wire rack. This ensures that the heat can escape from all sides, preventing the cake from becoming soggy on the bottom, which can distort the layers and cause them to shift.
- Avoid leaving the cakes in the tin for too long, as this can cause the layers to steam and become uneven. Once they have cooled enough to handle, transfer them to the wire rack for complete cooling.
- Avoid Overbaking
- Overbaking can cause the cake to shrink and become uneven, particularly around the edges. Always keep an eye on the baking time and check for doneness by lightly pressing the center of the cake. If it bounces back, it’s ready. Using the right oven temperature (usually 350°F/175°C) and avoiding opening the oven door prematurely can prevent this.
The Role of a Cake Smoother or Leveling Tool
- Using a Cake Smoother or Leveling Tool
- If you want a more precise leveling, a cake smoother or leveling tool can be invaluable. These tools are designed to help you cut even layers across the cake’s top without causing damage. The adjustable tool allows you to ensure your layers are consistently flat, regardless of the cake’s size.
- Professional Techniques
- If you’re aiming for a professional finish, consider investing in a rotating cake stand and a turntable. These tools allow you to easily rotate the cake as you level it, helping to keep your cuts straight and even. You can also use the turntable to ensure that the layers are stacked perfectly in alignment when assembling the cake.
Other Considerations for Even Layers
- The Role of Room Temperature
- For the best results, all of your ingredients, including butter, eggs, and milk, should be at room temperature before you begin mixing the batter. Cold ingredients can cause the batter to curdle or produce uneven mixing, which may lead to uneven rises in the cake.
- Similarly, allow the leveled layers to cool completely at room temperature before assembling them. Too much heat can cause the frosting to melt or settle unevenly, which affects the final look.
- Consistency of Batter
- Ensure your batter is well-mixed but not overworked. If the batter is too thick or not smooth enough, the cake may rise unevenly during baking, resulting in lumps or inconsistent layers. Gently fold the flour into the wet ingredients and take care not to overmix, as this can affect the texture and rise.
Advanced Tips for Perfecting Layer Evenness
- Baking Strips for Even Heating
- For perfectly even cakes without doming, you can use baking strips (also called cake strips) around the outside of the cake pans. These strips slow down the baking process around the edges, promoting even heat distribution and preventing the center from rising too quickly. As a result, your cake layers will bake more uniformly.
- These strips can be purchased or easily made at home by soaking fabric strips in water and wrapping them around the outside of your cake tins.
- Oven Positioning
- Place your cake tins on the middle rack of the oven to ensure the heat circulates evenly around the cakes. Avoid placing the tins too close to the top or bottom of the oven, as this can lead to uneven baking. An even temperature will ensure a consistent rise and a level top.
Key Takeaways for Achieving Even Layers and a Level Cake
- Choose proper-sized cake tins and evenly distribute the batter.
- Level the cake after baking with a serrated knife or a cake leveler for smooth, flat layers.
- Cool the cake completely on a wire rack to avoid warping or sogginess.
- Use a cake smoother or leveling tool for precision when trimming the layers.
- Experiment with baking strips and correct oven positioning to ensure uniform baking.
By following these techniques and paying attention to the details, you’ll achieve a perfectly level cake with even layers, ensuring a beautiful and professional finish to your Victoria sponge cake every time.
Serving Suggestions: Pairing with Tea or Dressing It Up for Special Occasions
The Victoria sponge cake is a versatile dessert that can be enjoyed in a variety of settings, from casual tea time to special celebrations. Its light, airy texture and rich flavors make it the perfect treat for many occasions. Whether you’re serving it in the traditional British style with a cup of tea or dressing it up for a festive celebration, there are countless ways to enhance the experience. In this section, we’ll explore how to serve your Victoria sponge cake and offer tips for elevating it for special events.
Pairing with Tea: The Classic British Tradition
- Traditional British Afternoon Tea
- The Victoria sponge cake is synonymous with the British tradition of afternoon tea. A delightful combination of delicate finger sandwiches, freshly baked scones, and cakes, including the iconic Victoria sponge, makes for an unforgettable afternoon treat. Pairing your Victoria sponge with a strong, fragrant tea elevates the experience, complementing the sweetness of the cake and the subtle flavors of the filling.
- A classic pairing for Victoria sponge cake is English Breakfast tea or Earl Grey. The robust flavors of these teas cut through the richness of the cake, while the delicate tannins provide a refreshing contrast to the buttery sponge and fruity raspberry jam. If you prefer a more floral pairing, Darjeeling tea or Jasmine tea also work wonderfully, offering a lighter, more aromatic flavor profile.
- Tea Temperature and Presentation
- When serving tea with your cake, ensure it’s brewed at the correct temperature. Black teas should be brewed at around 200°F (93°C), while green teas and white teas should be brewed at lower temperatures (170°F/77°C and 180°F/82°C, respectively). This allows the full flavor of the tea to develop without becoming bitter.
- For an elegant touch, serve the tea in fine china teacups, and accompany the Victoria sponge with small, delicate pastries or other finger foods. Arrange the cake slices on a three-tiered cake stand to enhance the visual appeal, creating a truly traditional tea-time experience.
Dressing Up for Special Occasions
- Enhancing the Presentation
- While a simple dusting of powdered sugar is enough for an everyday treat, you can easily dress up your Victoria sponge for more formal or celebratory events. Adding a layer of decorative frosting or a fondant finish can elevate the cake, making it a beautiful centerpiece for birthdays, weddings, or afternoon tea parties.
- Consider piping a decorative pattern on top with buttercream or whipped cream, and add edible flowers like violets or roses for a touch of elegance. You can also sprinkle gold leaf or edible glitter for a touch of luxury, especially for special milestones or festive occasions.
- Adding Fruit for a Festive Touch
- Top your Victoria sponge cake with a colorful selection of fresh berries to enhance its flavor and visual appeal. Raspberries, strawberries, blueberries, and blackberries are classic choices that complement the fruity raspberry jam filling and provide a burst of color. Arrange the berries in a beautiful pattern on top of the cake or around the edges for a professional finish.
- For a tropical twist, consider adding mango slices, kiwi, or passion fruit. These fruits provide a vibrant contrast to the golden sponge and give your cake an exotic flair.
Serving for Celebrations: Birthdays, Weddings, and More
- Victoria Sponge as a Birthday Cake
- The Victoria sponge cake is a great choice for a birthday celebration. Its versatility means it can be customized to suit different tastes and themes. For a classic birthday, decorate the cake with buttercream roses, sprinkles, or even personalized birthday messages in edible writing. Consider filling the cake with flavored buttercream such as chocolate or lemon, and adding a bit of colored icing to match the theme of the party.
- For larger celebrations, you can even make a multi-tiered Victoria sponge cake. Stack multiple layers of sponge cakes with jam and buttercream in between for a striking visual effect. Just ensure the layers are supported with dowels to maintain stability.
- Victoria Sponge for Weddings and Special Occasions
- For weddings or more formal celebrations, a Victoria sponge cake can serve as a beautiful, elegant dessert. Create a tiered cake with multiple layers, decorated with whipped cream, fresh flowers, and a variety of flavored jams. You can even pair it with champagne or a light sparkling wine for a sophisticated touch.
- If you’re hosting a wedding shower or baby shower, consider making mini individual Victoria sponge cakes or cupcakes with a jam filling. These smaller portions are perfect for guests to enjoy without cutting into a larger cake.
Customizing Fillings and Flavor Combinations
- Flavor Variations for Different Occasions
- While the traditional Victoria sponge features raspberry jam, you can mix things up with different flavor combinations for specific occasions. For a lemon-themed party, substitute the jam with lemon curd and enhance the flavor with lemon zest in the sponge cake.
- If you want to add a chocolate twist, substitute some of the buttercream with chocolate ganache and add chocolate chips to the sponge batter. Hazelnut or coffee flavors can also be added for a unique spin, perfect for holiday gatherings or anniversaries.
- Special Dietary Considerations
- For guests with dietary restrictions, consider offering a gluten-free or vegan Victoria sponge cake. Gluten-free cakes can be made using gluten-free flour blends, and vegan cakes can be created by substituting plant-based butter and egg replacers. These alternatives can still yield a delicious cake with the light, airy texture that the Victoria sponge is known for.
- You can also opt for sugar-free versions by using natural sweeteners like stevia or monk fruit for a healthier option.
Serving for Tea Parties and Casual Gatherings
- Casual Tea Party
- A Victoria sponge cake is a perfect option for a casual afternoon tea party or a coffee gathering. Serve slices of the cake alongside an assortment of biscuits, finger sandwiches, and a variety of loose-leaf teas. This combination offers a relaxed but elegant experience for your guests.
- You can even add finger food like quiches or savory scones to balance the sweetness of the cake and make your gathering more substantial. Consider having a tea station where guests can brew their favorite blends and enjoy the cake with a variety of accompaniments.
- Themed Gatherings
- For a summer garden party or a picnic, serve individual slices of Victoria sponge cake on paper plates or small cake stands. You can also package them as cute, portable desserts in mason jars or cupcake boxes for guests to take home. For a Christmas tea party, consider decorating the cake with festive sprinkles, candied fruits, or a dusting of cinnamon for a holiday-inspired twist.
Key Takeaways for Serving and Pairing Victoria Sponge Cake
- For a classic experience, serve Victoria sponge cake with English Breakfast or Earl Grey tea during afternoon tea.
- Dress up your cake with buttercream decorations, fresh fruit, and edible flowers for special occasions.
- Consider making a multi-tiered cake or mini versions for birthday parties, weddings, or baby showers.
- Experiment with different flavors and fillings, such as lemon curd, chocolate ganache, or hazelnuts, for unique occasions.
- For a more casual gathering, serve slices at a tea party or picnic for a refreshing treat.
Whether you’re enjoying a quiet afternoon with tea or celebrating a grand event, the Victoria sponge cake is a delightful treat that can be dressed up or down to suit any occasion. By pairing it with the right beverages and offering creative presentation options, you can elevate this timeless dessert into a memorable experience for your guests.
Conclusion
Mastering the perfect Victoria sponge cake takes a bit of patience and practice, but with the right techniques, anyone can create this classic British dessert. To recap, here are the key tips to keep in mind:
- Use self-raising flour for that light and fluffy texture.
- Always bake with room temperature ingredients for the best results, especially when it comes to eggs and butter.
- Mix the batter gently, and avoid overmixing to preserve the lightness of the sponge.
- Ensure your oven temperature is accurate and use proper-sized tins for even baking.
- Level your cake layers to ensure an even and professional-looking finish.
- Experiment with buttercream and jam fillings, and don’t hesitate to add a personal touch with fresh fruit or other flavor variations.
We encourage you to try the recipe and see how easy it is to create this delicious dessert. Don’t be afraid to experiment with different fillings—whether you stick to the traditional raspberry jam or mix things up with lemon curd or chocolate ganache, the possibilities are endless!
We would love to hear about your baking experiences. Share your tips, favorite variations, or photos of your perfect Victoria sponge cake in the comments below or on social media. Happy baking, and enjoy every delicious bite of your homemade sponge cake!