
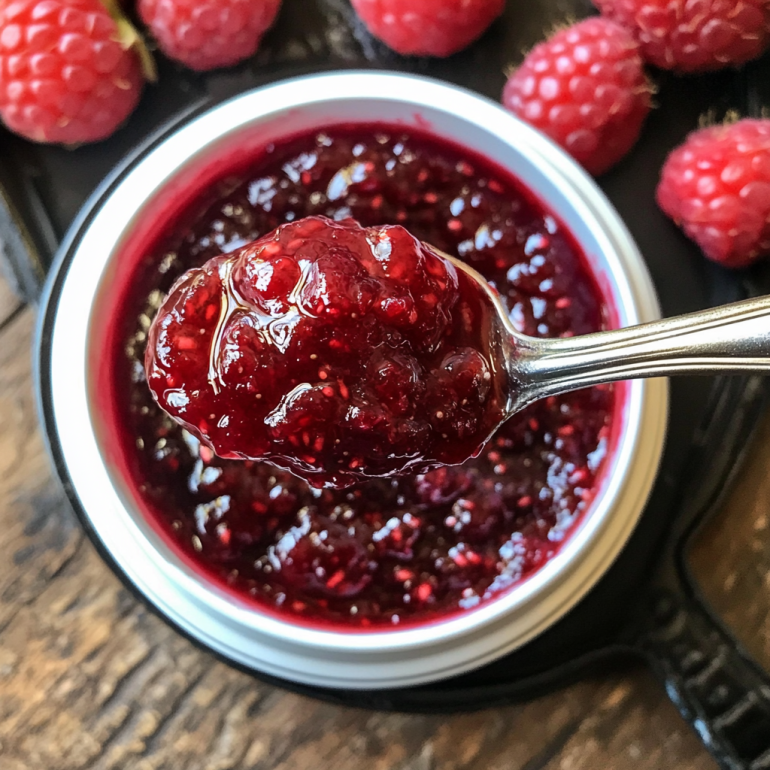
There’s nothing quite like the taste of homemade raspberry jam—sweet, slightly tart, and bursting with fresh raspberry flavor. Whether you spread it on warm toast, drizzle it over desserts, or mix it into yogurt, this delicious fruit preserve is a must-have in any kitchen.
Making raspberry jam at home is surprisingly simple and requires just a few basic ingredients. Unlike store-bought versions, homemade jam allows you to control the sweetness, skip artificial preservatives, and enjoy the pure, natural taste of fresh raspberries.
In this guide, we’ll walk you through a step-by-step raspberry jam recipe, from choosing the best ingredients to properly storing your jam. Whether you’re a beginner or a seasoned home cook, you’ll love how easy and rewarding it is to make your own jam from scratch!
Why Homemade Raspberry Jam is the Best
Better Flavor & Fresh Ingredients – No Artificial Preservatives
One of the biggest advantages of making homemade raspberry jam is the unbeatable freshness and flavor that store-bought versions simply can’t match. When you make jam from scratch, you’re using real, ripe raspberries, allowing their natural sweetness and tartness to shine without any unwanted additives.
Why Fresh Ingredients Matter
Fresh raspberries are the star of the show when making jam. Unlike commercial jams that may use fruit concentrates or flavor enhancers, homemade raspberry jam is made with whole, real raspberries. This means you get a pure, authentic berry flavor without dilution or artificial taste. Additionally, you have complete control over the ripeness of the berries, ensuring a balance between sweetness and acidity for the perfect jam.
No Artificial Preservatives or Additives
Many store-bought jams contain artificial preservatives, stabilizers, and high-fructose corn syrup to extend shelf life and maintain texture. While these additives help with mass production, they often alter the natural flavor and quality of the jam.
By making your own raspberry jam, you can avoid chemicals like potassium sorbate, artificial pectin, and excessive sugars, creating a healthier and more wholesome spread. Instead of synthetic preservatives, lemon juice naturally enhances the jam’s shelf life while adding a fresh, zesty brightness.
A Customizable Flavor Experience
With homemade jam, you can adjust the sweetness and texture to suit your taste. If you prefer a less sweet jam, you can reduce the sugar or use natural alternatives like honey or maple syrup. If you enjoy a thicker consistency, you can add a touch of natural pectin or cook the jam a little longer. The ability to customize your recipe ensures that your raspberry jam is made exactly the way you like it—something that mass-produced products can’t offer.
Conclusion
Using fresh, high-quality ingredients not only makes your raspberry jam taste better, but it also gives you peace of mind knowing exactly what’s in it. With no artificial preservatives, flavor enhancers, or excess sugar, your homemade jam will be a healthier, tastier, and more natural alternative to anything you can buy at the store.
Control Over Sugar & Sweetness – Adjust to Personal Preference
One of the biggest benefits of making homemade raspberry jam is the ability to control exactly how much sugar you use. Unlike store-bought jams that often contain excessive amounts of sugar or high-fructose corn syrup, homemade jam allows you to customize the sweetness level to match your taste and dietary preferences.
Why Store-Bought Jams Contain So Much Sugar
Many commercial raspberry jams are loaded with sugar for two main reasons:
- Preservation – Sugar acts as a natural preservative, helping to extend the jam’s shelf life.
- Flavor Enhancement – Since mass-produced jams use fruit concentrates or lower-quality berries, sugar is often added to enhance the flavor.
While this can make store-bought jams shelf-stable for years, it often results in overly sweet jams that overpower the natural tartness of raspberries.
Customizing Sugar Levels in Homemade Raspberry Jam
When making raspberry jam at home, you have the freedom to:
- Reduce the sugar if you prefer a more natural fruit flavor.
- Use natural sweeteners such as honey, maple syrup, or coconut sugar as a healthier alternative.
- Make a sugar-free version using low-carb sweeteners like stevia, erythritol, or monk fruit.
By adjusting the sugar content, you can create a perfectly balanced jam that’s sweet enough to enjoy while still allowing the bold, fruity flavor of raspberries to shine through.
Pectin and Sugar – What You Need to Know
Many traditional jam recipes rely on sugar to activate pectin, which helps the jam set properly. However, if you’re reducing sugar, you can:
- Use low-sugar pectin (available in stores) to achieve the right consistency.
- Let the jam cook longer to naturally thicken without extra sugar.
- Add chia seeds, which help absorb excess moisture and create a jam-like texture.
The Perfect Sweetness for Every Taste
Whether you love a classic, sweet raspberry jam, a tart, fruit-forward version, or a completely sugar-free alternative, homemade jam gives you full control over its flavor. No more settling for overly processed, syrupy jams—just pure, delicious raspberry goodness made exactly how you like it!
Cost-Effective & Fun to Make – A Great Way to Use Fresh Raspberries
Making homemade raspberry jam is not only a rewarding experience but also a cost-effective way to enjoy this delicious spread all year round. Fresh raspberries can be expensive when bought in small quantities, but by purchasing them in bulk or using homegrown berries, you can make high-quality jam at a fraction of the price of store-bought options. Plus, the process of making jam is a fun and satisfying activity, perfect for families, food lovers, and anyone who enjoys DIY kitchen projects.
Saving Money by Making Your Own Raspberry Jam
Store-bought raspberry jam, especially high-quality organic brands, can be quite expensive due to the cost of fruit, sugar, and packaging. By making your own jam, you can:
- Buy raspberries in bulk when they’re in season or on sale, reducing costs.
- Use locally grown or homegrown raspberries, which are often fresher and more affordable than imported store-bought berries.
- Adjust ingredients to fit your budget, such as using less sugar or opting for natural thickeners like chia seeds instead of store-bought pectin.
Homemade jam also eliminates extra costs associated with commercial production, such as branding, marketing, and distribution, allowing you to enjoy a premium product at a lower price.
The Perfect Way to Use Fresh or Overripe Raspberries
If you’ve ever found yourself with a surplus of raspberries that are ripe or slightly overripe, making jam is the perfect way to prevent waste and extend their shelf life. Instead of letting berries spoil, turning them into jam preserves their flavor, allowing you to enjoy the taste of summer long after raspberry season has ended.
Additionally, homemade raspberry jam can be:
- Stored in jars for long-term use.
- Used in various recipes like pastries, desserts, or yogurt toppings.
- Given as homemade gifts to family and friends.
A Fun and Rewarding Activity for All Ages
Making jam is an enjoyable and educational process that can be shared with family and friends. Whether you’re new to cooking or an experienced home chef, the process of transforming fresh raspberries into jam is simple, hands-on, and satisfying.
- Perfect for family bonding – Kids can help with washing raspberries, stirring the mixture, and filling jars.
- Great for home cooks – If you love experimenting in the kitchen, you can customize flavors by adding ingredients like vanilla, cinnamon, or lemon zest.
- DIY gifts – A jar of homemade raspberry jam makes a thoughtful and personal gift for birthdays, holidays, or special occasions.
Conclusion
Not only is homemade raspberry jam more affordable than store-bought alternatives, but it also allows you to use up fresh, ripe raspberries in a fun and creative way. Whether you’re making it as a personal treat, for family, or to give as a gift, this cost-effective and enjoyable kitchen project is one you’ll want to do again and again!
If you love making homemade jams, you might also enjoy learning how to make the best strawberry jam. Check out this step-by-step guide for a delicious, easy-to-follow recipe here.
Essential Ingredients and Tools for Raspberry Jam
Key Ingredients for the Best Raspberry Jam
Creating homemade raspberry jam is simple, but using the right ingredients ensures a flavorful, well-textured, and perfectly balanced jam. While raspberry jam doesn’t require a long list of ingredients, each component plays a crucial role in the final product. Here’s a breakdown of the key ingredients and their importance in making the best raspberry jam.
1. Fresh or Frozen Raspberries
Raspberries are, of course, the star ingredient. The quality of your raspberries will directly impact the flavor, texture, and overall success of your jam.
- Fresh raspberries: If they are in season, fresh raspberries provide the best natural sweetness and vibrant flavor. Look for plump, bright red berries with no signs of mold or mushiness.
- Frozen raspberries: A great alternative when fresh raspberries aren’t available. They are often picked at peak ripeness and retain their flavor. Just be sure to thaw and drain excess liquid before using them in your jam.
- Overripe raspberries: These work well for jam-making since they are naturally sweeter and softer, making them easier to break down during cooking.
2. Sugar
Sugar is essential in raspberry jam for more than just sweetness. It also helps with preservation, texture, and consistency.
- Granulated sugar: The most common choice, as it dissolves easily and allows the natural tartness of raspberries to shine through.
- Organic cane sugar: A less-processed alternative that works similarly to granulated sugar.
- Low-sugar or sugar substitutes: If you prefer a jam with less sweetness, you can use alternatives like honey, maple syrup, stevia, or erythritol. However, adjusting the sugar content may require additional pectin to help the jam set properly.
3. Lemon Juice
Lemon juice is a key ingredient in raspberry jam for both flavor and function. It enhances the natural tartness of raspberries, balancing the sweetness of the sugar. Additionally, lemon juice:
- Provides natural pectin, which helps the jam set properly.
- Acts as a natural preservative, increasing the jam’s shelf life.
- Enhances the brightness of the raspberry flavor, preventing it from tasting too sugary.
For best results, use freshly squeezed lemon juice rather than bottled, as it contains better acidity levels and no added preservatives.
4. Pectin (Optional but Helpful for Texture)
Pectin is a natural fiber found in fruit that helps jam thicken and set properly. While raspberries naturally contain some pectin, many jam recipes benefit from an added source of pectin to achieve the perfect consistency.
- No-added-pectin jam: If you prefer an all-natural jam, simply cook the raspberries longer to reduce moisture and thicken the jam naturally.
- Regular pectin: Found in most grocery stores, this helps jam set quickly and creates a firm consistency.
- Low-sugar pectin: If reducing sugar, this type of pectin ensures the jam sets without requiring large amounts of sweetener.
5. Optional Flavor Enhancers
While traditional raspberry jam is delicious on its own, you can experiment with additional ingredients to enhance its flavor profile.
- Vanilla extract: Adds a warm, sweet depth to raspberry jam.
- Cinnamon or nutmeg: A hint of spice complements the fruit’s natural tartness.
- Lemon zest: Boosts the citrusy brightness and enhances the jam’s freshness.
- Honey or maple syrup: Can be used as natural sweeteners for a more complex taste.
Conclusion
By using high-quality ingredients, you can create the best homemade raspberry jam with rich flavor, the perfect consistency, and a long-lasting shelf life. Whether you prefer a classic raspberry jam or a customized version with unique flavors, choosing the right ingredients will ensure a delicious final product.
Must-Have Tools for Making Raspberry Jam
Making homemade raspberry jam is a rewarding process, but having the right tools is essential for success. While you don’t need a lot of specialized equipment, having the basics will make the process smoother, safer, and more efficient. Here’s a breakdown of the must-have tools for making the best raspberry jam.
1. Large Heavy-Bottomed Pot
A large, heavy-bottomed pot is essential for evenly cooking the jam mixture. The heavy base helps prevent burning and ensures even heat distribution, so the jam doesn’t stick or scorch. When selecting a pot, make sure it’s large enough to accommodate the fruit, sugar, and liquids comfortably. A stainless steel or enameled cast iron pot is ideal since it’s durable, non-reactive, and perfect for even heat transfer.
2. Wooden Spoon or Heat-Resistant Silicone Spoon
You’ll need a wooden spoon or heat-resistant silicone spoon to stir the jam while it’s cooking. These tools are perfect because they are durable and won’t react with the acidic ingredients. Wooden spoons don’t retain heat, while silicone spoons are flexible and easy to clean. Stirring regularly ensures that the jam doesn’t burn and helps break down the fruit for the perfect texture.
3. Canning Jars with Lids
To preserve your homemade jam, you’ll need canning jars with proper lids. These jars create a vacuum seal that extends the shelf life of your jam. Look for jars that are designed for home canning to ensure they are heat-resistant. Sterilize the jars before use by boiling them or running them through a dishwasher cycle to prevent contamination.
4. Ladle
A ladle is essential for transferring your hot jam into jars without spills. Using a long-handled ladle keeps your hands safe from hot jam and makes the process smoother. It allows for more precise pouring into the jars, preventing drips that could interfere with the seal.
5. Jelly or Candy Thermometer
To achieve the ideal consistency, a jelly thermometer or candy thermometer is key. It helps you monitor the cooking temperature of the jam and ensures it reaches the correct temperature, typically 220°F (104°C) for proper setting. With the thermometer, you can avoid overcooking the jam or stopping too early, ensuring a thick, smooth texture.
Conclusion
The right tools make all the difference when making raspberry jam. A heavy-bottomed pot, wooden spoon, canning jars, and thermometer are essential for a smooth and successful jam-making experience. Whether you’re new to jam-making or an experienced cook, these tools will help you create delicious, homemade raspberry jam every time.
Step-by-Step Guide to Making Raspberry Jam
Preparing the Raspberries for Jam Making
The process of preparing raspberries for jam is a key step to ensure your homemade jam is flavorful and has the perfect texture. Proper preparation helps remove impurities, seeds, and any unwanted elements, while ensuring that your jam has the smoothness and sweetness you’re aiming for. Here’s how you can prep your raspberries for the jam-making process.
1. Choosing the Right Raspberries
Start with fresh, ripe raspberries for the best flavor and texture. The berries should be fully ripened but not overripe, as overripe raspberries can become mushy during cooking. Look for raspberries that are plump, firm, and vibrant in color. Avoid any that are moldy, squashed, or too soft, as they may affect the final texture and taste of your jam. If you use frozen raspberries, ensure they are thawed and drained of excess water to prevent adding too much liquid to your jam.
2. Washing the Raspberries
Before cooking, it’s important to wash the raspberries thoroughly to remove any dirt, dust, or pesticides. Raspberries have delicate skins that can trap debris, so it’s best to place them gently in a colander or fine mesh sieve and rinse them under cold running water. Avoid soaking them for too long, as this can cause the berries to become waterlogged. After rinsing, let the raspberries drain for a few minutes. You can gently pat them dry with a soft paper towel or clean kitchen cloth, being careful not to crush the delicate berries.
3. Removing Stems and Leaves
Carefully remove any stems, leaves, or debris from the raspberries. While the process of washing often removes most of this, some tiny stems can remain. You can pick these out by hand or use a small knife to carefully trim them away. If you’re using frozen raspberries, they may already be free of stems and leaves, but it’s still good practice to double-check before proceeding.
4. Crushing the Raspberries
Once your raspberries are clean, the next step is to crush them to release their juices. For a smooth jam, you’ll want to crush the raspberries into a mash to help break down the fruit and release natural pectin, which helps the jam set. You can do this using a potato masher, a fork, or a blender for a finer consistency. Keep in mind that the more you crush, the smoother your jam will be. If you prefer a chunkier texture, feel free to crush the berries less.
5. Straining (Optional)
If you prefer a seedless jam, you can strain the mashed raspberries to remove the seeds. To do this, place the mashed berries in a fine-mesh strainer or cheesecloth over a bowl, then press gently to extract the juice while leaving the seeds behind. This step is optional, depending on your personal preference for texture in your jam. If you’re not concerned with seeds, you can skip this part for a more rustic jam with a bit more texture.
6. Measuring the Prepared Fruit
Once the raspberries are prepared, it’s time to measure the amount of fruit you have. Most jam recipes will call for a specific quantity of fruit to ensure the right balance of sweetness and consistency. It’s important to measure carefully, as using too much fruit can affect the sugar-to-fruit ratio, which could alter the texture and flavor. A kitchen scale or standard measuring cups can help you get an accurate measurement of the prepared raspberries before you begin cooking.
Conclusion
Preparing the raspberries properly is essential for making the perfect raspberry jam. By choosing ripe, fresh raspberries, washing them thoroughly, removing stems, and crushing them carefully, you set the foundation for a smooth and delicious jam. Whether you prefer a chunky jam or a seedless one, this step ensures that your jam will have the best texture and flavor possible.
Cooking and Thickening the Raspberry Jam
Once your raspberries are prepared, the next crucial step is cooking and thickening the jam. This is where the magic happens—transforming the juicy fruit into a sweet, spreadable treat. The process involves boiling the fruit and sugar mixture to the right temperature to achieve that perfect jam consistency. Here’s a detailed look at how to cook and thicken your raspberry jam:
1. Combining Raspberries, Sugar, and Pectin
The first step in the cooking process is to combine the prepared raspberries with sugar and pectin. Pectin is a natural substance found in fruits that helps the jam set and thicken as it cooks. While some fruits, like apples and citrus, have high levels of natural pectin, raspberries have less, which is why adding commercial pectin (usually available in powder or liquid form) is often necessary.
Add the raspberries to your heavy-bottomed pot, followed by the sugar (usually in a 1:1 ratio, depending on the recipe) and the required amount of pectin. Stir the mixture gently to combine, ensuring that the sugar dissolves and the pectin is evenly distributed throughout the fruit. At this point, you can also add a splash of lemon juice, which helps balance the sweetness and enhances the natural flavor of the raspberries.
2. Heating the Mixture
Begin heating the mixture over medium heat, stirring occasionally to prevent burning or sticking. As the mixture heats up, the sugar will dissolve completely, and the raspberries will begin to release their juices. Continue stirring regularly to prevent any scorching at the bottom of the pot.
At this stage, the fruit will start to break down further, and the mixture will become more liquid. The heat will also help activate the pectin, which is key to achieving the desired consistency. If you’re using liquid pectin, it should be added according to the instructions provided on the package, usually at the beginning of the boiling process.
3. Boiling the Jam Mixture
Once the mixture reaches a boil, increase the heat to high and allow it to boil rapidly for 10-15 minutes. Stir constantly to ensure the jam doesn’t burn, and be sure to keep a close eye on it. During this time, the liquid will reduce, and the mixture will begin to thicken as the water evaporates. The pectin is working its magic, turning the mixture from a thin syrup into a more gel-like consistency.
You’ll know the jam is nearing the perfect thickness when it begins to bubble vigorously and has a glossy appearance. A useful test to check the consistency is the plate test: Place a small spoonful of jam on a cold plate and let it sit for a minute. Then, run your finger through the jam. If it wrinkles and doesn’t immediately run back together, the jam is ready. If not, continue boiling and check again in a few minutes.
4. Adjusting Consistency
While the plate test is a great way to check for doneness, you might also need to adjust the consistency of your jam based on personal preference. If the jam is too runny, it may need more time to cook. On the other hand, if it’s too thick or becoming too stiff, you can add a little more water or lemon juice to loosen it up. If you find that the jam is not thickening enough, consider adding a little more pectin and boiling it for a few more minutes.
5. Skimming Foam
As the jam cooks, you may notice foam forming on the surface. While this foam doesn’t affect the taste or texture of the jam, it can make the final product look less polished. Use a spoon or skimmer to remove any foam from the top of the jam as it cooks. Skimming off the foam will also help you achieve a clearer, smoother finished jam.
6. Testing the Jam’s Thickness Again
Before removing the jam from the heat, it’s essential to do a final thickness check. Perform the plate test once more and observe the consistency. If the jam has reached your desired texture, it’s time to remove the pot from the heat. If it’s still too thin, continue to cook for a few more minutes, checking the consistency periodically.
Conclusion
The key to perfect raspberry jam lies in the cooking and thickening process. By carefully combining the ingredients, boiling the mixture, and testing for the right consistency, you can ensure your jam will have the perfect spreadable texture. Don’t forget to adjust for consistency, skim off foam, and use pectin to guarantee a smooth, rich raspberry jam every time!
For a simple and pectin-free raspberry jam recipe, check out this easy guide that walks you through the steps to make delicious homemade jam with fresh raspberries here.
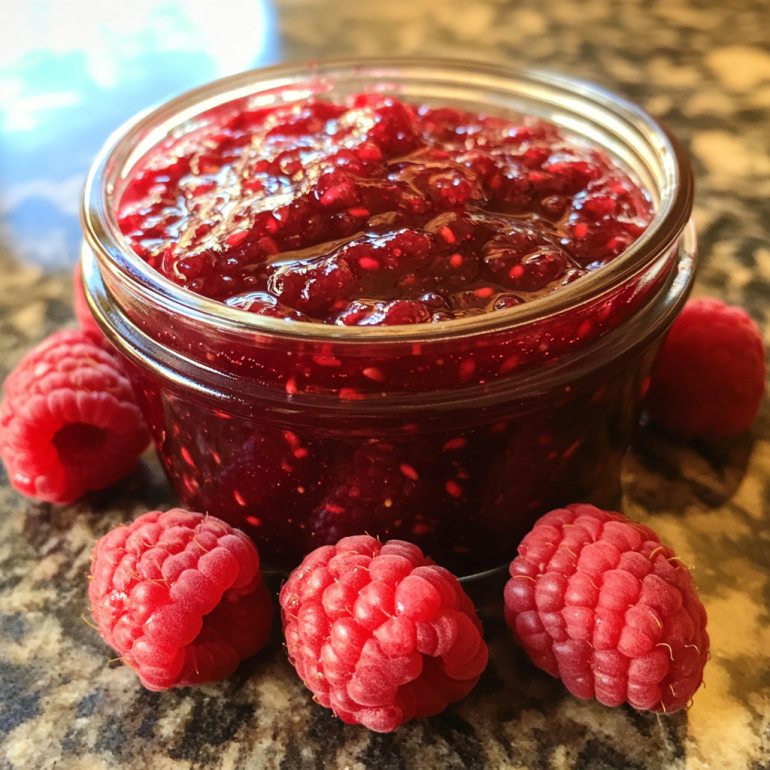
Jarring and Storing Raspberry Jam
Once your raspberry jam has reached the perfect consistency, it’s time to preserve it for future enjoyment. Proper jarring and storing are crucial steps to maintain the flavor and ensure the jam lasts. Here’s a step-by-step guide to help you jar and store your homemade jam correctly.
1. Sterilizing Jars for Jam
Sterilizing your jars is essential to prevent bacteria or mold growth in your jam. You can sterilize the jars using two methods:
- Boiling Method: Submerge the jars and lids in a pot of boiling water for 10 minutes. After sterilizing, set them aside on a clean towel to dry.
- Oven Method: Place the jars in an oven preheated to 250°F (120°C) for 10 minutes. This ensures the jars are completely dry and free of contaminants.
2. Filling the Jars
Once the jars are sterilized, carefully fill them with hot raspberry jam using a ladle or funnel. Leave about 1/4-inch of space at the top of the jar. This headspace is necessary for the jam to expand slightly as it cools. Be sure to wipe the rims of the jars with a clean cloth to ensure a proper seal.
3. Sealing the Jars
To seal the jars, place sterilized lids on top and screw on the bands until they are finger-tight. Avoid over-tightening, as this can prevent the jars from sealing correctly. If you’re following the water bath canning method, process the jars by submerging them in boiling water for 10-15 minutes. This will ensure a proper seal and help preserve the jam.
4. Storing the Jam
Once your jam is sealed and cooled, store the jars in a cool, dark place like a pantry or cupboard. Unopened jars can last up to a year. Once opened, store the jam in the refrigerator for up to three weeks. Always use clean utensils to scoop out the jam to avoid contamination.
5. Freezing Raspberry Jam
If you have more jam than you can use right away, consider freezing it. Leave about 1-inch of headspace to allow for expansion, and use freezer-safe jars or containers. The jam will stay fresh in the freezer for several months. When ready to use, thaw it in the fridge.
6. Checking for Spoilage
While your homemade raspberry jam can last up to a year if properly sealed, it’s important to check for signs of spoilage. If you notice any mold, unusual odors, or the lid pops easily, the jam has likely not sealed properly and should be refrigerated and consumed soon.
By following these steps for jarring and storing, you can enjoy your delicious raspberry jam throughout the year, savoring the fresh flavors of summer whenever you like.
How to Store and Use Raspberry Jam
Best Ways to Store Raspberry Jam for Freshness
Proper storage is key to maintaining the flavor and quality of your homemade raspberry jam. Whether you’re enjoying it right away or saving it for later, follow these best practices to ensure your jam stays fresh and delicious for as long as possible.
1. Store Unopened Jars in a Cool, Dark Place
For unopened jars of raspberry jam, the ideal storage environment is a cool, dark place like a pantry or cupboard. The temperature should be between 50°F to 70°F (10°C to 21°C). Avoid areas that are too humid or exposed to direct sunlight, as these can affect the flavor and color. Properly sealed jars can last for up to a year, but it’s best to use them within 6-9 months for the best flavor.
2. Refrigerate After Opening
Once you open a jar of raspberry jam, it’s essential to refrigerate it immediately. Opened jars are more vulnerable to bacterial growth, and storing them in the fridge helps preserve their freshness. When properly refrigerated, your jam can last for up to 3 weeks. Always use a clean utensil to scoop the jam to avoid contamination.
3. Freeze for Long-Term Storage
If you have extra jam, freezing is an excellent option for long-term storage. Leave 1 inch of headspace to allow for expansion and use freezer-safe jars or containers. When stored properly, frozen raspberry jam can last up to 1 year. To use it, simply thaw the jam in the fridge overnight. This preserves its taste and texture.
4. Use Vacuum Sealing
For extended shelf life, vacuum sealing is a great option. Vacuum-sealed bags or jars remove the air, preventing oxidation and spoilage. This method is especially useful for large batches of jam. Store vacuum-sealed jars in a cool, dark place for several months longer than standard sealed jars.
5. Watch for Signs of Spoilage
Even when stored properly, check your jam for signs of spoilage. Mold, fermented odors, or broken seals indicate it’s no longer safe to eat. Regularly inspect your stored jam to ensure it remains fresh and delicious.
By following these simple steps, you can enjoy your raspberry jam at its best, no matter when you choose to indulge.
How Long Does Raspberry Jam Last?
The shelf life of raspberry jam depends on several factors, including storage conditions and whether the jar has been opened. Proper storage ensures your homemade jam remains fresh and flavorful for as long as possible. Here’s how long your raspberry jam can last and the best ways to store it.
1. Unopened Raspberry Jam: Shelf Life in the Pantry
Unopened jars of homemade raspberry jam can last up to 1 year if stored in a cool, dark place, such as a pantry or cupboard. Sealing the jars properly prevents air and bacteria from getting inside, keeping the jam safe for long-term storage. Store-bought jam also has a best-before date on the label, but it can last beyond that if properly sealed. Over time, though, its flavor may degrade.
2. Opened Raspberry Jam: Refrigeration Extends Freshness
Once you open a jar of raspberry jam, it’s exposed to air, moisture, and bacteria, which can reduce its shelf life. Opened raspberry jam should be stored in the refrigerator and will typically last 3-4 weeks. Always use a clean spoon to scoop the jam, as contaminants can speed up spoilage. If your jam develops mold or an off smell, it’s best to throw it away.
3. Freezing Raspberry Jam for Longer Storage
For long-term storage, freezing raspberry jam is a great option. When frozen, it can last up to 1 year while retaining its flavor and texture. Use freezer-safe jars or containers and leave 1 inch of headspace for expansion. To use, thaw in the fridge overnight. Freezing preserves the freshness, so you can enjoy your jam months later.
4. Signs That Raspberry Jam Has Gone Bad
Even with proper storage, raspberry jam can spoil. Signs to watch for include:
- Mold on the surface or around the lid.
- Off smells, such as a fermented odor.
- A broken seal or unsealed jar.
- A change in texture, like excessive runniness.
By following these storage guidelines, you can enjoy your raspberry jam for as long as possible.
Delicious Ways to Enjoy Raspberry Jam
Raspberry jam isn’t just for spreading on toast – its sweet, tangy flavor makes it a versatile ingredient for a variety of dishes. Whether you’re looking to enhance your breakfast, add a burst of flavor to desserts, or create savory pairings, there are countless ways to enjoy homemade raspberry jam. Here are some creative and delicious ideas to try:
1. Spread on Toast, Bagels, or English Muffins
The classic way to enjoy raspberry jam is as a spread on your morning toast or bagels. The natural sweetness and slight tartness of raspberry jam pair perfectly with the crispness of toasted bread. For an extra indulgent treat, spread a layer of cream cheese or butter on your toast and top it with a generous spoonful of jam. This simple yet satisfying breakfast is sure to start your day off right.
2. Mix into Yogurt or Oatmeal
For a quick, healthy breakfast, swirl some raspberry jam into your favorite yogurt or oatmeal. The jam adds a burst of flavor and sweetness, making a plain bowl of oats or yogurt feel more indulgent. You can also add some fresh berries, granola, or nuts for an extra crunch and texture. This makes for a delicious and balanced breakfast or snack.
3. As a Topping for Pancakes or Waffles
Transform your morning pancakes or waffles into a special treat by topping them with raspberry jam. Heat the jam slightly to make it easier to drizzle, and it will add a rich, fruity flavor that pairs beautifully with the fluffy texture of pancakes. For a more decadent option, top your stack with whipped cream or a dollop of mascarpone cheese for a delightful contrast to the sweet jam.
4. Use in Desserts like Cakes and Pastries
Raspberry jam is a wonderful addition to many desserts. Use it as a filling for cakes, cupcakes, or tarts. It pairs especially well with chocolate, vanilla, or almond-flavored cakes. You can also spread jam between layers of sponge cakes for a raspberry jam-filled cake. Alternatively, spread it on puff pastry to make easy raspberry turnovers or use it in a jam-filled thumbprint cookie for a delightful bite-sized treat.
5. Pair with Cheese and Crackers
For a savory-sweet experience, raspberry jam pairs wonderfully with cheeses like brie, goat cheese, or sharp cheddar. Spread a little jam on a cracker, add a slice of cheese, and enjoy a simple yet flavorful appetizer. This combination is perfect for holiday gatherings, cheese boards, or as a quick snack.
6. Incorporate into Smoothies
Add a spoonful of raspberry jam to your smoothie for extra flavor. It pairs beautifully with fruits like strawberries, blueberries, or bananas, and adds a burst of sweetness and color. You can blend it with yogurt, milk, or juice, along with some ice for a refreshing, fruity treat.
7. Make a Raspberry Sauce for Desserts
Use raspberry jam as the base for a simple, flavorful raspberry sauce. To make the sauce, heat the jam with a little water or lemon juice, and then drizzle it over ice cream, cheesecake, or panna cotta. It adds a vibrant, fruity layer that elevates any dessert.
By experimenting with these delicious ways to use raspberry jam, you’ll find plenty of opportunities to enjoy its sweet-tart flavor. Whether it’s breakfast, snacks, or desserts, raspberry jam is a versatile and tasty ingredient for all occasions.
Conclusion
Making homemade raspberry jam is a simple and rewarding process that allows you to enjoy the fresh, vibrant flavors of summer all year long. With just a few ingredients and easy steps, you can create a delicious batch of jam that’s free of artificial preservatives and tailored to your personal taste.
Don’t be afraid to experiment with different flavors by adding spices, herbs, or even blending it with other fruits to create your own unique jams. The possibilities are endless!
I encourage you to try the recipe for yourself – it’s a fun, cost-effective way to make something truly special. And if you have any questions or feedback, feel free to leave a comment below. I’d love to hear about your homemade raspberry jam experiences and any creative twists you’ve added to your jams!