
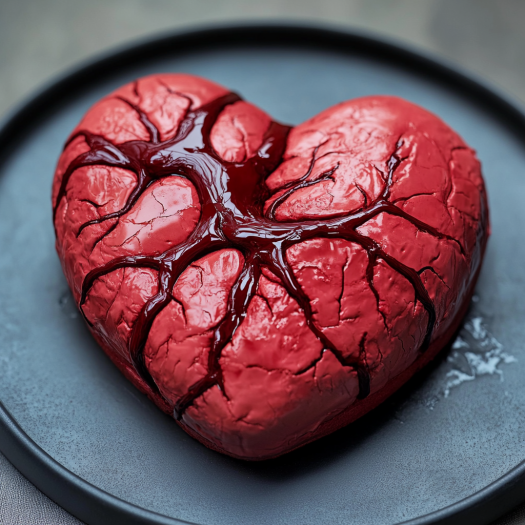
Heart-shaped cakes have become a popular choice for celebrations of love and special occasions. Whether it’s Valentine’s Day, an anniversary, or a wedding, a heart cake adds a personal and meaningful touch to any event. Their symbolic shape represents love, affection, and togetherness, making them the perfect dessert to share with loved ones.
In this post, we will provide you with a comprehensive, step-by-step guide on how to make the perfect heart cake. From selecting the right ingredients to decorating your cake with creative touches, you’ll have all the tips and tricks you need to create a show-stopping heart cake that will leave everyone impressed. Let’s get started!
Why a Heart Cake is the Perfect Choice for Special Occasions
Occasions to Celebrate with a Heart Cake
Heart cakes are a timeless symbol of love and affection, making them the perfect choice for a wide variety of celebrations. Their charming shape and sweet symbolism add a personal touch to any occasion, and here are just a few events where a heart cake can take center stage:
1. Valentine’s Day: A Sweet Treat for Your Loved One
The most obvious occasion for a heart cake is Valentine’s Day, when couples and loved ones exchange gifts, cards, and treats to show their affection. A beautifully decorated heart-shaped cake is a wonderful way to celebrate romantic love. Whether it’s a small, intimate dessert for two or a grand cake for a Valentine’s Day party, a heart cake sets the tone for this love-filled holiday.
2. Anniversaries: Celebrate Love Through the Years
Whether it’s the anniversary of your wedding, first date, or any other significant relationship milestone, a heart-shaped cake is a meaningful way to commemorate the occasion. The cake can be customized with flavors, colors, and decorations that reflect the couple’s preferences or the theme of the anniversary. It’s a sweet, symbolic gesture that shows how much the couple’s love has flourished over time.
3. Weddings: A Symbol of Everlasting Love
Heart cakes are also a popular choice for weddings, particularly as a personalized touch for a couple’s cake or a smaller cake for an intimate celebration. A heart-shaped wedding cake can symbolize the couple’s love and commitment to each other, and can be made elegant with beautiful fondant, intricate piping, and personalized messages. For those looking for a creative twist, tiered heart-shaped cakes can be a show-stopping centerpiece at any wedding.
4. Engagement Parties: Celebrating a New Chapter Together
What better way to celebrate the start of a lifetime together than with a heart-shaped cake at your engagement party? This cake can be decorated to match the couple’s theme, be it simple and understated or lavish and romantic. It’s a sweet way to mark the beginning of the couple’s journey toward marriage and show guests the couple’s shared love.
5. Mother’s Day or Family Gatherings: A Heartfelt Tribute
A heart cake isn’t just for romantic celebrations. It can also be used to honor family members, especially on Mother’s Day. A cake decorated with heartfelt messages and vibrant colors is a thoughtful gesture to show appreciation and love. The heart shape, symbolizing care and affection, makes it the ideal cake to celebrate family bonds.
6. Baby Showers: A Sweet Celebration of New Life
Heart cakes are also great for baby showers, particularly when the cake is decorated in soft pastel shades or with playful designs like baby onesies or baby booties. The heart shape, representing the love and joy a new child will bring, adds a sweet and tender touch to the celebration of the upcoming arrival.
7. Graduations or Achievements: Celebrating Milestones with Love
While heart cakes are often associated with love, they can also be used to celebrate accomplishments and milestones, like graduations or personal achievements. For example, a heart-shaped cake could be a fun way to congratulate a loved one for completing a challenging project, graduating from school, or reaching a personal goal. It conveys that love and support are present through all of life’s milestones.
The Symbolism Behind the Heart Cake
Heart-shaped cakes are more than just a delightful treat—they carry a deep symbolic meaning that resonates with love, affection, and connection. Here’s a closer look at the symbolism behind the heart cake and why it’s such a powerful and emotional choice for celebrations:
1. A Representation of Love and Affection
The heart shape is universally recognized as a symbol of love, romance, and affection. For centuries, the heart has been associated with emotions of the deepest kind, from passionate love to familial bonds. When incorporated into a cake, it takes on the meaning of shared love, whether it’s romantic, platonic, or familial. A heart cake is a way of expressing those feelings in a tangible form, bringing a sense of warmth and intimacy to any celebration.
2. A Symbol of Commitment and Togetherness
In the context of weddings and anniversaries, the heart shape carries even more significance. It represents the lifelong commitment two people make to each other. Just like a heart’s central role in sustaining life, the act of sharing a heart cake symbolizes a shared journey in love, filled with joy, challenges, and mutual respect. Whether you’re celebrating a wedding, anniversary, or engagement, a heart cake captures the essence of togetherness and unity between partners, signifying that their love will continue to grow stronger.
3. Heart Cake and Family Bonds
The symbolism of the heart isn’t limited to romantic love—it’s also deeply connected to family and friendship. In many cultures, the heart is seen as the center of emotional connections. A heart-shaped cake at a family gathering or a Mother’s Day celebration emphasizes the love and nurturing relationships that bind family members together. It celebrates the unconditional love parents have for their children, the bond between siblings, and the affection shared among close friends. In these contexts, the heart cake becomes a tribute to the people we cherish most.
4. A Representation of Care and Thoughtfulness
Giving or making a heart-shaped cake is often a gesture of deep thoughtfulness. The effort to create a cake in such a deliberate shape, decorated with care and attention, shows the person receiving it how much they mean to you. A heart cake isn’t just about the sweet treat—it’s about showing someone that you’ve put time and love into making something special just for them. The shape itself symbolizes the giver’s devotion and thoughtfulness in celebrating an important occasion.
5. Emotional Connection Across Cultures
Across many cultures, the heart has been revered as the center of emotions and affection, making it a fitting choice for any celebration that marks love and care. For example, in Western traditions, heart-shaped objects are common during Valentine’s Day, while in other cultures, the heart also symbolizes health, vitality, and happiness. The universal nature of the heart shape makes it accessible and meaningful to people from different backgrounds, giving it a unique ability to unite us through love and connection, no matter where we come from.
6. A Sweet Expression of Happiness and Joy
The heart shape isn’t just a symbol of love—it also represents joy, positivity, and emotional fulfillment. Heart-shaped cakes are often present at celebrations designed to uplift spirits and bring joy, such as birthdays, baby showers, or even achievements like graduations. In these cases, the heart represents the happiness that accompanies the event, reminding us of the love and good fortune that surrounds us.
By adding layers of meaning and symbolism to the heart-shaped cake, it’s clear why this cake design resonates with so many. Whether it’s for a romantic occasion, a family celebration, or any special event, the heart cake communicates feelings that words alone often can’t express. It’s a delicious, tangible expression of affection, care, and happiness, making it a perfect centerpiece for life’s most meaningful moments.
Adding a Personal Touch with a Heart Cake
One of the most beautiful aspects of a heart cake is its versatility. It can be customized in so many ways to reflect the personality and preferences of the person being celebrated, making it the perfect dessert for any special occasion. By adding a personal touch, you can elevate a simple heart cake into a meaningful expression of love, appreciation, or celebration. Here are some ideas to help you personalize your heart cake and make it even more special:
1. Customizing the Flavor to Suit the Occasion
The flavor of the cake is one of the most important personal touches you can add. Whether it’s a favorite flavor of the guest of honor or a unique combination that represents a shared memory, customizing the flavor of your heart cake makes it all the more thoughtful.
- Signature Flavor: Consider baking the cake in a flavor that has sentimental value—perhaps a flavor that has special meaning to you and the recipient. For example, a chocolate and raspberry heart cake might remind you of a romantic date, or a lemon and lavender heart cake could evoke memories of a summer picnic.
- Tailored to Preferences: For someone with specific tastes or dietary restrictions, you can tailor the cake to meet those needs, such as making a gluten-free, dairy-free, or vegan heart cake without sacrificing flavor. This not only shows consideration but also ensures that everyone can enjoy the cake.
2. Personalized Messages and Decorations
A heart cake provides the perfect canvas for personalization through decoration. From adding a name to writing a heartfelt message, these small details can make a big impact.
- Messages of Love or Gratitude: Whether it’s “I Love You,” “Happy Anniversary,” or a short poem, a personalized message on the heart cake adds a layer of emotion that connects the cake to the celebration. You can pipe the message with royal icing, or use fondant or edible markers to add a personal note that suits the theme of the event.
- Handcrafted Decorations: You can personalize the decoration by adding elements that hold sentimental meaning. For example, if the recipient loves a certain flower, you can adorn the heart cake with fondant roses or edible daisies. A wedding anniversary cake can feature tiny fondant hearts or the couple’s initials, while a baby shower cake can be decorated with baby booties or little hearts in pastel shades.
3. Creating a Theme Around the Heart Cake
The heart shape itself is inherently romantic, but you can customize the cake further by aligning it with the theme of the event, adding another personal layer to the cake.
- Matching Event Colors: If you are celebrating a special occasion like a wedding or baby shower, consider incorporating the event’s color palette into the heart cake. You can color the frosting, fondant, or decorations to match the bride and groom’s wedding colors or the baby shower theme, creating a cohesive, personalized experience.
- Theme-Specific Decorations: For birthdays or anniversaries, you might add decorative elements like edible glitter, gold leaf, or chocolate shavings in the shape of hearts to elevate the design. A Valentine’s Day heart cake could have a sprinkle of red and pink sprinkles, while a graduation celebration might include fondant caps and diplomas in the shape of hearts.
4. Incorporating Photos or Special Mementos
Another great way to add a personal touch is by including photos or special mementos on or around the heart cake.
- Edible Photo Prints: You can print a photo of the couple, family, or guest of honor on edible paper and place it on top of the cake. This could be a picture from a special moment in their life—like a wedding day, an engagement, or a family gathering. It adds a heartfelt connection and makes the cake more meaningful.
- Fondant Cut-Outs of Meaningful Objects: Consider using fondant or edible decorations to create meaningful symbols that reflect the occasion. For example, a heart cake for a wedding could include fondant versions of wedding rings, while a heart cake for a baby shower might feature tiny baby bottles or rattles. These tiny touches bring even more personality to the cake.
5. Special Toppings and Fillings
To make your heart cake even more unique, consider personalizing the fillings and toppings. The filling is the heart of the cake, quite literally, and it’s a great opportunity to incorporate flavors and textures that the person celebrating loves.
- Creative Fillings: You can experiment with different fillings like chocolate ganache, fruit preserves, or even a layer of cream cheese frosting. For a more indulgent touch, add a layer of caramel, a berry compote, or even a swirl of nutella for an extra layer of decadence.
- Toppings with Meaning: Top the cake with meaningful edible elements, such as fresh flowers, chocolate curls, or colored sugar crystals. For example, a Valentine’s Day heart cake could be topped with dark chocolate shavings, fresh strawberries, and a dusting of edible gold leaf to give it a sophisticated, yet romantic, flair.
6. Creating a Multi-Layered Heart Cake
A multi-layered heart cake can take the personalization a step further by allowing you to incorporate different flavors, fillings, or decorative elements in each layer. For instance, one layer could feature a vanilla cake with a raspberry filling, while another could be a rich chocolate cake with a chocolate ganache center. The layers can be stacked in the shape of a heart, each one offering a delightful surprise for the recipient.
Adding a personal touch to a heart cake transforms it from a simple dessert into a memorable experience that reflects the love, care, and attention you have for the person or people being celebrated. Whether it’s through custom flavors, meaningful decorations, or creative touches that tie into the event’s theme, a personalized heart cake shows that you’ve put thought and effort into making the celebration truly special.
Essential Ingredients for a Perfect Heart Cake
Basic Ingredients for Heart Cake Batter
To create a heart-shaped cake that is both delicious and visually appealing, it’s essential to start with the right ingredients. While the design and decoration may steal the spotlight, a heart cake’s flavor and texture are just as important. By using high-quality, simple ingredients, you can create a light, moist, and flavorful cake base that serves as the perfect foundation for any celebration. Here’s an overview of the basic ingredients you’ll need to make a traditional heart cake batter:
1. All-Purpose Flour: The Foundation of the Cake
All-purpose flour is the primary dry ingredient in the cake batter, providing structure and stability. The flour helps bind the other ingredients together, creating a cake that holds its shape without being too dense.
- For Light and Fluffy Cakes: Sift the flour before adding it to the batter to ensure it’s light and free of clumps. This process helps incorporate air into the flour, making the batter lighter and giving the cake a fluffier texture.
- Gluten-Free Alternatives: For those with dietary restrictions, you can substitute all-purpose flour with gluten-free flour blends. Be sure to use a blend that is specifically formulated for baking to maintain the texture and consistency of the cake.
2. Baking Powder and Baking Soda: Leavening Agents
Baking powder and/or baking soda are crucial for making the cake rise and become light and airy. These leavening agents release gas during baking, helping the batter expand and form a soft crumb.
- Baking Powder: This is a double-acting leavening agent, meaning it reacts twice—once when mixed with liquid and once when exposed to heat. It’s often used in cakes to ensure a rise that’s light and fluffy.
- Baking Soda: Baking soda, on the other hand, requires an acidic ingredient to activate it, such as buttermilk or vinegar. It’s usually used in recipes that include acidic elements for a softer texture.
3. Sugar: Sweetening the Cake
Sugar isn’t just used for sweetness in heart cake batter; it also helps with texture and moisture. As sugar dissolves into the batter, it traps air, which helps the cake become light and soft.
- White Granulated Sugar: This is the most common type of sugar used in cakes, as it provides the perfect level of sweetness and helps create a tender crumb.
- Alternative Sweeteners: If you’re looking for a healthier option, you can swap white sugar for alternatives like coconut sugar, maple syrup, or honey. Keep in mind that these alternatives may slightly affect the texture, so it’s a good idea to experiment with different options.
4. Butter or Oil: For Moisture and Rich Flavor
Butter (or oil) adds richness, moisture, and flavor to your heart cake. While butter contributes a decadent, rich flavor, oil creates a softer texture and can make the cake slightly more moist.
- Butter: Butter is often the go-to ingredient for cakes when you want a rich, buttery flavor and slightly firmer texture. It also helps the cake retain moisture.
- Oil: If you want a cake that’s extra moist with a lighter texture, oil (such as vegetable or canola oil) is a great alternative. Oil makes the cake slightly more tender and keeps it moist for a longer time.
5. Eggs: Binding the Batter Together
Eggs are essential in cake recipes for binding the ingredients together, providing structure, and adding moisture. They also help the cake rise and contribute to the overall texture and flavor.
- Whole Eggs: The yolk adds richness and flavor, while the egg white helps the cake rise and creates a delicate crumb.
- Egg Substitutes: For those who can’t or prefer not to use eggs, there are several substitutions. For example, you can use flaxseed meal mixed with water, applesauce, or even silken tofu as egg alternatives. Each substitute will impact the texture of the cake slightly, but they can all yield delicious results.
6. Milk or Buttermilk: For Moisture and Tenderness
Milk or buttermilk adds moisture to the batter and helps create a smooth, soft texture. Buttermilk, in particular, adds a slight tanginess and reacts with baking soda for a tender crumb.
- Whole Milk or Skim Milk: Whole milk is often preferred for its richness, but you can use any type of milk, depending on your preference. The milk helps create a smooth batter that bakes into a soft, moist cake.
- Buttermilk: Buttermilk provides an extra level of tenderness and flavor. If you don’t have buttermilk, you can make a substitute by adding a tablespoon of vinegar or lemon juice to one cup of milk and letting it sit for a few minutes.
7. Vanilla Extract: Adding Flavor
Vanilla extract is a key ingredient that enhances the flavor of the cake, making it more aromatic and flavorful. It adds depth to the overall taste of the cake, complementing the sweetness and richness of the other ingredients.
- Pure Vanilla Extract: For the best flavor, opt for pure vanilla extract over imitation vanilla. Pure vanilla extract has a stronger, more authentic flavor that will elevate the overall taste of the cake.
- Vanilla Bean Paste: If you want to add an extra touch of luxury, vanilla bean paste is a great option. It’s more concentrated and contains actual vanilla seeds, giving the cake an authentic, gourmet flavor.
8. Salt: Balancing the Sweetness
A pinch of salt may seem like an insignificant ingredient, but it plays an important role in enhancing the overall flavor of the cake. Salt helps balance the sweetness and brings out the flavors of the other ingredients.
- Fine Salt: Use a small amount of fine salt to ensure it blends smoothly into the batter. You don’t want the salt to be overpowering—just enough to create balance.
9. Optional Add-ins (for Extra Flavor and Texture)
Once you have the basic ingredients for your heart cake batter, you can customize it with additional flavorings and textures.
- Chocolate Chips or Chunks: Add chocolate chips for a classic flavor combination, or even mix in some cocoa powder for a rich, chocolatey cake.
- Fruit Zest or Purees: For a citrus twist, add lemon or orange zest to the batter. Alternatively, you can incorporate fruit purees, such as raspberry or strawberry, for a fruity flair.
- Nuts or Spices: Chopped nuts like almonds, walnuts, or pecans add crunch and flavor to the cake, while spices like cinnamon, nutmeg, or cardamom can infuse the cake with warmth and complexity.
By carefully selecting and combining these basic ingredients, you can create a heart-shaped cake that is as delicious as it is visually stunning. These foundational ingredients ensure the batter has the right texture, flavor, and moisture, providing the perfect base for any personalized design or decoration you choose.
Using Buttercream and Fondant for Heart Cake Decoration
Once you’ve baked your heart cake to perfection, the next step is bringing it to life with beautiful decorations. Two of the most popular and versatile options for decorating a heart-shaped cake are buttercream and fondant. Each has its own unique benefits and applications, allowing you to create anything from a rustic, textured finish to a flawless, professional-looking design. Let’s explore how to use buttercream and fondant to decorate your heart cake like a pro.
1. Decorating with Buttercream: Soft, Creamy, and Versatile
Buttercream is a classic and widely loved cake frosting known for its creamy texture and rich flavor. It’s easy to work with and can be used for both simple and intricate designs. Here’s how you can use buttercream to decorate your heart cake:
Types of Buttercream for Heart Cakes
Different types of buttercream can be used depending on the look and taste you’re going for:
- American Buttercream: The simplest and sweetest type, made with butter, powdered sugar, vanilla, and a touch of milk or cream. It’s great for piping and spreading but can be a bit on the sweeter side.
- Swiss Meringue Buttercream: A silkier and less sweet option, made by whipping egg whites and sugar before adding butter. It’s perfect for achieving a smooth, elegant look.
- Italian Meringue Buttercream: Similar to Swiss but made by adding a hot sugar syrup to egg whites before incorporating butter, resulting in a more stable and glossy finish.
- French Buttercream: Made with egg yolks instead of egg whites, giving it a richer, custard-like flavor.
How to Apply Buttercream for a Beautiful Finish
- Crumb Coat: Apply a thin layer of buttercream to seal in the crumbs before adding the final layer. This ensures a smooth, professional finish.
- Final Coat: Once the crumb coat is set, apply another layer of buttercream, using an offset spatula to smooth the surface. A cake scraper can help achieve a flawless finish.
- Textured Effects: Create unique designs by using piping techniques like rosettes, ruffles, or ombre effects with different shades of buttercream.
- Piping Decorations: Use a piping bag with various nozzles to add borders, swirls, and even tiny hearts for a decorative touch.
Best Buttercream Color Ideas for a Heart Cake
- Romantic Red & Pink: Perfect for Valentine’s Day or anniversaries.
- Classic White: A timeless choice for elegant wedding or engagement cakes.
- Pastel Shades: Soft pink, lavender, or peach for a dreamy, delicate look.
- Bold & Fun Colors: Bright shades like purple, teal, or gold for birthdays or festive celebrations.
2. Decorating with Fondant: Smooth, Elegant, and Professional
Fondant is a pliable, dough-like sugar paste that can be rolled out and draped over cakes for a sleek, polished look. It’s commonly used for professional-style cakes because of its versatility in sculpting and detailed designs.
How to Cover a Heart Cake with Fondant
- Prepare the Cake: Before applying fondant, ensure your cake is covered in a thin layer of buttercream or ganache to create a smooth base.
- Roll Out the Fondant: Dust your work surface with cornstarch or powdered sugar and roll the fondant into a thin, even sheet, large enough to cover your heart cake.
- Drape and Smooth: Carefully place the fondant over the cake, starting from the center and gently smoothing it outwards to avoid air bubbles. Use a fondant smoother to refine the edges.
- Trim the Edges: Use a sharp knife or fondant cutter to trim any excess fondant around the base of the cake.
Fondant Decoration Ideas for a Heart Cake
- Embossed Patterns: Use textured mats or rolling pins to imprint delicate lace or floral patterns onto the fondant.
- Marbled Fondant: Blend different colors of fondant together for a stunning marble effect.
- Gold or Silver Accents: Brush edible gold or silver dust onto fondant details for a luxurious look.
- 3D Fondant Hearts: Create small fondant hearts to decorate the sides or top of the cake.
- Fondant Ribbons and Bows: Add elegant ribbons, pearls, or bows made from fondant for an extra touch of sophistication.
3. Combining Buttercream and Fondant for the Best of Both Worlds
Many bakers use a combination of buttercream and fondant to get the best texture and design flexibility. Here are some ways to blend both:
- Buttercream Base with Fondant Accents: Cover the cake with buttercream and use fondant cutouts (like hearts, flowers, or letters) for decoration.
- Fondant Covering with Buttercream Details: Apply fondant to the cake for a smooth finish, then add buttercream piping for intricate borders or floral details.
- Ombre Buttercream with Fondant Toppers: Create a stunning ombre effect with buttercream and top it off with a fondant heart centerpiece.
4. Extra Tips for a Stunning Heart Cake Decoration
- Chill the Cake Before Decorating: A firm, chilled cake is easier to frost and prevents the buttercream or fondant from melting.
- Use Gel Food Coloring: For vibrant colors, gel-based food coloring works better than liquid food dyes as it doesn’t alter the texture of the buttercream or fondant.
- Invest in Quality Tools: A rotating cake turntable, smoothers, and piping tips can make a big difference in achieving a professional-looking cake.
- Add Edible Sparkle or Flowers: Finish off with edible glitter, gold leaf, or fresh flowers for a breathtaking design.
By using buttercream and fondant creatively, you can transform your heart cake into a stunning, eye-catching masterpiece. Whether you prefer a soft, creamy texture or a flawless, polished finish, these decorating techniques will help you achieve a cake that’s both delicious and visually impressive.
Flavor Variations for Your Heart Cake
While the classic vanilla or chocolate heart cake is always a favorite, experimenting with different flavors can make your cake stand out and add a unique twist to your special occasion. Whether you’re baking for a romantic celebration, a birthday, or a festive gathering, the right flavor can elevate your heart cake and make it truly unforgettable. Below are some delicious flavor variations to consider.
1. Classic and Crowd-Pleasing Flavors
These timeless flavors are perfect for any occasion and are guaranteed to be loved by everyone.
Vanilla Bean Heart Cake
A vanilla heart cake is elegant and simple, yet rich in flavor. To enhance its taste:
- Use high-quality pure vanilla extract or vanilla bean paste for a deep, aromatic flavor.
- Add a touch of almond extract for a hint of nuttiness.
- Pair with buttercream frosting, fresh berries, or a light glaze.
Decadent Chocolate Heart Cake
Chocolate is a top choice for romantic occasions like Valentine’s Day and anniversaries. To create the ultimate chocolate heart cake:
- Use Dutch-processed cocoa powder or melted dark chocolate for a rich, deep flavor.
- Incorporate coffee or espresso powder to enhance the chocolate notes.
- Pair with ganache, whipped chocolate frosting, or even a raspberry filling for contrast.
Red Velvet Heart Cake
Red velvet is a classic romantic cake flavor that combines cocoa and buttermilk for a soft, slightly tangy taste.
- Use a balance of cocoa powder and vanilla for depth of flavor.
- Buttermilk and vinegar are essential for achieving the signature tender texture.
- Pair with classic cream cheese frosting for the perfect combination.
2. Fruity and Refreshing Flavors
If you want a lighter, fruit-based flavor, these options will bring a fresh and delightful twist to your heart cake.
Strawberry Heart Cake
A strawberry-flavored cake is sweet, fruity, and perfect for romantic occasions.
- Use fresh or freeze-dried strawberries in the batter for an intense berry flavor.
- A strawberry reduction can enhance the natural taste without adding too much moisture.
- Pair with strawberry buttercream or a white chocolate ganache for a stunning finish.
Lemon or Orange Zest Heart Cake
Citrus flavors add a refreshing, zesty twist to your cake, making it perfect for spring and summer celebrations.
- Use fresh lemon or orange zest along with a bit of juice for a bright, tangy flavor.
- Pair with a lemon glaze, cream cheese frosting, or a berry compote for balance.
- Add poppy seeds for an extra layer of texture and flavor.
Raspberry Swirl or Blueberry Heart Cake
For a berry-infused cake with a unique twist:
- Swirl raspberry or blueberry puree into the batter before baking.
- Use a complementary frosting like lemon, vanilla, or white chocolate buttercream.
- Add fresh berries on top for a beautiful and natural decoration.
3. Exotic and Unique Flavors
For those who love experimenting with flavors, these creative options will make your heart cake stand out.
Matcha (Green Tea) Heart Cake
A matcha-flavored cake brings an earthy, slightly bitter taste that pairs well with sweet frostings.
- Use high-quality matcha powder for a vibrant green color and rich taste.
- Pair with white chocolate or honey buttercream to balance the flavors.
- Add azuki (red bean) paste as a filling for an authentic Japanese touch.
Coconut and Pineapple Heart Cake (Pina Colada-Inspired)
For a tropical-inspired heart cake:
- Use coconut milk and shredded coconut in the batter for a rich coconut flavor.
- Add crushed pineapple for sweetness and moisture.
- Frost with coconut whipped cream or cream cheese frosting and garnish with toasted coconut flakes.
Chai-Spiced Heart Cake
If you love warm, spiced flavors, a chai-spiced cake is a wonderful option:
- Add ground cinnamon, cardamom, nutmeg, ginger, and a hint of black pepper to the batter.
- Use brewed chai tea or chai concentrate for an extra depth of flavor.
- Pair with honey or vanilla buttercream for a cozy and comforting treat.
4. Decadent and Indulgent Flavors
If you’re looking to impress with a luxurious and rich cake, these flavors are perfect for a sophisticated dessert.
Salted Caramel Heart Cake
A sweet and salty combination that is both elegant and delicious.
- Use caramel sauce in the batter for a rich caramel flavor.
- Pair with salted caramel buttercream or drizzle caramel sauce over the top.
- Add sea salt flakes for an extra pop of flavor.
Mocha (Coffee & Chocolate) Heart Cake
A perfect choice for coffee lovers, this cake combines rich chocolate with bold coffee flavors.
- Use espresso powder or strong brewed coffee in the batter.
- Pair with mocha buttercream or chocolate ganache.
- Garnish with chocolate-covered coffee beans for an elegant finish.
Hazelnut & Nutella Heart Cake
For a nutty, chocolatey treat:
- Use ground hazelnuts or hazelnut extract in the batter.
- Swirl Nutella into the cake layers or use it as a filling.
- Pair with a chocolate-hazelnut frosting for the ultimate indulgence.
5. Alternative and Healthier Options
For those looking for a healthier heart cake, these options cater to different dietary needs without compromising flavor.
Gluten-Free Heart Cake
- Use almond flour or a gluten-free flour blend for a light and moist texture.
- Pair with fruit-based frostings or dark chocolate ganache for a rich taste.
Vegan Heart Cake
- Use flaxseed or chia seed as an egg replacer.
- Opt for dairy-free milk (such as almond or oat milk) and coconut oil or vegan butter.
- Pair with dairy-free buttercream or a coconut whipped frosting.
Sugar-Free or Keto Heart Cake
- Use almond flour and a sugar substitute like erythritol or monk fruit sweetener.
- Pair with a sugar-free chocolate or cream cheese frosting.
- Add fresh berries or nuts for a natural, low-carb garnish.
Final Thoughts
Your heart cake doesn’t have to be limited to the usual flavors. Whether you’re going for classic vanilla, decadent chocolate, fruity delights, or exotic flavors, there’s a perfect variation for every occasion. Choose a flavor that complements the theme of your celebration, and don’t be afraid to mix and match different elements for a unique and memorable dessert.
How to Make the Perfect Heart Cake: Step-by-Step Instructions
Preparing the Heart Cake Batter
The heart cake batter is the foundation of your delicious creation, so ensuring it has the right texture, consistency, and flavor is key. Whether you’re making a classic vanilla cake, a rich chocolate cake, or a unique flavored cake, the steps to preparing the batter remain largely the same. Below, we’ll guide you through the essential process of making a smooth, well-balanced batter that bakes into a moist and fluffy heart cake.
1. Gather Your Ingredients
Before you start mixing, make sure you have all your ingredients measured and ready. This ensures a smooth baking process and prevents mistakes.
Basic Ingredients for a Classic Heart Cake Batter:
- Flour – All-purpose flour or cake flour provides structure. Cake flour yields a lighter, softer cake.
- Sugar – Granulated sugar sweetens the batter and adds moisture.
- Butter or Oil – Butter gives a rich flavor, while oil creates a more moist texture.
- Eggs – They help bind the ingredients together and add structure.
- Baking Powder/Baking Soda – Leavening agents that help the cake rise.
- Milk or Buttermilk – Adds moisture and helps create a tender crumb. Buttermilk also enhances flavor and softness.
- Vanilla Extract – Essential for flavor enhancement, even in chocolate cakes.
- Salt – Balances sweetness and enhances the overall flavor.
Ingredient Variations for Different Flavors:
- For a chocolate heart cake, add cocoa powder and substitute some milk with brewed coffee to intensify the chocolate taste.
- For a red velvet heart cake, use cocoa powder, buttermilk, and a small amount of vinegar for that classic tangy taste.
- For a fruit-flavored heart cake, mix in fruit puree or zest for added freshness and natural sweetness.
2. Mixing the Batter: Step-by-Step Instructions
Proper mixing is essential to achieving a light, fluffy, and well-textured cake.
Step 1: Creaming Butter and Sugar (If Using Butter)
- In a large mixing bowl, beat the butter and sugar together until light and fluffy (about 3-5 minutes). This step incorporates air into the batter, making the cake lighter.
- If using oil instead of butter, mix it with the sugar and eggs until well combined.
2: Adding the Eggs
- Add eggs one at a time, beating well after each addition. This helps emulsify the batter and prevent curdling.
- If the mixture looks slightly separated, don’t worry—it will come together when the dry ingredients are added.
3: Incorporating the Dry Ingredients
- In a separate bowl, whisk together the flour, baking powder (or baking soda), and salt.
- Gradually add the dry ingredients to the wet mixture, alternating with the milk or buttermilk. This method ensures an even blend without overmixing.
- Mix on low speed until just combined. Overmixing can lead to a dense cake.
4: Flavor Enhancements
- Add vanilla extract, citrus zest, or any additional flavoring at this stage.
- If using chocolate, fold in melted chocolate or cocoa powder with the dry ingredients.
5: Checking the Batter Consistency
- The batter should be smooth, slightly thick, and pourable but not runny.
- If the batter seems too thick, add a tablespoon of milk at a time until the right consistency is achieved.
- If it’s too thin, add a bit more flour, one tablespoon at a time.
3. Preparing the Cake Pans for Baking
Since you’re making a heart-shaped cake, proper pan preparation ensures an even bake and easy removal from the mold.
Choosing the Right Heart-Shaped Cake Pan
- Use a dedicated heart cake pan for a perfect shape.
- If you don’t have a heart-shaped pan, create one by combining a round and a square cake pan. Cut and arrange the pieces into a heart shape before frosting.
Greasing and Lining the Pan
- Grease the heart cake pan with butter or non-stick spray to prevent sticking.
- Line the bottom with parchment paper for extra insurance.
- Lightly dust the pan with flour, shaking out any excess.
4. Pouring and Smoothing the Batter
- Pour the prepared batter evenly into the cake pan.
- Use a spatula to smooth the top and ensure even distribution.
- Tap the pan gently on the counter to remove any air bubbles.
5. Final Check Before Baking
- Ensure your oven is preheated to the correct temperature (typically 325–350°F (163–177°C)).
- Double-check the batter for smoothness and even distribution.
- Place the pan in the center of the oven for even baking.
By following these steps, you’ll have a perfectly prepared heart cake batter ready for baking. The next step is ensuring the cake bakes evenly and turns out beautifully golden and moist!
Baking Your Heart Cake
Baking your heart cake to perfection requires the right temperature, timing, and technique. A well-baked heart cake should be soft, fluffy, and evenly cooked, with a golden-brown crust and a moist interior. Below, we’ll cover the essential steps to ensure your heart cake bakes evenly and turns out just right.
1. Preheating the Oven for Optimal Baking
Preheating your oven is crucial for an evenly baked cake. If the oven isn’t hot enough when you place the batter inside, the cake may rise unevenly or become dense.
Key Steps for Preheating:
- Set the correct temperature – Most heart cakes bake well at 325–350°F (163–177°C). If your recipe specifies a different temperature, follow that.
- Allow the oven to fully preheat – Wait at least 10–15 minutes to ensure even heat distribution.
- Use an oven thermometer – If your oven runs hot or cold, an oven thermometer helps maintain accurate baking conditions.
2. Placing the Cake in the Oven
Where and how you place your cake in the oven affects how it bakes.
Tips for Proper Cake Placement:
- Place the cake on the middle rack for even air circulation.
- Avoid overcrowding the oven—if baking multiple layers, leave enough space between pans.
- Use a baking sheet underneath if using a silicone heart-shaped mold to provide stability.
3. Baking Time and Checking for Doneness
Different cake batters and pan sizes require slightly different baking times.
General Baking Time Estimates:
- 8-inch heart cake: 30–35 minutes
- 9-inch heart cake: 35–40 minutes
- Two-layer heart cake: 25–30 minutes per layer
- Dense cakes (chocolate, red velvet, or fruit cakes): May need an extra 5–10 minutes
How to Check If Your Heart Cake is Fully Baked:
- Toothpick test – Insert a toothpick into the center of the cake. If it comes out clean or with a few moist crumbs (not wet batter), the cake is done.
- Spring-back test – Gently press the top of the cake. If it springs back, it’s ready. If it leaves an indentation, bake for a few more minutes.
- Visual cues – The edges should slightly pull away from the pan, and the top should be a golden brown.
4. Cooling the Cake Properly
Cooling your heart cake correctly prevents it from becoming dense or falling apart when removing it from the pan.
1 Cooling Steps:
- Let the cake cool in the pan – Allow it to rest for 10–15 minutes before attempting to remove it.
- Use a cooling rack – Transfer the cake to a wire rack to cool completely. This prevents the bottom from getting soggy.
- Avoid rushing the process – Decorating a warm cake can cause icing or fondant to melt. Wait at least 1–2 hours before frosting.
5. Troubleshooting Common Baking Issues
If your cake doesn’t turn out as expected, here are some possible causes and solutions:
| Issue | Possible Cause | Solution |
|---|---|---|
| Cake is dry | Overbaked or too much flour | Reduce baking time or check flour measurement |
| Cake is too dense | Overmixing the batter | Mix until just combined |
| Cake sinks in the middle | Underbaked or too much leavening agent | Bake for a few more minutes and measure ingredients carefully |
| Cake sticks to the pan | Pan wasn’t greased properly | Use parchment paper and grease the sides thoroughly |
| Uneven baking | Oven temperature is inconsistent | Rotate the cake halfway through baking |
By following these steps, you’ll ensure that your heart cake bakes evenly, retains moisture, and is ready for decorating. Up next, we’ll cover how to level and decorate your cake to make it visually stunning! 🎂❤️
Cooling Your Heart Cake for Decoration
Properly cooling your heart cake is a crucial step before decorating. If the cake is too warm, frosting, buttercream, or fondant may melt, slide off, or create a sticky mess. Cooling ensures a stable and smooth surface for decoration while preserving the cake’s moisture and texture. Below, we’ll cover the best techniques for cooling your heart cake to achieve perfect results.
1. Let the Cake Cool in the Pan First
Once your heart cake is fully baked, resist the urge to remove it from the pan immediately. Removing it too soon can cause the cake to break apart or lose its shape.
Best Practices for Cooling in the Pan:
- Leave the cake in the pan for 10–15 minutes after removing it from the oven.
- Place the pan on a wire cooling rack to allow air to circulate underneath.
- If using a silicone heart mold, allow extra cooling time before attempting to remove the cake to prevent distortion.
2. Transferring the Cake to a Cooling Rack
After the initial cooling period, the next step is to remove the cake from the pan and let it cool completely.
Steps to Safely Remove the Cake:
- Run a butter knife or offset spatula around the edges of the cake to loosen it.
- Place a large plate or cooling rack over the top of the pan.
- Flip the pan gently and tap the bottom to help release the cake.
- Slowly lift the pan away, making sure the cake stays intact.
- If the cake sticks, let it sit for a few more minutes and try again.
Why Use a Wire Cooling Rack?
A cooling rack allows air to circulate around the cake, preventing condensation from making the bottom soggy. If you don’t have a cooling rack, place the cake on a parchment-lined surface, flipping it occasionally to allow even cooling.
3. Allowing the Cake to Cool Completely
Before decorating, your cake must be completely cool—not warm, not slightly warm, but room temperature. If the cake is even slightly warm, frosting will melt and decorations won’t hold their shape.
How Long Should You Wait?
- Single-layer heart cake: 1–2 hours
- Multi-layer heart cake: 2–3 hours (or chill in the fridge for 30–45 minutes)
- Dense cakes (chocolate, red velvet, or fruit cakes): May require extra cooling time
How to Speed Up the Cooling Process
If you’re short on time, you can speed up the cooling process:
- Use the fridge: Place the cake (on a rack) in the refrigerator for 30–45 minutes.
- Use the freezer: For extra-fast cooling, wrap the cake in plastic wrap and freeze for 15–20 minutes.
- Cut the cake into layers: If making a layered heart cake, slicing the cake into layers will help it cool faster.
4. Leveling the Cake for a Smooth Finish
Once your cake has fully cooled, it’s time to prepare it for decoration. Leveling the cake creates a flat surface for frosting, stacking, and fondant application.
How to Level a Heart Cake:
- Use a serrated knife or cake leveler to trim the dome from the top of the cake.
- Keep the knife parallel to the cake and slice slowly for an even cut.
- If making a layered cake, cut the cake into even layers before assembling.
Tip: Save the cake scraps for cake pops, trifle desserts, or snacking!
5. Storing the Cake Before Decorating
If you’re not decorating the cake immediately, proper storage keeps it fresh and prevents it from drying out.
Short-Term Storage (Same Day)
- Wrap the cake in plastic wrap or place it in an airtight container.
- Keep it at room temperature in a cool, dry place.
Overnight or Long-Term Storage
- Wrap the cake in plastic wrap, then in foil, and store it in the refrigerator.
- For longer storage, freeze the cake for up to 3 months, ensuring it’s double-wrapped to prevent freezer burn.
By following these cooling and preparation steps, your heart cake will be perfectly set for decorating. Now, you’re ready to apply buttercream, fondant, or other beautiful finishing touches to make your heart cake look as amazing as it tastes! 🎂❤️
For a stunning vintage-style heart cake, check out this vintage heart cake tutorial from Sugar & Sparrow for inspiration and expert decorating tips!
Decorating Your Heart Cake: Ideas & Tips
Basic Heart Cake Decoration Techniques
Decorating your heart cake is where creativity comes to life! Whether you prefer a simple, elegant look or a vibrant, eye-catching design, mastering a few basic decorating techniques will help you achieve a stunning result. Below, we’ll explore the essential steps and methods to decorate your heart cake beautifully.
1. Preparing the Cake for Decoration
Before applying any frosting or decorations, you need to prepare your cake to ensure a smooth and professional finish.
Steps to Prepare Your Heart Cake:
- Trim and level the cake – Use a serrated knife or cake leveler to remove any domed tops and create an even surface.
- Apply a crumb coat – This is a thin layer of frosting that traps loose crumbs and provides a clean base for further decoration.
- Chill the cake – Place the cake in the fridge for 15–30 minutes to help the crumb coat set and make decorating easier.
2. Applying a Smooth Buttercream Finish
Buttercream is a classic choice for decorating a heart cake. A smooth, creamy layer of buttercream provides a polished look or serves as a base for additional decorations.
How to Apply Buttercream Smoothly:
- Use an offset spatula or bench scraper – Spread the buttercream evenly over the cake, starting from the top and working down the sides.
- Apply a thin crumb coat first – Let it set before adding the final coat.
- Smooth the buttercream – Hold a bench scraper at a slight angle and run it around the cake’s edges for a clean, even surface.
- Chill for firmness – If needed, refrigerate the cake for 15 minutes before making final touches.
Tip: If you want a textured buttercream look, use a spoon or spatula to create rustic swirls.
3. Using Fondant for a Flawless Look
Fondant creates a sleek, professional finish for heart cakes and allows for intricate designs.
Steps for Covering a Heart Cake with Fondant:
- Dust your work surface – Lightly sprinkle with cornstarch or powdered sugar to prevent sticking.
- Roll out the fondant – Aim for a ¼-inch thick sheet large enough to cover the cake.
- Drape the fondant over the cake – Gently place it over the top and smooth it down the sides.
- Smooth and trim – Use a fondant smoother to eliminate air bubbles and trim excess fondant with a sharp knife.
Tip: If fondant cracks, rub a little shortening on the area to smooth it out.
4. Piping Designs and Borders
Piping adds decorative touches such as borders, swirls, or personalized messages.
Essential Piping Techniques:
- Basic border – Use a round or star tip to pipe dots, shells, or pearls along the cake’s edges.
- Rosettes and flowers – A star tip can create beautiful buttercream roses for a romantic touch.
- Writing on the cake – Use a fine round tip to pipe names, messages, or heartfelt words.
Tip: Practice on parchment paper before piping directly onto the cake.
5. Adding Final Decorative Touches
Now that your base is set, add extra embellishments to enhance your heart cake’s design.
Popular Decoration Ideas:
- Sprinkles and edible glitter – Adds sparkle and texture.
- Fresh fruit – Strawberries, raspberries, or cherries create a fresh, elegant look.
- Chocolate drips – Drizzle melted chocolate over the edges for a trendy effect.
- Themed toppers – Use sugar flowers, fondant shapes, or customized cake toppers for a special touch.
By using these basic heart cake decoration techniques, you can create a cake that looks as delightful as it tastes! Whether you choose buttercream, fondant, or a mix of both, your heart-shaped cake is sure to impress. 🎂❤️
Creative Heart Cake Decoration Ideas
Decorating a heart cake is an opportunity to showcase creativity, whether for a romantic celebration, a birthday, or a special event. From elegant and sophisticated designs to fun and colorful decorations, there are endless ways to personalize your heart cake. Below, we’ll explore a variety of creative heart cake decoration ideas to help you achieve a stunning and unique design.
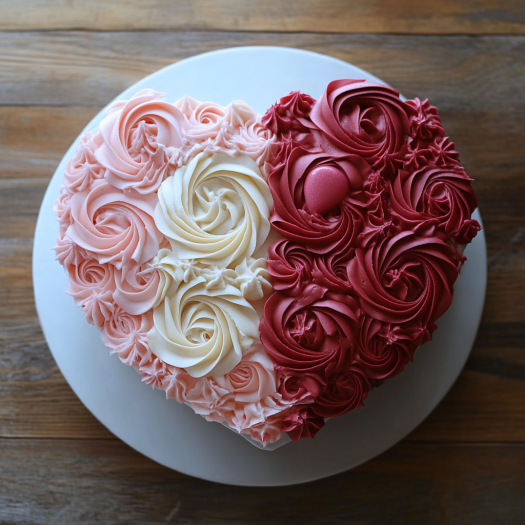
1. Romantic-Themed Heart Cake Decorations
A heart cake is often associated with love and romance, making it perfect for anniversaries, weddings, and Valentine’s Day.
Ideas for a Romantic Look:
- Ombre Buttercream – Create a beautiful gradient effect using different shades of pink, red, or purple.
- Rosette Swirls – Pipe buttercream roses all over the cake for a soft and romantic feel.
- Gold Leaf Accents – Edible gold leaf or metallic dust can add a luxurious touch.
- Handwritten Love Notes – Use a fine piping tip to write meaningful messages like “I love you,” “Forever Yours,” or “Be Mine.”
- Heart-Shaped Toppers – Add fondant or chocolate heart toppers to enhance the theme.
Tip: A combination of red velvet cake and cream cheese frosting creates a visually stunning and deliciously romantic heart cake.
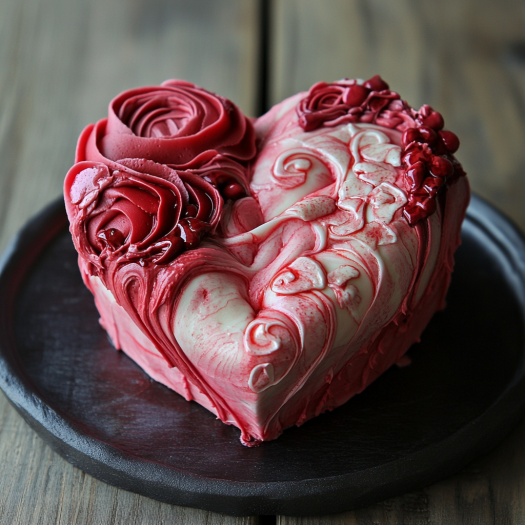
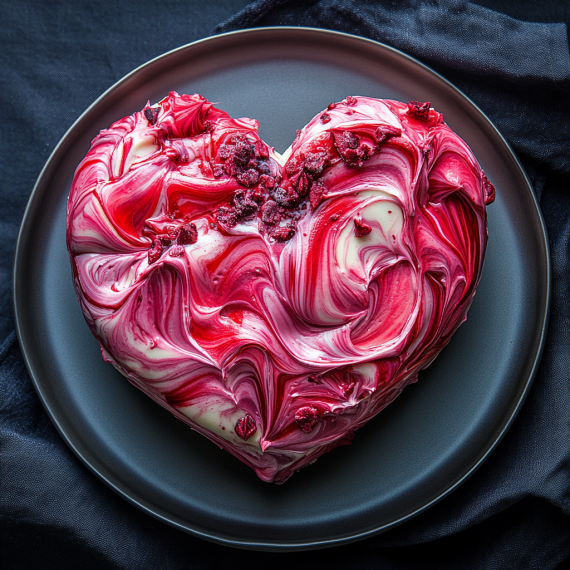
2. Floral-Inspired Heart Cake Designs
Flowers can add a delicate and elegant touch to your heart cake, whether fresh or made from buttercream, fondant, or edible sugar.
Ways to Incorporate Floral Decorations:
- Fresh Flowers – Use edible flowers like roses, violets, or pansies to decorate the cake.
- Buttercream Flowers – Pipe realistic buttercream roses, peonies, or daisies using floral piping tips.
- Pressed Flower Design – Gently press edible flowers onto a buttercream or fondant-covered cake for a natural and artistic effect.
- Floral Watercolor Effect – Blend pastel-colored buttercream to create a soft, hand-painted floral look.
Tip: If using fresh flowers, make sure they are non-toxic and free of pesticides. You can wrap the stems in floral tape or place them in food-safe plastic tubes before inserting them into the cake.
3. Fun and Playful Heart Cake Decorations
For birthdays, kids’ parties, or casual celebrations, a heart cake can be decorated in a fun and whimsical way.
Playful Decoration Ideas:
- Rainbow Layers – Bake multiple colored cake layers for a vibrant surprise when sliced.
- Candy Overload – Top the cake with chocolates, sprinkles, and mini candies for a colorful and fun design.
- Confetti Surprise – Fill the center of the cake with sprinkles or candy so they spill out when sliced.
- Cartoon-Inspired Look – Outline the cake’s edges with black piping gel for a trendy comic cake effect.
- Drip Cake Effect – Use melted chocolate or colored ganache to create a dripping effect around the edges.
Tip: A heart-shaped piñata cake, where candy spills out when cut, is a great surprise for kids’ birthdays!
4. Elegant and Minimalist Heart Cake Styles
Sometimes, less is more! A minimalist heart cake can look just as beautiful as an elaborate one, focusing on simplicity and elegance.
Simple Yet Stunning Decoration Ideas:
- Naked or Semi-Naked Cake – A light layer of buttercream that lets the cake layers peek through for a rustic-chic look.
- Monochrome Theme – Use a single color for the entire cake and decorations, such as an all-white cake with pearl accents.
- Textured Buttercream – Instead of smooth frosting, use a palette knife to create artistic, textured strokes.
- Pearl or Bead Accents – Place edible pearls or sugar beads around the cake’s edges for a sophisticated finish.
- Marble Fondant Effect – Mix different shades of fondant for a marble-like appearance.
Tip: A simple dusting of powdered sugar or cocoa powder over a stencil can create an elegant design with minimal effort.
5. Seasonal and Holiday-Themed Heart Cakes
Heart cakes can be adapted for different holidays, making them a festive treat for various occasions.
Seasonal Decoration Ideas:
- Valentine’s Day: Classic red and pink colors, heart-shaped sprinkles, and romantic messages.
- Christmas: White or red fondant with snowflake patterns and peppermint accents.
- Easter: Pastel colors, bunny toppers, and mini chocolate eggs for a cute holiday cake.
- Halloween: Black and orange buttercream, spiderweb designs, and candy eyeballs for a spooky twist.
- New Year’s Eve: Gold and silver edible glitter, champagne bottle toppers, and sparkler candles for a celebratory cake.
Tip: Themed cake toppers, colored icing, and holiday-specific sprinkles make it easy to customize a heart cake for any season.
Final Thoughts
Heart cake decorations can range from romantic and elegant to playful and festive, depending on the occasion. Whether you prefer classic buttercream designs, intricate fondant work, or simple minimalist touches, there’s no limit to the creativity you can bring to your heart-shaped cake.
Now that you have plenty of decoration ideas, you’re ready to make a stunning heart cake that’s as beautiful as it is delicious! 🎂❤️
Advanced Heart Cake Decorating Techniques
Once you’ve mastered basic heart cake decoration techniques, you may want to take your skills to the next level. Advanced decorating techniques allow you to create show-stopping cakes that look as impressive as those from professional bakeries. Below are some expert-level methods to elevate your heart cake to a masterpiece.
1. Mastering the Perfect Buttercream Finish
A smooth, flawless buttercream finish is the foundation of many advanced cake designs. Achieving a polished look requires precision and patience.
How to Get a Professional Buttercream Finish:
- Use a Turntable: A cake turntable helps you apply and smooth frosting evenly.
- Apply a Crumb Coat: Spread a thin layer of buttercream over the cake to lock in crumbs, then chill before adding the final coat.
- Use a Bench Scraper: Hold a scraper against the cake while turning the turntable to achieve sharp edges and smooth surfaces.
- Chill Between Layers: Refrigerate the cake for 10-15 minutes after applying each coat to prevent smudging.
- Use an Offset Spatula for Textures: Create artistic textures by dragging an offset spatula across the buttercream.
Tip: If you want ultra-sharp edges, try using the “acrylic disk method” for a bakery-level finish.
2. Sculpting and Carving for a 3D Heart Cake
For a more dynamic look, you can carve a three-dimensional (3D) heart cake rather than relying on a standard heart-shaped pan.
Steps to Carve a Perfect 3D Heart Cake:
- Start with a Round Cake – Bake two round cakes and stack them with buttercream in between.
- Create the Heart Shape – Use a serrated knife to carve out a “V” at the top and taper the bottom for a natural heart shape.
- Smooth the Carved Edges – Apply a thin layer of frosting to seal in crumbs before decorating.
- Refine with Buttercream or Fondant – Use a combination of buttercream and fondant for a seamless finish.
Tip: If you’re unsure about carving, sketch the heart shape onto parchment paper and use it as a guide while cutting.
3. Creating Stunning Fondant Decorations
Fondant allows for intricate, elegant designs that buttercream alone cannot achieve. Here’s how to work with fondant like a pro:
Advanced Fondant Techniques:
- Ruffle Effect: Roll out thin strips of fondant, pleat them, and attach them in layers for a romantic look.
- Quilted Pattern: Use a ruler and fondant embossing tool to create a quilted effect with edible pearls at the intersections.
- Hand-Painted Details: Use food coloring mixed with alcohol or lemon extract to paint delicate floral or watercolor effects.
- 3D Fondant Shapes: Create decorative bows, roses, or lace patterns to enhance the cake’s design.
Tip: Lightly dust your work surface with cornstarch to prevent fondant from sticking and stretching too much.
4. Airbrushing for a Professional Gradient Effect
It is a novelty in cake decorating, allowing for smooth color gradients and professional shading.
Airbrushing Techniques for Heart Cakes:
- Ombre Effect: Gradually blend from one color to another for a soft and elegant look.
- Metallic Sheen: Use gold, silver, or pearl airbrush colors for a luxurious finish.
- Stenciled Patterns: Place stencils on the cake before airbrushing to create intricate lace or floral designs.
- Shadowing for Depth: Add darker shades around the edges of the heart shape to enhance dimension.
Tip: Always practice on parchment paper before airbrushing your actual cake to test color intensity.
5. Intricate Piping and Royal Icing Details
For elegant and detailed decorations, royal icing and advanced piping techniques can add stunning designs to your heart cake.
Piping Techniques to Try:
- Lace Patterns: Use a fine piping tip (#1 or #2) to pipe delicate lace-like details.
- Filigree and Scrollwork: Create elegant, swirling patterns for a classic design.
- Basketweave Effect: Pipe vertical and horizontal lines in an overlapping pattern for a woven look.
- String Work and Bridges: Pipe delicate strings that “float” above the cake using a bridge technique.
Tip: Royal icing dries quickly, so cover your piping bag with a damp cloth when not in use.
6. Gravity-Defying and Sculptural Elements
For a truly unique heart cake, incorporate sculptural elements that add height and movement.
Ideas for Sculptural Cake Decorations:
- Floating Hearts: Use clear wires to attach heart-shaped decorations that appear to be “floating” above the cake.
- Spun Sugar Accents: Create delicate sugar threads for an elegant, artistic touch.
- Chocolate Curls and Shards: Tempered chocolate can be shaped into artistic ribbons or geometric shards.
- Tiered Heart Cakes: Stack multiple heart cakes of different sizes for a dramatic effect.
Tip: When working with gravity-defying elements, always use food-safe supports like dowels or wire.
Final Thoughts
Advanced heart cake decorating techniques allow you to turn a simple cake into a breathtaking centerpiece. Whether you master fondant sculpting, intricate piping, airbrushing, or gravity-defying elements, these techniques will help you create a show-stopping cake that wows any crowd.
With the right tools, patience, and creativity, your heart cake can rival those made by professional cake artists. Time to take your cake decorating skills to the next level! 🎂❤️
Troubleshooting Common Heart Cake Problems
Preventing Heart Cake from Sticking or Crumbling
One of the most common challenges when baking a heart-shaped cake is preventing it from sticking to the pan or crumbling when removed. A perfectly baked heart cake should hold its shape, have a smooth surface, and be easy to work with when decorating. Below are some essential tips and techniques to ensure your heart cake comes out of the pan flawlessly and remains intact.
1. Properly Greasing and Lining Your Cake Pan
A well-prepared cake pan is the first step in preventing sticking and crumbling.
Best Methods for Preparing Your Heart Cake Pan:
- Use Butter and Flour: Generously coat the inside of the pan with butter, then dust it lightly with flour. Tap out any excess flour to avoid clumping.
- Non-Stick Baking Spray: A quick and even coat of baking spray with flour works well for convenience.
- Parchment Paper Lining: Cut parchment paper to fit the bottom of the heart-shaped pan. This creates a barrier that prevents sticking and makes cake removal easier.
- Use Cake Release Paste: Mix equal parts flour, oil, and shortening, then brush the mixture onto the pan for a professional, non-stick coating.
Tip: If using a heart-shaped pan with sharp curves, ensure all edges and crevices are thoroughly coated to prevent cake from catching in corners.
2. Allowing the Cake to Cool Before Removing
Removing a cake from the pan too soon can cause it to break apart. Proper cooling ensures the cake sets and maintains its shape.
Cooling Steps to Prevent Crumbling:
- Let the Cake Rest in the Pan: After baking, let the cake sit in the pan for about 10-15 minutes to firm up.
- Loosen the Edges: Use a butter knife or an offset spatula to gently release the sides from the pan.
- Invert the Cake Carefully: Place a wire rack or plate over the cake pan, then flip it upside down in one smooth motion.
- Remove the Pan Slowly: If the cake sticks, tap the bottom gently or lift one side to help it release.
- Cool Completely on a Wire Rack: Allow the cake to cool at room temperature before decorating to prevent icing from melting.
Tip: For extra delicate cakes, place a second cooling rack on top before flipping to avoid breakage.
3. Using the Right Cake Batter Consistency
The structure of your cake depends on the consistency of the batter. Too dry, and it crumbles; too wet, and it sticks.
How to Achieve the Right Batter Texture:
- Use the Right Flour: Cake flour creates a softer texture, while all-purpose flour provides more structure.
- Avoid Overmixing: Overmixing develops too much gluten, leading to a dense cake that crumbles easily. Mix until just combined.
- Check for Proper Hydration: If the batter looks too thick, add a little extra milk or eggs for moisture.
- Use a Tested Recipe: Follow a well-balanced heart cake recipe to ensure the right ratio of wet to dry ingredients.
Tip: If your cake is still crumbly despite using a good recipe, try adding an extra egg for more binding power.
4. Preventing Overbaking for a Moist, Sturdy Cake
Overbaked cakes dry out, making them more prone to crumbling when cut or removed from the pan.
How to Avoid Overbaking Your Heart Cake:
- Follow the Suggested Baking Time: Keep an eye on the clock and start checking doneness 5 minutes before the recommended baking time.
- Use the Toothpick Test: Insert a toothpick into the center of the cake. If it comes out clean or with a few moist crumbs, the cake is done.
- Watch for Golden Edges: The cake should pull slightly away from the edges of the pan when fully baked.
- Use an Oven Thermometer: If your oven runs too hot, it can overbake the cake. Keep it at the correct temperature.
Tip: If the cake does come out dry, brush it with simple syrup (a mix of sugar and water) to restore moisture before decorating.
5. Handling and Storing the Cake to Prevent Crumbling
Once your heart cake is baked and cooled, proper handling and storage help maintain its structure.
How to Store and Handle Your Cake Safely:
- Wrap in Plastic Wrap: Once cooled, tightly wrap the cake in plastic wrap to keep it moist and prevent drying.
- Refrigerate for Stability: If the cake is soft or crumbly, chilling it for 30 minutes before decorating will make it easier to handle.
- Use a Sharp Knife for Slicing: A serrated knife helps make clean cuts without crumbling.
- Freeze for Longer Storage: Wrap the cake in plastic wrap and aluminum foil before freezing. Thaw at room temperature before serving.
Tip: If your cake does crumble slightly, use buttercream frosting to “glue” it back together before decorating.
Final Thoughts
A perfectly baked heart cake should be soft, moist, and easy to remove from the pan without breaking apart. By properly greasing your pan, cooling your cake correctly, using the right batter consistency, and preventing overbaking, you can ensure your heart cake holds its shape beautifully. With these tips, you’ll be able to create a stunning, sturdy heart cake that’s ready for decorating and celebrating any special occasion. ❤️🎂
Achieving Smooth Frosting on Your Heart Cake
A smooth, flawless frosting finish is one of the key elements that elevate a heart cake from homemade to professional-looking. Achieving the perfect smooth frosting can be tricky, but with the right techniques and tools, you’ll be able to create a sleek, polished surface. Whether you’re using buttercream, ganache, or whipped cream, the following tips will help you get that smooth, glossy look you’re after.
1. Choose the Right Frosting Consistency
The consistency of your frosting plays a crucial role in how easily it spreads and smooths out on the cake. Too thick, and it’ll be difficult to spread evenly; too thin, and it won’t hold its shape.
Tips for Achieving the Right Frosting Consistency:
- Buttercream: For a smooth finish, your buttercream should be soft enough to spread easily but firm enough to hold its shape. If it’s too stiff, add a teaspoon of milk at a time until you reach the desired consistency. If it’s too soft, add more powdered sugar.
- Ganache: Ganache should have a thick, pourable consistency. Let it cool slightly until it reaches a spreadable texture before using it to frost the cake.
- Whipped Cream: For a smooth whipped cream finish, whip the cream just enough to create stiff peaks, but avoid overwhipping to prevent it from turning into butter.
Tip: Always make sure your frosting is well-mixed and free of air bubbles for the smoothest finish.
2. Apply a Crumb Coat
A crumb coat is a thin layer of frosting that helps seal in any crumbs from the cake, preventing them from interfering with your final layer of frosting. This step is essential for achieving a smooth finish.
How to Apply a Perfect Crumb Coat:
- Chill the Cake First: Before applying the crumb coat, ensure your cake is completely cool. If necessary, refrigerate it for 15-20 minutes.
- Spread a Thin Layer of Frosting: Use an offset spatula to apply a very thin layer of frosting over the entire cake. Don’t worry about imperfections at this stage, as the crumb coat’s purpose is just to lock in crumbs.
- Chill Again: Place the cake in the fridge for at least 30 minutes to allow the crumb coat to set. This will create a sturdy base for your final layer of frosting.
Tip: A well-chilled crumb coat makes it much easier to achieve a smooth finish with the final layer.
3. Use the Right Tools for Smooth Application
The right tools can make all the difference when trying to achieve a smooth frosting finish.
Tools for Achieving a Smooth Finish:
- Offset Spatula: An offset spatula helps apply an even layer of frosting with control. A long one (6 to 8 inches) is perfect for smoothing the surface of larger cakes.
- Bench Scraper: A bench scraper is an essential tool for smoothing out the frosting once it’s applied. You can use it to achieve sharp edges and create a perfectly smooth surface.
- Cake Turntable: A turntable allows you to rotate the cake as you frost it, which makes smoothing much easier and more uniform.
Tip: When using an offset spatula or bench scraper, keep the tool angled at about 45 degrees to avoid scraping off too much frosting.
4. Smooth the Frosting with Hot Water Method
Using hot water to smooth the frosting is a simple but effective technique that creates a flawless, glossy finish. This method works especially well with buttercream and ganache.
Steps for Using the Hot Water Method:
- Heat Water: Fill a cup with hot water (but not boiling) and place a metal offset spatula in it.
- Dry the Spatula: After a few seconds, remove the spatula from the water and dry it with a towel. The heat will slightly melt the frosting, making it easier to smooth.
- Smooth the Cake: Use the warm spatula to gently smooth the surface of the frosting. Continue wiping off any excess moisture from the spatula as needed and repeat the process. The heat helps to create a shiny, smooth finish.
Tip: For ganache, you can also pour a slightly cooled but still runny ganache over the cake and use a spatula to smooth it down.
5. Make Sure the Cake Is Chilled When Smoothing Frosting
Chilling the cake between each step is a vital part of getting a perfectly smooth finish. This ensures the frosting sets quickly and stays in place as you work with it.
How Chilling Helps with Smoothing:
- Frosting Sets Faster: The colder the cake, the less likely it is that the frosting will slide or smudge. Chilling the cake helps the frosting firm up and stay where you want it.
- Prevents Melting: Warm frosting can melt too quickly, making it difficult to achieve smooth edges. Refrigerating the cake helps the frosting stay in place and maintain its texture.
- Sharpens Edges: After applying the final layer of frosting, place the cake back in the fridge for 15 minutes. This will help you achieve crisp, clean edges when smoothing with a bench scraper.
Tip: Always allow the cake to come to room temperature before serving, so the frosting doesn’t feel too hard or cold when cut.
6. Use a Spatula to Create Texture or Designs
While a smooth finish is often preferred for a polished look, you can also use your smoothing techniques to create subtle textures or designs that complement the heart shape. Adding gentle lines or swirls with your spatula can make the cake even more visually appealing.
Techniques for Adding Texture to Your Frosting:
- Swirling: Gently swirl the surface of the frosting with an offset spatula for a soft, textured effect.
- Rough Finish: For a rustic look, use a bench scraper to create a “rough” finish by dragging the scraper across the frosting in different directions.
- Textured Edges: Use the edge of a spatula to create subtle ridges or patterns along the sides of the cake.
Tip: Textured finishes can be particularly beautiful when you’re adding decorative elements like fresh flowers or fondant shapes to the cake.
Final Thoughts
Achieving smooth frosting on your heart cake requires the right tools, techniques, and a little patience. Whether you use the hot water method, a chilled cake, or a combination of both, you can create a beautiful, smooth surface that’s ready for decoration. The key to a perfect frosting finish is practice, so don’t hesitate to experiment with different methods until you find the one that works best for you. Once you master the smooth frosting technique, your heart cake will be ready to shine at any celebration!
Storing Your Heart Cake for Freshness
Proper storage is essential for maintaining the flavor, texture, and overall appearance of your heart cake, whether you’re preparing it in advance or trying to preserve its freshness after serving. When stored correctly, your heart cake will remain moist, delicious, and visually appealing for several days. Here are key tips for storing your heart cake so it stays fresh and tasty.
1. Storing Your Heart Cake Before Decoration
If you’ve baked your heart cake ahead of time and plan to decorate it later, it’s crucial to store it properly to prevent it from drying out or absorbing unwanted odors.
Best Ways to Store Unfrosted Cakes:
- Wrap in Plastic Wrap: Once your heart cake has completely cooled, wrap it tightly in plastic wrap to prevent it from losing moisture. This also helps protect it from air exposure, which can dry out the cake.
- Store in an Airtight Container: After wrapping the cake, place it in an airtight container for added protection. This is especially important if you’re storing the cake in the fridge.
- Room Temperature vs. Refrigeration: If you’re decorating the cake within 1-2 days, it can be stored at room temperature. If you plan to store it for a longer period, refrigerating it will help keep it fresh. However, note that refrigeration can sometimes cause the cake to dry out.
Tip: For cakes that are particularly delicate or moist, storing them in the fridge can help preserve freshness. Just be sure to let the cake come to room temperature before decorating.
2. Storing Your Heart Cake After Decoration
After decorating your heart cake, whether it’s with buttercream, fondant, or any other frosting, storing it correctly is key to keeping it fresh and intact.
Storing Decorated Cakes:
- Leave the Cake Uncovered for 1-2 Hours (If Possible): If your cake is decorated with buttercream, fondant, or ganache, leave it uncovered for about an hour after decorating. This allows the frosting to firm up, reducing the risk of it smearing during storage.
- Use a Cake Dome or Cake Box: A cake dome is an excellent tool for storing decorated cakes, as it prevents the cake from drying out while keeping it protected. If you don’t have a dome, a cake box will also work. The goal is to protect the decorations from any potential damage while keeping the cake fresh.
- Room Temperature for Short-Term Storage: For cakes that have been decorated with buttercream or fondant, you can keep them at room temperature for up to 2-3 days, depending on the environment. However, ensure your kitchen is cool and dry to prevent the frosting from melting or the cake from becoming too soft.
- Refrigeration for Long-Term Storage: If you need to store your cake for more than a couple of days, place it in the fridge. However, the fridge can sometimes cause fondant to sweat or harden, so be sure the cake is well-protected in a cake box or under a dome.
Tip: If your cake is covered with buttercream, it’s generally okay to store it at room temperature, as buttercream is stable for a few days. However, cakes with perishable fillings (like cream cheese or whipped cream) should always be refrigerated.
3. Freezing Your Heart Cake for Extended Freshness
If you need to store your heart cake for longer than a few days, freezing it is a great option. Freezing preserves both the cake and its decorations, ensuring you can enjoy it for weeks or even months later.
How to Freeze Your Heart Cake:
- Cool the Cake Completely: Before freezing, make sure your cake has cooled completely to avoid condensation, which can make the cake soggy.
- Wrap in Plastic Wrap and Aluminum Foil: Wrap the cake tightly in plastic wrap to lock in moisture. Then, cover it with a layer of aluminum foil to protect the cake from freezer burn.
- Use a Freezer-Safe Cake Box: If the cake is decorated, place it in a cake box or any freezer-safe container to prevent any pressure on the cake or decorations.
- Label with Date: Label your frozen cake with the date so you can keep track of how long it’s been in the freezer.
- Thawing the Cake: When you’re ready to use the cake, remove it from the freezer and allow it to thaw at room temperature for several hours. If the cake is decorated with fondant, you may want to let it thaw in the fridge first, as this prevents condensation from forming on the fondant surface. Once the cake has fully thawed, it’s ready to be enjoyed.
Tip: For best results, freeze a cake without frosting and then decorate it once it’s thawed, as freezing with fondant can cause it to become soft or damaged.
4. Storing Leftover Cake Slices
If you have leftover slices of heart cake after serving, it’s important to store them properly so they retain their flavor and freshness.
How to Store Leftover Cake Slices:
- Wrap Individual Slices: For convenience, wrap individual slices of the cake in plastic wrap. This keeps the cake fresh without exposing it to air.
- Store in an Airtight Container: Place the wrapped slices in an airtight container to prevent them from drying out or absorbing odors from the fridge.
- Refrigerate or Freeze for Longer Storage: If you’re planning to eat the leftover cake within a few days, store it in the refrigerator. For longer storage, you can freeze the slices by wrapping them in plastic wrap and aluminum foil, then placing them in a freezer-safe bag.
- Reheat Slices if Desired: To refresh the flavor and texture of leftover cake, gently reheat slices in the microwave for about 10-15 seconds, or let them come to room temperature before serving.
Tip: To prevent leftover cake from becoming too dry when reheated, you can drizzle it with a simple syrup before microwaving or serving.
5. Tips to Maintain Cake Freshness
To ensure your heart cake stays as fresh as possible during storage, here are a few additional tips:
- Keep the Cake Away from Strong Odors: Cakes are highly absorbent, so store your cake away from foods with strong odors (like onions or garlic) to prevent it from picking up unwanted smells.
- Avoid Storing Cake in High Humidity: Excessive moisture can cause your cake to become soggy or cause frosting to melt. Store your cake in a dry area, particularly if you live in a humid climate.
- Use a Cake Slicer for Fresh Cuts: For the freshest slices, use a serrated knife to cut the cake. Clean the knife between slices to maintain neat, crisp edges and prevent crumbs from mixing into the frosting.
Tip: If you’re storing a particularly delicate heart cake, make sure it’s in an area where it won’t get bumped or jostled, as this could cause it to lose its shape.
Final Thoughts
Storing your heart cake properly ensures that it remains just as delicious and visually stunning as when it was first made. Whether you’re refrigerating, freezing, or storing it at room temperature, following these tips will keep your cake fresh, moist, and ready to be enjoyed for days to come. Whether you’re preparing your cake ahead of time or saving leftovers for later, the right storage methods will help preserve the heart-shaped beauty and taste.
For more celebration cake ideas you can try, don’t miss our guide to the best graduation cake designs you’ll love: from classic to modern – perfect for any special occasion!
Conclusion: Make Your Next Occasion Extra Special with a Heart Cake
In this step-by-step guide, we’ve covered everything you need to know to make the perfect heart cake — from choosing the right ingredients to decorating it with love. Whether you’re celebrating a romantic occasion, a milestone, or simply want to brighten someone’s day, a heart-shaped cake is the perfect centerpiece for any event. By following these simple yet effective techniques, you can create a beautiful, delicious cake that’s bound to leave a lasting impression.
Remember to personalize your heart cake with your favorite flavors and creative decorations to make it uniquely yours. Whether you’re keeping it simple with buttercream or taking it to the next level with fondant, your heart cake will shine with love and creativity.
So, why not give this recipe a try for your next special celebration? We’d love to see how your heart cakes turn out! Share your creations with us and let us know what unique touches you added. Your heart cake could be the next big inspiration for someone else’s baking journey!
Try this heart cake recipe today and create sweet memories for your loved ones!