
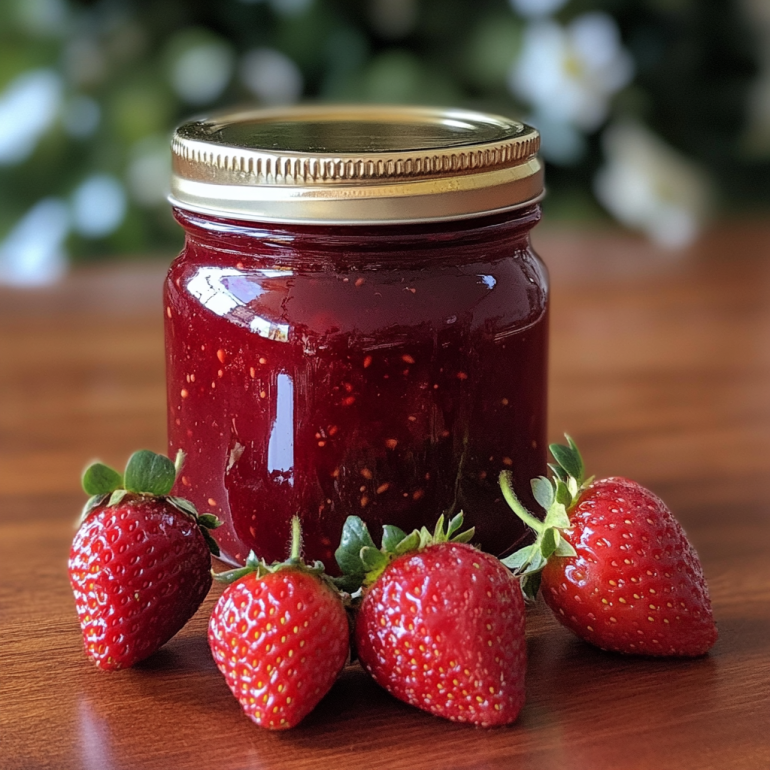
There’s nothing quite like the taste of homemade strawberry jam—sweet, fruity, and bursting with fresh flavors. Unlike store-bought versions loaded with preservatives, making your own jam allows you to control the ingredients, sweetness, and texture. Whether you’re a beginner or an experienced home cook, this step-by-step guide will show you how to make the best strawberry jam using simple ingredients like fresh strawberries, sugar, and lemon juice.
In this guide, you’ll learn:
How to select the best strawberries for jam
The essential tools and ingredients you need
A foolproof method to achieve the perfect consistency
Tips to avoid common mistakes and store your jam properly
Let’s get started on making a delicious, homemade strawberry jam that you can enjoy on toast, desserts, and more! 🍓✨
Why Homemade Strawberry Jam is the Best Choice
The Benefits of Homemade Strawberry Jam Over Store-Bought
While store-bought strawberry jam may seem like a convenient option, nothing compares to the fresh taste, natural ingredients, and health benefits of making it at home. Here’s why homemade strawberry jam is the superior choice:
1. No Artificial Preservatives or Additives
Most commercial strawberry jams contain preservatives, artificial flavors, and high-fructose corn syrup to extend shelf life and enhance sweetness. These additives can affect the natural taste of the strawberries and may not be the healthiest option. When making jam at home, you have complete control over the ingredients—using only fresh strawberries, sugar, and lemon juice for a pure and natural flavor.
2. Better Flavor and Freshness
Homemade strawberry jam is made with ripe, fresh strawberries, ensuring a vibrant and authentic taste that store-bought versions often lack. Commercial jams are mass-produced, sometimes using lower-quality fruit or fruit concentrates, which can affect both texture and flavor. By making your own, you get a rich, fruity spread that truly tastes like fresh strawberries.
3. Control Over Sugar and Sweetness
Many store-bought jams are loaded with excess sugar or artificial sweeteners to make them more appealing and longer-lasting. This can make the jam overly sweet and unhealthy. With homemade strawberry jam, you can adjust the amount of sugar or even experiment with natural sweeteners like honey, maple syrup, or agave nectar to suit your preference and dietary needs.
4. Customizable Texture and Thickness
Do you like your jam chunky, smooth, thick, or runny? With homemade jam, you decide! Store-bought jams are often made with pectin, a thickening agent that can make the texture more uniform and jelly-like. If you prefer a softer, spreadable jam or a jam with real fruit chunks, homemade is the way to go. You can also experiment with the cooking time to achieve the perfect consistency.
5. More Economical and Sustainable
Making your own strawberry jam can be more budget-friendly than buying premium brands, especially if you take advantage of seasonal strawberries when they’re at their freshest and most affordable. Additionally, you can reuse glass jars and avoid excessive plastic packaging, making homemade jam a more eco-friendly choice.
6. Fun and Rewarding Experience
There’s something deeply satisfying about making your own jam from scratch. It’s a fun kitchen project that allows you to enjoy the process of preserving fresh fruit, experimenting with flavors, and sharing your homemade creations with family and friends. Plus, homemade strawberry jam makes a fantastic gift for special occasions! 🎁
Final Thoughts
While store-bought strawberry jam may offer convenience, homemade jam provides better taste, natural ingredients, and complete customization—all while being healthier and more rewarding to make. Once you try homemade strawberry jam, you’ll never want to go back to the store-bought version! 🍓✨
Fresh Ingredients vs. Processed Fruit Concentrates
One of the biggest advantages of homemade strawberry jam is the use of fresh, ripe strawberries. When making jam at home, you can select the best-quality fruit, ensuring a rich, natural flavor. Store-bought jams, however, often rely on fruit concentrates or lower-quality strawberries that have been processed and stored for long periods. These commercial processes can strip the fruit of some of its natural taste and freshness, resulting in a less vibrant jam.
Natural Sweeteners vs. Refined Sugars
Homemade strawberry jam allows for complete control over the type and amount of sweetener used. You can choose traditional sugar, honey, or even sugar alternatives to adjust the sweetness to your preference. Many store-bought jams, on the other hand, contain high levels of refined sugar or high-fructose corn syrup (HFCS). HFCS is used as a cost-effective way to sweeten products and extend shelf life, but excessive consumption has been linked to various health concerns.
Natural Pectin vs. Artificial Thickeners
Pectin is a natural thickening agent found in many fruits, and it is often used in homemade jam to achieve the perfect consistency. Some commercial jams, however, rely on artificial thickeners like modified cornstarch, xanthan gum, or other stabilizers. While these ingredients help create a uniform texture, they can make the jam overly gelatinous or change its natural mouthfeel.
Homemade Preservatives vs. Chemical Additives
Homemade strawberry jam uses simple, natural preservatives like lemon juice, which helps maintain freshness and balance acidity. In contrast, store-bought jams require chemical preservatives such as potassium sorbate, sodium benzoate, or sulfur dioxide to extend their shelf life. While these preservatives prevent spoilage, they also introduce unnecessary additives that may not be ideal for those looking to eat cleaner, minimally processed foods.
No Artificial Colors or Flavors
The bright red color and rich aroma of homemade strawberry jam come naturally from fresh fruit. However, many commercial jams use artificial food dyes, such as Red 40 or carmine, to enhance their appearance. Additionally, artificial strawberry flavoring is often added to mimic the taste of fresh fruit. By making jam at home, you ensure that all the flavor and color come from real strawberries without the need for synthetic additives.
How Making Your Own Jam Lets You Control Sweetness and Texture
Adjusting the Sweetness to Your Preference
One of the biggest benefits of making your own strawberry jam is the ability to control how sweet it is. Store-bought jams often use fixed amounts of sugar or high-fructose corn syrup, which can make them overly sweet for some. When making jam at home, you can choose how much sugar to add, or opt for natural sweeteners like honey, agave, or maple syrup. These alternatives can bring unique flavors to your jam and offer a healthier option for those looking to reduce refined sugar. You also have the flexibility to make sugar-free or low-sugar versions of your jam, tailoring it to your health goals or taste preferences.
Achieving the Perfect Texture
The texture of your homemade strawberry jam is another area where you have full control. Pectin, the natural gelling agent found in fruit, plays a key role in the consistency of your jam. If you prefer a thicker, more spreadable jam, you can add extra pectin or cook the mixture for a longer time. Conversely, if you enjoy a runnier, syrup-like texture, you can reduce the cooking time or use less pectin. This gives you the freedom to create a jam that suits your exact texture preferences, whether it’s thick and hearty or light and pourable.
Avoiding Artificial Thickeners and Additives
Many commercial jams rely on artificial thickeners and stabilizers to achieve a consistent texture. Ingredients like modified cornstarch, xanthan gum, or guar gum are commonly used, which can sometimes result in a gelatinous or overly firm texture. Homemade jam, however, allows you to avoid these additives and rely on natural pectin to achieve the perfect consistency. This not only ensures a more natural texture but also gives you the peace of mind that your jam is free from unnecessary chemicals and preservatives.
Essential Ingredients and Tools for Strawberry Jam

Key Ingredients: Fresh Strawberries, Sugar, Lemon Juice, Pectin (Optional)
Fresh Strawberries
The key ingredient in any great strawberry jam is, of course, fresh strawberries. Ripe, juicy strawberries provide the best natural flavor, color, and sweetness for your jam. When selecting strawberries, look for berries that are firm, bright red, and free of blemishes or over-ripeness. Fresh strawberries not only contribute to a vibrant color and intense flavor but also help achieve the right texture. Overripe strawberries can result in a mushier jam with a less appealing taste, so choose carefully to ensure the best end result.
Sugar
Sugar serves multiple purposes in your strawberry jam. First, it sweetens the jam to the desired level, balancing out the acidity from the lemon juice and enhancing the natural sweetness of the strawberries. Second, sugar helps the jam set by interacting with the pectin and acid in the fruit. While white granulated sugar is most common, you can opt for alternative sweeteners like honey or maple syrup for a different flavor or healthier option. Adjusting the amount of sugar allows you to tailor the sweetness to your preference, and you can experiment with lower-sugar or sugar-free recipes if desired.
Lemon Juice
Lemon juice is essential in homemade strawberry jam as it brings a burst of acidity that helps balance the sweetness of the sugar. It also plays a critical role in helping the jam set by interacting with the natural pectin in the strawberries. The acidity from the lemon helps the jam reach the correct gel-like consistency. Without it, your jam might not thicken properly, and the flavor could become overly sweet. A few tablespoons of lemon juice is typically enough to achieve the perfect balance.
Pectin (Optional)
Pectin is a natural carbohydrate found in fruit that is essential for thickening jams. While strawberries do contain some natural pectin, adding extra pectin can help achieve a thicker and more set jam, especially if your fruit is low in natural pectin. It’s an optional ingredient, as some people prefer to make jam without it, relying solely on the natural pectin in the strawberries and lemon juice. However, if you want a firmer, more spreadable texture or if you’re working with fruit that’s lower in pectin, adding commercial pectin can ensure your jam sets perfectly.
Tools You’ll Need: Jam Jars, Sterilization Tools, Pot, Ladle, Thermometer
Jam Jars
The most important tool you’ll need when making strawberry jam is the right kind of jam jar. These jars are designed to store your finished product and keep it fresh for longer periods. When selecting jam jars, opt for glass jars with tight-fitting lids that can create a seal when processed. These seals help preserve the jam, preventing air from entering and keeping the jam from spoiling. Make sure the jars are of an appropriate size for the amount of jam you plan to make, with small jars being ideal for gifts and larger jars suitable for long-term storage. Ensure that your jars are clean and free of cracks, as even small imperfections can cause leakage or spoilage.
Sterilization Tools
Sterilization is key when making homemade jam, as it helps eliminate harmful bacteria and ensures the longevity of your jam. To sterilize your jam jars, you’ll need a large pot or a dishwasher capable of handling glass jars. A simple method is to place the jars in a large pot of boiling water for around 10 minutes, ensuring they are fully submerged. Tongs or jar lifters are helpful for safely removing the jars from the hot water. You’ll also need to sterilize your lids in boiling water. Keep in mind that proper sterilization is critical for food safety, especially when storing jam for extended periods.
Pot
A heavy-duty, wide pot is necessary to cook your strawberry jam. The pot should be large enough to accommodate the ingredients and allow for stirring without spilling. A wide base helps the jam cook evenly and reduces the risk of burning or sticking. Copper or stainless steel pots are ideal for making jam, as they provide even heat distribution. Make sure the pot has high sides to prevent the jam from splattering during the cooking process, as hot syrup can create a mess and potentially cause burns.
Ladle
A ladle is a simple yet essential tool for transferring the jam from the pot to your sterilized jars. It allows you to carefully pour the jam into the jars without spilling or making a mess. Opt for a ladle with a long handle to keep your hands safely away from the hot jam, and choose one with a large capacity so you can fill the jars more efficiently. A ladle with a wide, deep bowl will help ensure you get the right amount of jam into each jar in one go.
Thermometer
A candy or jam thermometer is a must-have tool for making perfect strawberry jam. It helps you monitor the temperature of the jam during the cooking process and ensures it reaches the right consistency. Jam typically needs to reach a temperature of around 220°F (104°C) to achieve the proper gel-like texture. Using a thermometer ensures that you don’t overcook or undercook the jam, both of which can affect its flavor and texture. With a thermometer, you can achieve the perfect thickness and consistency every time. Make sure the thermometer is calibrated and easy to read, allowing for accurate temperature measurements during the cooking process.
Choosing the Best Strawberries for the Perfect Jam
Look for Ripeness and Freshness
When selecting strawberries for your homemade jam, the key is to choose ripe and fresh fruit. Ripe strawberries are naturally sweeter and more flavorful, which will translate into a tastier jam. Overripe or under-ripe strawberries may not provide the same depth of flavor. Opt for berries that are deep red in color, as this is a sign of ripeness. Firm, plump strawberries with a vibrant color are ideal, as they will yield a jam with the best texture. Avoid strawberries that are soft, mushy, or have any white or green spots, as these may indicate under-ripeness or age. The fresher the strawberries, the better your jam will taste, so always buy from a reputable source or, if possible, harvest them yourself.
Local, In-Season Strawberries
Local, in-season strawberries are often the best choice when making jam. During peak strawberry season, typically late spring to early summer, the berries are at their freshest and most flavorful. These strawberries are likely to be more fragrant and less expensive than those that are imported or grown out of season. Local berries also tend to be picked at the height of ripeness, which is important for jam-making, as they pack the most flavor and natural sweetness. If you have the option, try visiting a local farm or farmer’s market to find strawberries that are freshly picked and grown in your region. Not only will this support local farmers, but it will also ensure your jam has the best possible flavor.
Choose Heirloom or Specialty Varieties for Unique Flavors
While the classic June-bearing strawberries are always a solid choice, experimenting with different strawberry varieties can give your jam a unique twist. Heirloom varieties, like the Albion or the Chandler, have complex flavors and textures that can add depth to your jam. These strawberries may not always be as large as commercial varieties, but their concentrated flavor makes them an excellent option for homemade jam. Additionally, some specialty strawberries, such as the everbearing varieties, produce fruit throughout the growing season and can offer a mix of flavors for a jam that’s both tart and sweet.
Avoid Strawberries with Pesticides or Chemicals
Whenever possible, choose organic strawberries to avoid the use of harmful pesticides and chemicals. Conventional strawberries are often treated with pesticides, which can leave residue on the fruit. Since jam involves cooking the fruit at high temperatures, these chemicals may not break down completely, potentially affecting the flavor and safety of your jam. Organic strawberries, on the other hand, are grown without synthetic pesticides, offering a cleaner and more natural option. If organic strawberries aren’t available, thoroughly washing and rinsing the fruit before making jam can help reduce pesticide residue, though buying organic is always the safer and more sustainable choice.
Note ;
Check out this easy and delicious strawberry jam recipe on AllRecipes! It’s a simple, step-by-step guide to making homemade strawberry jam with fresh ingredients. Perfect for spreading on toast or adding to your favorite dishes. Learn more here.
Step-by-Step Guide: How to Make Strawberry Jam
Step 1: Preparing and Cleaning Fresh Strawberries
Wash Your Strawberries Thoroughly
The first step in preparing fresh strawberries for jam is to clean them properly. Strawberries are often grown close to the ground, which means they can be exposed to dirt, pesticides, and other contaminants. To ensure your strawberries are clean and safe to use, rinse them thoroughly under cool running water. Avoid soaking the berries in water for too long, as this can cause them to absorb moisture and lose some of their natural sweetness. Gently rub each strawberry with your fingers to remove any dirt or debris. You can also use a soft brush to clean the surface without damaging the delicate fruit.
Remove the Green Tops (Hulling)
Once your strawberries are clean, the next task is to remove the green tops and hull the berries. Hulling means removing the white, tough core at the top of the strawberry. This part is not edible and can affect the texture of the jam. Use a small paring knife or a dedicated strawberry huller tool to cut around the green leaves and stem, making sure to remove all of the hard core. While some people may leave the tops on, it’s better to remove them for a smoother jam and to avoid any fibrous parts in your final product.
Inspect and Discard Damaged or Overripe Berries
After hulling the strawberries, inspect them for any signs of damage, mold, or over-ripeness. It’s important to select only the best berries for your jam. Berries with soft spots or discoloration should be discarded, as they can negatively affect the flavor and texture of the jam. Overripe strawberries, while sweet, tend to break down too much during cooking, which can lead to a mushier consistency in the jam. Only use berries that are firm, ripe, and free of imperfections to ensure the best quality jam.
Cut or Mash the Strawberries
Once your strawberries are hulled and cleaned, you’ll need to decide how to prepare them for the jam-making process. You can either cut the strawberries into small chunks or mash them for a smoother jam. Cutting the strawberries into pieces will yield a chunkier texture in the final product, while mashing will result in a smoother consistency. If you prefer to have a mix of both, you can use a potato masher to lightly crush some of the strawberries, leaving others in larger pieces. If you want to save time, you can also use a food processor to pulse the strawberries for a more consistent texture. However, be careful not to puree them too finely, as some chunkiness adds to the texture of the jam.
Dry the Strawberries
Once the strawberries are cleaned, hulled, and cut or mashed, lay them out on a clean towel to remove any excess water. Moisture left on the surface of the fruit can interfere with the gelling process of your jam, so drying them gently is important. Use a soft cloth or paper towels to blot the strawberries, ensuring they’re not too wet before moving on to the next step. A dry surface will also help the sugar and lemon juice adhere better, improving both the flavor and texture of your jam.
By following these steps to properly prepare and clean your fresh strawberries, you’ll ensure that your jam has the best flavor and texture possible, with minimal waste and maximum sweetness.
Step 2: Cooking the Strawberries with Sugar and Lemon Juice
Combining Strawberries and Sugar
Once your strawberries are cleaned, hulled, and prepared, the next step in making strawberry jam is combining them with sugar. The sugar plays a vital role in the jam-making process as it helps to draw out the natural juices from the strawberries, creating the sweet syrupy base that will eventually become your jam. Add the sugar to your prepared strawberries in a large, heavy-bottomed pot. The typical ratio is about 3 cups of sugar for every 4 cups of strawberries, but this can vary depending on your preferred level of sweetness. Stir the mixture well, ensuring that the sugar is evenly distributed among the strawberries. Let the mixture sit for about 10-15 minutes. This resting period allows the sugar to begin dissolving and draw out the juices from the strawberries, creating a syrupy base that will thicken during cooking.
Adding Lemon Juice
After the sugar has had time to combine with the strawberries, it’s time to add lemon juice. Lemon juice is an essential ingredient in homemade strawberry jam for several reasons. First, it adds a subtle tanginess that balances the sweetness of the strawberries and sugar. This acidity enhances the overall flavor of the jam and prevents it from being overly sweet. Second, lemon juice helps activate the pectin in the strawberries, which is responsible for the gelling process. Pectin is a naturally occurring substance in fruits that, when combined with acid and sugar, helps the jam set and reach the desired consistency. Adding around 1/4 cup of fresh lemon juice per batch of strawberries is typically sufficient. Stir the lemon juice into the strawberry-sugar mixture, ensuring it’s evenly incorporated.
Heating the Mixture
With the strawberries, sugar, and lemon juice combined, it’s time to start cooking the mixture. Turn your stove to medium-high heat and bring the contents of the pot to a boil. As the mixture heats up, the sugar will continue to dissolve, and the strawberries will soften, releasing more juice. Stir the mixture regularly to prevent burning and ensure even heating. Keep an eye on the pot to make sure the mixture doesn’t boil over. Once the mixture begins to boil, reduce the heat to medium and allow it to simmer. As it simmers, you’ll notice that the texture will begin to change, becoming more syrupy as the liquid evaporates and the flavors concentrate.
Skimming the Foam
As the jam cooks, you may notice foam forming on the surface of the mixture. This foam is created by impurities and air bubbles that are released during the cooking process. While the foam isn’t harmful, it’s typically removed to ensure a smoother and clearer jam. Use a spoon or ladle to skim off the foam from the top and discard it. This step also helps improve the overall texture of the jam. Removing the foam ensures a cleaner, more polished final product, especially if you prefer your jam to have a smooth consistency without air pockets.
Monitoring the Temperature
As the strawberry mixture continues to simmer, the temperature will rise. To make sure you reach the correct consistency for jam, it’s important to monitor the temperature of the mixture. The ideal temperature for strawberry jam is around 220°F (104°C). At this temperature, the mixture will thicken and start to gel. You can use a candy thermometer to check the temperature, or perform the “plate test” (explained later in the post) to determine if the jam has reached the proper consistency. Keep stirring the mixture to prevent burning, especially as the liquid thickens and becomes more concentrated.
Testing for Doneness
During the cooking process, it’s important to test the jam to ensure it’s reached the correct consistency. One popular method is the “plate test.” Take a spoonful of the hot jam and place it on a chilled plate. After a minute, run your finger through the jam. If it wrinkles and holds its shape, the jam has reached the desired consistency. If it’s still runny, continue simmering and testing every few minutes until you reach the right texture. The jam should be thick enough to spread easily, but not so firm that it becomes jelly-like.
Cooking the strawberries with sugar and lemon juice is a crucial part of the jam-making process. This step not only combines the flavors but also sets the foundation for a beautifully textured, flavorful jam. The cooking time and attention to detail will ensure that your homemade strawberry jam has the perfect balance of sweetness, tang, and consistency.
Step 3: Testing for the Right Jam Consistency (Thickness, Spreadability)
Understanding the Importance of Consistency
One of the most crucial steps in making strawberry jam is ensuring that it has the right consistency. The consistency of your jam determines how well it will set and how easily it can be spread on bread, toast, or other treats. If the jam is too thin, it will run off the bread or leak out of jars, creating a mess. On the other hand, if the jam is too thick, it will be hard to spread and could even become more like jelly than jam. Achieving the perfect balance between thickness and spreadability is key to a successful batch of strawberry jam. There are several methods to test the consistency, with the most common being the “plate test” and the “spoon test.”
The Plate Test
The plate test is one of the most reliable methods for checking the consistency of your jam. Here’s how to do it:
- Before you start cooking your jam, place a couple of small plates in the freezer. These should be used exclusively for testing your jam, as they need to be very cold.
- Once your jam reaches a boil and starts to thicken, take a spoonful of the hot jam and place it onto one of the cold plates.
- Allow it to cool for a minute or two.
- Run your finger through the jam on the plate. If the jam wrinkles and holds its shape, it’s reached the right consistency. If the jam runs back together and doesn’t hold its shape, it’s still too runny and needs more cooking time.
This method is particularly useful because the cold plate mimics the temperature at which the jam will set once it’s cooled, helping you gauge the final texture.
The Spoon Test
The spoon test is another simple way to check your jam’s consistency. Start by dipping a spoon into the jam and lifting it out. Let the jam drip off the spoon.
- If the jam drips in a steady stream, it’s still too runny and needs more time to cook.
- If the jam drips off the spoon in a few thick drops, you’re getting closer to the right consistency.
- If the jam coats the back of the spoon and holds its shape when you tilt the spoon, it’s likely ready to be jarred.
This test helps you judge whether your jam will spread easily or if it will be too thin to set properly.
The Wrinkle Test
In addition to the plate test and spoon test, some jam makers like to use the wrinkle test to check for the perfect jam consistency. For this test, take a small spoonful of jam and place it on a cold plate (as with the plate test). After it has cooled for a few moments, gently push the jam with your finger. If the surface of the jam wrinkles and doesn’t run back together, it’s a good sign that the jam is thick enough to set. If the surface remains smooth or runs back together, the jam needs more cooking time to reach the desired consistency.
Monitoring Cooking Time
One of the easiest ways to ensure that your jam has the right consistency is to cook it for the proper amount of time. After bringing the mixture to a boil, allow it to simmer for about 20-30 minutes while continuously stirring and checking the consistency. Keep in mind that the time can vary depending on the moisture content of the strawberries, the amount of sugar you’ve used, and the temperature you’re cooking at. As the jam cooks, you’ll notice it begins to thicken. Be patient—rushing this step can lead to jam that doesn’t set properly, resulting in a runny or watery texture. It’s always better to check the consistency multiple times and give it more time if needed rather than risk undercooking.
Factors That Affect Jam Consistency
Several factors can impact the final texture of your strawberry jam. For instance, the type of strawberries you use can make a difference. Riper strawberries tend to have more moisture, which can result in a runnier jam. On the other hand, under-ripe strawberries are lower in pectin and might require more cooking or added pectin to help the jam set. The temperature of your cooking environment can also influence the cooking time and the rate at which your jam thickens. Finally, the amount of sugar you use plays a significant role—sugar acts as a natural preservative and helps the jam reach the perfect consistency. If you’ve reduced the sugar for a healthier version, you might need to cook the jam longer or use additional pectin.
When to Stop Cooking
Knowing when to stop cooking is just as important as knowing when to start testing. Once your jam has passed the consistency tests, it’s important to stop cooking before it becomes too thick or hardens too much. Overcooked jam can result in a crystallized or gummy texture, making it unpleasant to eat. As soon as your jam has the right thickness, remove it from the heat to prevent overcooking. Keep in mind that your jam will continue to thicken slightly as it cools, so it’s better to err on the side of slightly runny rather than overcooked.
By carefully testing for the right consistency and paying attention to the texture at each stage, you can ensure your homemade strawberry jam has the perfect spreadability, offering a sweet, smooth, and delightful addition to any meal.
Step 4: Properly Canning and Storing Your Strawberry Jam
Why Canning is Important
Canning is a crucial step in the process of preserving homemade strawberry jam. It helps to extend the shelf life of the jam while maintaining its flavor and texture. Proper canning ensures that your strawberry jam stays fresh for months, allowing you to enjoy it long after the strawberry season has passed. Additionally, the canning process seals out air and bacteria, preventing spoilage and mold growth. If done correctly, canned strawberry jam can last for up to a year in a cool, dark place. Without proper canning, homemade jam is vulnerable to contamination and spoilage, shortening its shelf life significantly.
Preparing the Jars
Before you begin canning your strawberry jam, it’s essential to ensure that your jars and lids are properly sterilized. This prevents the growth of bacteria or mold inside the jar, which could spoil your jam. You can sterilize your jars by washing them in hot, soapy water, then placing them in a boiling water bath for 10 minutes. Make sure the jars are completely dry before filling them with jam. The lids should be heated as well. To do this, place them in a pot of simmering (not boiling) water for 5 minutes before using. Heating the lids ensures a proper seal when the jar is closed.
Filling the Jars
Once your jars are sterilized, it’s time to fill them with your freshly made strawberry jam. Use a ladle or a jar funnel to carefully spoon the hot jam into the jars. It’s important to leave about 1/4-inch of headspace at the top of each jar. This space allows room for the jam to expand slightly as it cools and for the sealing process to work effectively. Be mindful to wipe the rims of the jars with a clean cloth to remove any jam residue, as this can interfere with the sealing process. Once the jars are filled and the rims are clean, place the heated lids on top of each jar, securing them with the metal rings.
Sealing the Jars
The next step is to properly seal your jam jars to ensure the jam is stored safely. To do this, you need to use the water bath canning method. Place the filled jars in a large pot of water, ensuring that the jars are covered by at least 1-2 inches of water. Bring the water to a gentle boil and let it simmer for about 10-15 minutes. The boiling water will create a vacuum seal as the air inside the jars is forced out and the lids are sealed tight. After the jars have been processed, remove them from the water and allow them to cool at room temperature. You’ll hear a “pop” sound as the jars seal, which indicates that the process has been successful.
Storing Your Jam
Once your jars are properly sealed and cooled, it’s time to store your strawberry jam. Label each jar with the date it was made so you can keep track of its shelf life. Store the sealed jars in a cool, dark place, such as a pantry or cupboard. Avoid storing them in direct sunlight or in warm environments, as this can cause the jam to spoil more quickly. When stored properly, homemade strawberry jam can last for up to a year. Once you open a jar, however, it should be refrigerated and consumed within 3-4 weeks.
Tips for Long-Term Storage
For long-term storage, make sure to check the seals on your jars before placing them in storage. If a jar hasn’t sealed properly, you’ll notice that the lid will be slightly raised or will move when you press it down. In this case, you can either refrigerate the jar and use the jam right away or reprocess the jar by heating it again in a water bath. For best results, use canning jars specifically designed for preserving jam, as they are made to withstand the heat and pressure of the canning process. Avoid using old jars or jars that aren’t designed for canning, as they may not provide a proper seal.
What to Do if a Jar Doesn’t Seal
Occasionally, a jar may not seal properly, even if you follow all of the canning steps carefully. If this happens, you can still salvage your strawberry jam. First, check the lid to ensure that it is properly aligned and that the ring is securely tightened. If the lid is not sealed, you can reprocess the jar by placing it back into the boiling water bath for an additional 10 minutes. Alternatively, you can store the jar in the refrigerator and use it within a few weeks. Even if a jar doesn’t seal, you can still enjoy your homemade jam—it just requires a bit more attention to ensure its freshness.
How to Use Your Jam
Once you’ve properly canned and stored your strawberry jam, you’ll have a delicious, homemade treat that you can use in a variety of ways. Spread it on toast, use it as a topping for desserts, add it to yogurt, or even incorporate it into savory dishes. Strawberry jam adds a sweet, fruity touch to both breakfast and dessert recipes. Plus, knowing that you made it yourself makes it even more enjoyable to eat!
By following these canning and storing steps, you can preserve your homemade strawberry jam in a way that ensures its freshness and flavor. With proper care, you’ll have jars of delicious strawberry jam ready to enjoy for months to come.
Common Mistakes to Avoid When Making Strawberry Jam
Why Your Jam Might Turn Out Too Runny or Too Thick
Too Runny Jam: Common Causes
If your strawberry jam turns out runny, the most likely culprit is undercooking. Jam needs time to cook down and allow the natural pectin in the fruit to activate, thickening the jam. If not cooked long enough, excess moisture remains in the jam, leading to a thinner, runnier texture. Another cause could be using underripe strawberries. Underripe fruit contains less pectin, which is essential for proper setting. Also, using an incorrect ratio of fruit to sugar can result in runny jam. If you use too little sugar, it may not help the jam set properly.
How to Fix Runny Jam
If your jam ends up runny, don’t worry! You can re-cook it to thicken it. Simply return the jam to the pot, bring it to a boil, and cook for 10-15 minutes, checking the consistency frequently. To test, spoon some jam onto a cold plate and allow it to cool. If it holds its shape and is not too runny, it’s ready. You can also add more pectin if needed. Dissolve extra pectin in water and stir it into the jam while it’s still warm. Cook for a few more minutes, and check the consistency again.
Too Thick Jam: Common Causes
Overcooking or using too much sugar are the primary reasons for jam that turns out too thick. If the jam cooks too long, the water evaporates, and the mixture becomes overly firm. Similarly, using too much sugar in proportion to the fruit can draw out too much water, leading to a stiff, thick jam. Additionally, adding too much pectin can also result in a jam that is difficult to spread. It’s essential to stick to the recipe’s recommended ratios of fruit, sugar, and pectin.
How to Fix Too Thick Jam
If your jam turns out too thick, you can easily adjust it. Add small amounts of water, fruit juice, or lemon juice to thin it out. Gradually stir in the liquid, checking the texture as you go. The goal is to make the jam spreadable while maintaining its consistency. You can also reheat the jam gently in a pot, stirring frequently and adding liquid if needed. Reheat the jam slowly, making sure not to overdo it. Once you’ve achieved the desired consistency, test it again using the spoon method.
Preventing the Problem in Future Batches
To avoid a runny or thick jam next time, monitor your cooking time and temperature carefully. Use a thermometer to keep track of the temperature, and test your jam consistently throughout the cooking process. Be sure to use ripe strawberries with plenty of natural pectin. Stick to the recipe and follow the guidelines for the right amount of sugar and pectin for the amount of fruit you’re using. By paying attention to these details, you’ll be able to make perfect strawberry jam every time.
The Importance of Sterilizing Jars to Prevent Spoilage
Why Sterilization Is Crucial
Sterilizing jars is one of the most important steps in the jam-making process. It’s essential for preventing spoilage and ensuring that your homemade jam stays fresh for as long as possible. Without proper sterilization, bacteria, yeast, and molds can contaminate the jam, leading to spoilage and even the growth of harmful microorganisms. When you preserve food, you’re essentially creating a sealed environment, and any contamination that gets inside could cause the jam to spoil much faster, potentially ruining all your hard work.
Sterilization works by killing off these microorganisms, ensuring that your jam stays safe to eat. The process of sterilizing jars helps create a clean, sanitized environment, eliminating any harmful bacteria that could interfere with the preservation process. This step is especially crucial if you’re canning your jam for long-term storage.
How to Sterilize Jam Jars
Sterilizing jars is easy but must be done thoroughly. First, you should wash the jars and lids with hot, soapy water to remove any dirt or residue. Then, place the jars in a large pot of boiling water, ensuring they are completely submerged, and boil them for at least 10 minutes. This process kills any bacteria or other contaminants. If you’re using a dishwasher, make sure to run the jars through a hot cycle just before using them to ensure they are sanitized.
You should also sterilize the jar lids. However, be sure to follow the manufacturer’s instructions for your lids, as some metal lids may rust if exposed to prolonged heat. You can sterilize them by placing them in a pot of hot water for 5 to 10 minutes before sealing your jars.
Preventing Spoilage Through Proper Canning
Once your jars and lids are sterilized, they should be kept warm until you’re ready to fill them with your jam. If you’re using the water bath canning method, it’s important that both the jars and the water are hot before you begin the sealing process. After filling the jars with hot jam, sealing them properly creates an airtight environment that prevents contamination. If air can get inside the jar, it could result in spoilage. Ensuring that the jars are sealed tightly and the air is evacuated helps keep the jam from going bad.
Properly sterilizing your jars is a key step in preserving your jam and making sure it remains safe to eat. It’s important not to skip this step, as it can mean the difference between a jam that stays fresh for months and one that spoils prematurely.
How Sterilization Affects Jam Shelf Life
Sterilization can significantly extend the shelf life of your strawberry jam. A well-canned and sterilized jar can last for up to a year or more when stored in a cool, dark place. The high heat and sealed environment created by sterilization prevent bacteria from growing, which helps preserve both the texture and flavor of the jam. However, even with sterilization, it’s essential to check the jars periodically for any signs of spoilage, such as bulging lids or off smells. If you spot any signs of spoilage, it’s best to discard the jar immediately.
By taking the time to properly sterilize your jars and lids, you create an environment that will help your homemade strawberry jam remain safe, delicious, and free from spoilage. This extra care in the preparation process can go a long way in ensuring that your jam lasts for months, allowing you to enjoy it well beyond the strawberry season.
How to Fix Jam That Won’t Set Properly
Understanding Why Jam Won’t Set
Sometimes, despite following the recipe, your strawberry jam may not set to the right consistency. Common causes include undercooking, improper sugar-to-fruit ratio, or insufficient pectin. If the jam hasn’t cooked long enough, the pectin in the fruit won’t activate, leading to a runny texture. Another factor is the sugar amount, which works with pectin to create a thick consistency. If there’s not enough sugar or too much fruit, the jam may not set as expected. Additionally, strawberries naturally have less pectin than other fruits, so without added pectin, the jam might struggle to firm up.
How to Fix Runny Jam
If your jam is too runny, the first step is to cook it longer. Return the jam to the pot and bring it to a simmer again. Let it cook for 10–15 more minutes, checking the consistency regularly. You can test the jam using the “wrinkle test.” Place a spoonful of jam on a cold plate, let it cool for a minute, and then push it with your finger. ✅If it wrinkles, it’s ready. If not, continue cooking. If additional cooking doesn’t work, the next step is to add more pectin to help the jam set.
Adding More Pectin
If cooking longer doesn’t help, you may need to add pectin. There are two types of pectin: liquid and powdered. Liquid pectin should be added near the end of cooking, while powdered pectin is usually mixed in earlier. When using powdered pectin, dissolve it properly in the jam and bring it to a boil to activate it. If you’re using liquid pectin, carefully follow the package instructions to avoid over- or under-using it. Both types of pectin can help the jam achieve the right thickness and texture.
Preventing Setting Issues in the Future
To prevent setting issues in future batches, it’s essential to use the correct fruit-to-sugar ratio. Typically, a 1:1 ratio works well for many jam recipes. If your strawberries are particularly low in pectin, consider adding store-bought pectin to ensure proper setting. Additionally, cook the jam long enough to activate the pectin fully. Using a thermometer, aim for a temperature of 220°F (104°C). Regularly check the consistency during the cooking process to avoid over- or undercooking. With these steps, your jam will set perfectly every time.
Delicious Ways to Use Strawberry Jam
On Breakfast Foods: Toast, Pancakes, Waffles
Strawberry Jam on Toast
One of the simplest and most satisfying ways to enjoy strawberry jam is on a slice of toasted bread. The combination of crispy, golden-brown toast with sweet, fruity jam creates a perfect balance of textures and flavors. Whether you spread the jam thick or light, the sweet and tangy strawberry flavor adds a delightful touch to the bread. The acidity of the strawberries complements the richness of butter or margarine often used on toast, creating a harmonious and comforting breakfast. The vibrant red color of the jam also makes your toast more visually appealing, enhancing the overall breakfast experience.
Strawberry Jam with Pancakes
Pancakes are another breakfast favorite that pairs beautifully with strawberry jam. While syrup is a classic choice, strawberry jam provides a more intense and natural sweetness, elevating your pancakes. The jam can be spread between layers of pancakes or served on the side as a topping. For an extra burst of flavor, some people mix the strawberry jam into the pancake batter before cooking, creating pockets of fruity goodness. This also offers a healthier alternative to syrup, as strawberry jam typically contains fewer processed sugars. When paired with yogurt or granola, it turns into a balanced and flavorful breakfast.
Strawberry Jam on Waffles
Waffles, with their crispy texture and deep pockets, are perfect for holding generous amounts of strawberry jam. The jam fills the pockets, allowing you to enjoy its sweet, tangy flavor in every bite. Strawberry jam enhances the slightly buttery taste of the waffles without overpowering them. For a more indulgent treat, top your waffles with whipped cream, fresh strawberries, and a drizzle of strawberry jam. The combination of warm waffles and cool cream, along with the jam, makes for a satisfying breakfast experience that’s both comforting and delicious.
Creative Uses for Strawberry Jam in Breakfast
While toast, pancakes, and waffles are classic choices, strawberry jam can be used in many other creative ways. It can be spread on croissants, mixed into yogurt or oatmeal, or used as a filling for muffins or pastries. You can also drizzle it over cereal or granola, adding a fruity twist to your morning. Strawberry jam is versatile, making it easy to incorporate into almost any breakfast dish. It adds flavor and nutrients, all while being quick and easy to prepare. Whether you enjoy it on traditional breakfast foods or try something new, strawberry jam is a great way to sweeten up your morning meal.
In Desserts: Cakes, Pastries, Yogurt Parfaits
Strawberry Jam in Cakes
Strawberry jam is a versatile and delicious ingredient in many cake recipes. One of the most popular ways to incorporate it is by using it as a filling between cake layers. Whether you’re making a simple sponge cake or a more decadent layered cake, a spread of strawberry jam adds both sweetness and moisture, elevating the flavor profile of the cake. The jam can also be used to glaze the top of cakes, adding a glossy finish and a burst of strawberry flavor. For instance, a classic strawberry shortcake features sponge or biscuit layers filled with jam, whipped cream, and fresh strawberries, creating a light and refreshing dessert perfect for any occasion. You can also mix the jam into cake batter itself for added fruitiness, giving the cake a subtle yet delightful strawberry flavor throughout.
Strawberry Jam in Pastries
Incorporating strawberry jam into pastries is a wonderful way to add a fruity and tangy element to otherwise buttery, flaky treats. For example, strawberry jam is often used as a filling for Danish pastries, croissants, or turnovers. The sweetness of the jam pairs perfectly with the richness of the dough, creating a well-balanced dessert. When making turnovers, you simply spoon a little jam into the center of the dough, fold it over, and bake until golden brown. The result is a delicious pastry with a fruity, jammy center. Strawberry jam can also be used in tarts or pies, either as a filling or as a glaze to give them a shiny, inviting finish. The jam’s vibrant color and sweet flavor help make pastries not only taste delicious but also look visually appealing.
Strawberry Jam in Yogurt Parfaits
Yogurt parfaits are another dessert where strawberry jam shines. Layering strawberry jam with creamy yogurt and granola creates a delightful contrast of textures. The smooth yogurt complements the chunky, fruit-filled jam, while the granola adds a satisfying crunch. Strawberry jam can be used as the base layer or drizzled over the top for a burst of color and flavor. For a more indulgent parfait, you can also add fresh strawberries, nuts, or even a bit of whipped cream. This combination makes for a light, healthy, and delicious dessert that’s perfect for breakfast, an afternoon snack, or a light post-dinner treat. You can even experiment with other layers, such as chocolate or coconut, to create your own signature parfait.
Creative Dessert Ideas with Strawberry Jam
Beyond cakes, pastries, and yogurt parfaits, strawberry jam can be used in a wide variety of other desserts. For instance, you can swirl it into ice cream or frozen yogurt for a refreshing fruity twist. It also makes a great topping for cheesecakes, panna cotta, or brownies. Simply spoon some jam over the dessert before serving for a pop of color and sweetness. Strawberry jam can also be used to flavor mousses, soufflés, or custards, giving these delicate desserts a fruity depth. Additionally, it can be incorporated into cookies, either by filling thumbprint cookies or by adding it as a drizzle on top of iced cookies. Strawberry jam adds a layer of flavor to any dessert, enhancing both taste and appearance with its natural sweetness and vibrant color.
Strawberry jam is a simple and versatile ingredient that can transform a wide range of desserts, making them more flavorful and visually appealing. Whether used as a filling, topping, or mixing into batters and doughs, it brings a fresh, fruity sweetness that’s perfect for a variety of sweet treats. Its versatility ensures that it can complement both light, refreshing desserts as well as rich, indulgent ones.
As a Spread or Glaze: Sandwiches, Meat Glazes, Salad Dressings
Strawberry Jam as a Sandwich Spread
While peanut butter and jelly are classic sandwich staples, strawberry jam offers a delightful twist on the traditional spread. The smooth texture and sweet-tart flavor of strawberry jam pair beautifully with various bread types, including whole wheat, white, or even a rich brioche. A simple strawberry jam sandwich is both comforting and quick, making it a great option for breakfast or lunch. You can also elevate the sandwich by adding a layer of cream cheese or ricotta to balance the sweetness of the jam, creating a creamier, more indulgent spread. Additionally, the bright red color of the jam enhances the visual appeal of the sandwich, making it an attractive choice for both adults and kids alike. For a more unique variation, you can use strawberry jam in combination with other fruits, such as sliced bananas or strawberries, for a fresh, fruity filling.
Strawberry Jam as a Meat Glaze
Strawberry jam may not be the first thing that comes to mind when considering glazes for meats, but it offers an unexpected and delightful flavor. When used as a glaze for meats like chicken, pork, or lamb, strawberry jam strikes a perfect balance between sweetness and acidity. This combination helps tenderize and infuse the meat with delicious flavors.
As the jam cooks, its natural sugars caramelize, creating a shiny, rich coating on the meat. For example, a strawberry jam glaze on roasted chicken adds a sweet contrast to the savory flavors, while the natural acidity of the strawberries adds a tangy brightness to the dish.
You can also enhance the depth of flavor by mixing the jam with ingredients like balsamic vinegar, mustard, or soy sauce. Whether used as a glaze for grilled pork chops or a finishing touch on roasted chicken, strawberry jam adds an intriguing twist to savory dishes, making it a versatile and flavorful ingredient.
Strawberry Jam in Salad Dressings
Strawberry jam can also be an unexpected yet delicious addition to homemade salad dressings. Its natural sweetness can help balance the acidity in vinaigrettes, while the fruitiness enhances the flavor of salads, particularly those that feature fresh greens, goat cheese, or even grilled chicken. When combined with ingredients like balsamic vinegar, olive oil, and mustard, strawberry jam makes for a vibrant dressing that can brighten up any salad. A strawberry jam-based dressing works wonderfully on salads with ingredients like arugula, spinach, or mixed greens, as it complements their natural bitterness and adds a refreshing touch. For a unique twist, you can experiment by adding chopped herbs such as basil or thyme, which pair beautifully with strawberries. The jam can also serve as a base for fruit-forward dressings, adding both texture and a natural sweetness that works particularly well with salads featuring fruits like apples, pears, or even strawberries themselves.
Creative Ways to Use Strawberry Jam as a Spread or Glaze
Beyond traditional sandwiches, strawberry jam can be incorporated into various savory and sweet dishes as a glaze or spread. Try using it in savory dishes like glazed ham or as a topping for grilled cheese sandwiches, where its sweetness can complement the sharpness of the cheese. For a more adventurous spread, mix strawberry jam with a bit of goat cheese or mascarpone, creating a rich, creamy topping that can be used on crackers or toasted bread. The possibilities for using strawberry jam as a glaze or spread extend beyond the usual boundaries of breakfast foods, bringing new, delightful flavors to savory meals as well as desserts. Whether as a topping for meats or as a drizzle on salads, strawberry jam’s versatility shines, adding complexity and balance to a variety of dishes.
Conclusion
Making strawberry jam at home is a rewarding and simple process that allows you to enjoy the pure, natural taste of fresh strawberries throughout the year. By controlling the sweetness, texture, and quality of the ingredients, you can create a jam that’s tailored to your taste preferences. From its health benefits, such as avoiding preservatives and artificial additives, to its versatility in both sweet and savory dishes, homemade strawberry jam offers endless possibilities. Whether used as a spread on toast, a glaze for meats, or a flavorful addition to desserts and salad dressings, strawberry jam can enhance any meal with its rich, vibrant flavor. By following the step-by-step guide to making your own strawberry jam, you can ensure that each jar is packed with fresh, delicious goodness that will bring joy to your meals for months to come.