
Croissants are a beloved French pastry, known for their buttery, flaky layers that melt in your mouth with every bite. While they may seem like a treat reserved for bakeries, you can easily recreate this iconic pastry at home with a little patience and the right technique by following a professional croissant recipe.
In this guide, we’ll walk you through a professional croissant recipe, offering step-by-step instructions to help you master the art of making these delicious pastries. Whether you’re an experienced baker or a beginner, this recipe will equip you with the knowledge and skills to bake croissants that rival those from your favorite bakery.
Get ready to elevate your baking game and enjoy fresh, homemade croissants that are perfect for breakfast, brunch, or any special occasion!
Key Ingredients in a Professional Croissant Recipe for Perfect Results

Butter: Why Butter Quality Matters for Flaky Layers
Butter is the heart of any professional croissant recipe, playing a crucial role in achieving the signature flaky, layered texture. The quality of butter you use directly impacts the taste, texture, and lamination process of your croissants. Let’s break down why butter matters and how to choose the best one for your homemade croissants.
1. Higher Butterfat Content for Flakiness
Not all butter is created equal, and when it comes to croissants, higher butterfat content is key. European-style butter, which contains 82-86% butterfat, is the best choice because:
- It has less water content, preventing steam pockets that can ruin the delicate layers.
- The higher fat makes the dough more pliable and easier to roll and fold during lamination.
- It enhances the rich, buttery flavor of your croissants.
Regular supermarket butter typically contains 80% butterfat, which has more water and can cause uneven layers or tougher croissants.
2. Cold Butter for Proper Lamination
Temperature control is crucial in making a professional croissant recipe. The butter must remain cold but pliable throughout the lamination process to:
- Create distinct layers instead of blending into the dough.
- Prevent excessive melting, which can make rolling difficult.
- Ensure even distribution of fat, leading to the best rise and flakiness.
Pro tip: Before starting lamination, shape your butter into a rectangle and chill it to the same consistency as your dough. This will make the folding process much smoother.
3. Unsalted vs. Salted Butter: Which One to Use?
Professional bakers always use unsalted butter for croissants. Here’s why:
- Control over salt levels: Salted butter varies in salt content, which can affect the dough’s flavor balance.
- Pure butter taste: Unsalted butter allows the natural sweetness and richness of the butter to shine.
- Better lamination: Salted butter has a slightly different moisture content, which can interfere with the layers.
If you only have salted butter on hand, you can use it, but consider reducing the salt in your dough recipe to maintain balance.
4. How to Incorporate Butter for the Best Results
To ensure your croissants turn out perfectly:
- Use high-quality, high-butterfat European butter like Plugrá, Kerrygold, or Président.
- Keep butter cold throughout lamination for distinct layers.
- Avoid overhandling the dough, as heat from your hands can soften the butter too much.
By choosing the right butter and handling it correctly, you’ll create croissants with crispy, golden layers and a soft, airy interior, just like a professional baker!
Flour: Choosing the Right Flour for the Dough Texture
Flour is one of the most essential ingredients in a professional croissant recipe, as it directly impacts the dough’s elasticity, strength, and final texture. The type of flour you use determines how well your croissants rise, how flaky they become, and how easy the dough is to work with during the lamination process. Let’s explore the key aspects of choosing the right flour for perfect croissants.
1. Protein Content: The Key to Structure and Flakiness
The protein content in flour determines its gluten formation, which affects the dough’s ability to stretch and hold layers. For croissants, you need a balance between strength and tenderness.
- Bread flour (12-14% protein):
- Provides strong gluten development, helping the dough hold its shape.
- Ideal for professional bakers looking for well-structured, layered croissants.
- However, too much gluten can make the dough tough and harder to roll.
- All-purpose flour (10-12% protein):
- Offers a more tender crumb with sufficient gluten for layering.
- Easier to roll out and work with, making it a good choice for beginners.
- May not create as strong layers as bread flour.
- Pastry flour (8-9% protein):
- Too soft for croissants, leading to weak layers and less rise.
- Not recommended for a professional croissant recipe.
Best choice: Many professional bakers use a blend of bread flour and all-purpose flour (50/50 ratio) to achieve the ideal balance of structure and tenderness.
2. How Flour Affects Dough Handling and Lamination
Choosing the right flour is crucial for how the dough behaves during rolling and folding. The right flour will ensure:
- A smooth, elastic dough that rolls out evenly.
- Strong enough gluten development to trap air, leading to a light, flaky croissant.
- Proper absorption of butter during lamination, preventing greasy or dense results.
If the flour is too strong (high protein), the dough may become too elastic and difficult to roll. If the flour is too weak (low protein), the dough may tear easily and fail to rise properly.
3. The Importance of Flour Absorption and Hydration
Different flours absorb water at different rates, which affects how the dough comes together. Higher-protein flours absorb more water, meaning:
- You may need to adjust the hydration slightly to get a smooth, pliable dough.
- Proper hydration helps gluten develop without making the dough too dry or sticky.
Pro Tip: When using new flour, add water gradually and observe the dough’s consistency. It should be soft, elastic, and slightly tacky, but not sticky.
4. Using High-Quality Flour for Professional Results
For the best croissant texture, always use high-quality, unbleached flour. Bleached flour has weaker gluten, which can lead to poor structure and less defined layers.
Some recommended brands for professional-quality croissants:
- King Arthur Bread Flour (high gluten, great for structure)
- King Arthur All-Purpose Flour (balances strength and tenderness)
- Bob’s Red Mill Artisan Bread Flour (great for laminated doughs)
- Caputo Manitoba Oro Flour (used in professional French bakeries)
By choosing the right flour with the ideal protein balance, hydration, and quality, you’ll create a professional croissant recipe that delivers flaky, airy, and bakery-style results every time!
How to Avoid Common Yeast-Related Issues
Even with the best yeast, mistakes can happen. Here’s how to troubleshoot common yeast problems:
- Croissants didn’t rise enough
- Check if the yeast is expired or inactive before starting.
- Ensure the dough is proofed at the right temperature—cold proofing slows the rise, but too much cold can inhibit yeast activity.
- Avoid over-kneading, which can make the dough too tight and limit gas expansion.
- Croissants over-proofed and lost shape
- Do not proof at too high a temperature, as this can cause the butter to melt into the dough.
- Use a gently warm environment (not above 80°F / 27°C) to maintain structure.
- Keep proofing time in check—over-proofed dough can collapse and lose its layers.
- Croissants taste bland
- Use a slow fermentation method (overnight cold proofing) for better yeast flavor development.
- Make sure to add the right amount of sugar, which feeds the yeast and enhances taste.
Sugar & Salt: Balancing Flavor for a Slightly Sweet Croissant
In a professional croissant recipe, sugar and salt play a crucial role in enhancing both the flavor and texture of the final pastry. While croissants are not as sweet as traditional pastries like brioche or Danish, they do have a subtle sweetness that balances the rich, buttery flavor. At the same time, salt is essential for adding depth to the dough and regulating fermentation. Understanding how these two ingredients work together will help you achieve the perfect balance of flavor in your croissants.
1. The Role of Sugar in Croissants
Sugar is more than just a sweetener—it influences the dough’s structure, browning, and yeast activity.
How Sugar Affects Croissant Dough:
- Enhances flavor: Adds a delicate sweetness that balances the buttery taste.
- Feeds the yeast: Yeast consumes sugar during fermentation, producing carbon dioxide, which helps the dough rise.
- Improves texture: Sugar tenderizes the gluten, making the dough more pliable and easy to roll.
- Affects browning: Sugar contributes to the Maillard reaction, giving croissants their golden-brown crust.
How Much Sugar Should You Use?
A professional croissant recipe typically uses a moderate amount of sugar—enough to enhance the flavor without making the dough overly sweet. The average ratio is around 5-10% sugar relative to the flour weight.
- Too much sugar: Can weaken the gluten structure, making the dough too soft and sticky.
- Too little sugar: May result in a pale, underdeveloped flavor with less browning.
For the best results, aim for a balanced sweetness that complements the buttery richness of the croissant.
2. The Role of Salt in Croissants
Salt is often overlooked, but it’s a critical ingredient in a professional croissant recipe. It enhances the overall flavor while helping to control the dough’s fermentation and texture.
How Salt Affects Croissant Dough:
- Enhances flavor: Brings out the natural flavors of the butter and flour, preventing the croissant from tasting bland.
- Regulates yeast activity: Slows down yeast fermentation, preventing the dough from over-proofing and collapsing.
- Strengthens gluten: Helps build a strong dough structure, ensuring proper elasticity and flakiness.
How Much Salt Should You Use?
Salt should be used in just the right amount—too much can interfere with yeast activity, while too little can result in a flat-tasting croissant. The standard ratio is around 1.5-2% salt relative to the flour weight.
- Too much salt: Can slow down yeast activity too much, resulting in poor rise and dense croissants.
- Too little salt: Leads to weak gluten structure and a lack of depth in flavor.
Using the right amount of salt ensures that croissants have a balanced, well-rounded taste while maintaining their light and airy texture.
3. Finding the Perfect Balance Between Sugar & Salt
Since sugar and salt have opposite effects on yeast fermentation—sugar speeds it up, while salt slows it down—it’s essential to find the right balance.
Tips for Perfectly Balanced Croissant Dough:
- Follow the correct ratios: Using 5-10% sugar and 1.5-2% salt ensures the best balance.
- Evenly distribute ingredients: Mix salt and sugar well into the flour before adding liquids to ensure they dissolve properly.
- Adjust based on recipe needs: If making sweet variations (e.g., chocolate croissants), slightly increase sugar. If making savory croissants, consider reducing sugar slightly.
By mastering the balance between sugar and salt, you’ll achieve perfectly flavored croissants with a delicate sweetness, rich buttery taste, and beautifully golden crust—just like those from a top French bakery! 🥐✨
The Art of Mixing and Kneading in a Professional Croissant Recipe

Preparing the Dough: Combining Ingredients and the Importance of Proper Hydration
The dough is the foundation of a professional croissant recipe, and getting it right is essential for achieving light, flaky layers and a buttery, tender crumb. Properly combining ingredients and ensuring the dough is correctly hydrated will affect everything from the gluten structure to the final texture of your croissants.
In this section, we’ll explore the step-by-step process of preparing croissant dough, why hydration matters, and how to achieve the perfect balance for bakery-quality results.
1. The Importance of Precise Ingredient Mixing
To create the perfect croissant dough, it’s crucial to combine the ingredients in the right order and with the correct technique. Unlike simple bread dough, croissant dough contains butter, milk, and sugar, which influence gluten development and hydration.
Step-by-Step Dough Preparation
- Mix dry ingredients first:
- Combine flour, sugar, salt, and yeast in a large mixing bowl.
- Mixing dry ingredients first ensures even distribution and prevents yeast from coming into direct contact with salt (which can inhibit yeast activity).
- Add liquid ingredients gradually:
- Slowly pour in cold milk or water while mixing to allow the flour to absorb the liquid evenly.
- Use cold liquid (instead of warm) to control fermentation speed and prevent premature yeast activation before the butter is laminated.
- Incorporate butter into the dough:
- Unlike laminated butter (which is folded in later), a small amount of softened butter is mixed into the dough for extra richness.
- Knead the dough just until it comes together—over-kneading at this stage can lead to excessive gluten development, making it harder to roll out later.
- First resting period (bulk fermentation):
- Once mixed, the dough is shaped into a rough ball and left to rest in the refrigerator for 8-12 hours.
- This slow fermentation process allows the dough to develop flavor while keeping the butter firm for lamination.
2. Why Proper Hydration is Key for Croissant Dough
Hydration (the ratio of liquid to flour) is one of the most critical aspects of croissant dough preparation. A well-hydrated dough ensures:
Elasticity – Helps gluten formation, allowing the dough to stretch without tearing.
Flakiness – The right amount of moisture creates delicate layers when baked.
Proper proofing – Ensures the dough rises evenly, leading to an airy texture.
How Much Hydration is Ideal?
A professional croissant dough typically has a hydration level of 60-65%, meaning for every 100g of flour, there should be 60-65g of liquid (water or milk).
- Too little hydration: Dough will be stiff, making it difficult to roll out, resulting in dense croissants.
- Too much hydration: Dough becomes too sticky and weak, leading to difficulty in lamination and shaping.
Using the right amount of liquid ensures the dough remains smooth, pliable, and easy to work with during the rolling and folding process.
3. Common Mistakes When Mixing Croissant Dough
Even with the best ingredients, improper dough preparation can affect the final result. Here are some common mistakes to avoid:
- Over-mixing the dough: Creates excessive gluten, making the dough too elastic and difficult to roll out. Mix until just combined.
- Using warm liquid: Activates the yeast too early, leading to premature fermentation before lamination. Always use cold liquids.
- Skipping the resting stage: Resting in the fridge allows the dough to relax and develop flavor—never rush this step!
- Adding too much flour during mixing: Leads to a dry dough that won’t roll out smoothly. Stick to the recommended flour-to-liquid ratio.
4. Pro Tips for Perfect Croissant Dough
Use high-quality ingredients – Choose bread flour for strength, high-fat butter for richness, and fresh yeast for the best rise.
Chill the dough properly – Always refrigerate the dough before laminating to maintain butter consistency.
Don’t rush the process – Croissant dough needs time to develop its structure and flavor. Be patient!
By carefully combining ingredients and ensuring proper hydration, you’ll create a dough that is smooth, easy to roll, and perfect for achieving those delicate, buttery layers in your croissants. 🥐✨
Kneading Tips: How to Achieve the Perfect Dough Consistency
Kneading is a crucial step in making a professional croissant recipe. It helps develop gluten, which gives the dough its strength and elasticity—essential for creating the light, airy, and flaky layers characteristic of a perfect croissant. However, since croissant dough is laminated (layered with butter), it requires a gentler approach to kneading compared to traditional bread dough. Over-kneading can make the dough too tight and resistant to rolling, while under-kneading can result in weak layers that don’t hold their structure.
In this section, we’ll cover the best kneading techniques, common mistakes to avoid, and tips for achieving the ideal dough consistency for croissants.
1. Understanding Gluten Development in Croissant Dough
Unlike regular bread dough, which is kneaded until fully elastic, croissant dough needs just enough gluten development to provide structure without becoming too tight. The goal is to achieve a dough that is smooth, slightly stretchy, and easy to roll out without springing back too much.
- Too little kneading results in a weak dough that tears easily and lacks structure.
- Too much kneading leads to overdeveloped gluten, making the dough too elastic and difficult to roll.
- Proper kneading creates a dough that is smooth, slightly firm, and easy to handle.
2. Best Techniques for Kneading Croissant Dough
Since croissant dough is enriched with butter, milk, sugar, and yeast, it requires a more delicate approach compared to lean bread dough. Follow these techniques to achieve the perfect consistency:
Hand Kneading Method
If kneading by hand, use a gentle folding technique rather than aggressive stretching.
- Press and stretch the dough using the heel of your hand, then fold it back over itself.
- Turn the dough 90 degrees and repeat the motion, continuing for about three to five minutes.
- Stop when the dough is soft but not sticky, holding its shape when lightly pressed.
Stand Mixer Method
If using a stand mixer, be careful not to over-knead.
- Use a dough hook and mix on low speed for two to three minutes until ingredients are combined.
- Increase speed slightly and knead on medium speed for two to three more minutes until the dough is smooth.
- Check for elasticity—the dough should stretch without breaking but should not feel overly tight.
3. How to Know When Croissant Dough is Kneaded Enough
Since croissant dough will go through additional rolling and folding during lamination, it should not be fully kneaded like bread dough. Instead, look for these signs:
- The dough feels smooth and slightly firm, not sticky.
- When stretched gently, it forms a thin membrane without tearing (a partial windowpane test).
- The dough does not snap back too much when rolled out—it should be pliable but hold its shape.
If the dough feels too tight or elastic at this stage, let it rest in the fridge for 10 to 15 minutes before continuing. This helps relax the gluten, making it easier to work with.
4. Common Kneading Mistakes & How to Fix Them
Even experienced bakers can run into kneading issues. Here’s how to troubleshoot common problems:
- If the dough is too stiff and difficult to roll out, it may be over-kneaded, contain too much flour, or lack hydration. Let it rest longer in the fridge to relax gluten. If necessary, add a small amount of liquid and knead gently.
- If the dough is too sticky and hard to handle, it may be under-kneaded, have too much hydration, or warm ingredients were used. Lightly dust with flour (without overdoing it) and knead until the dough becomes smooth. Ensure liquids and butter are cold before mixing.
- If the dough springs back too much when rolling out, it may have overdeveloped gluten from excessive kneading. Let the dough rest in the refrigerator for 15 to 30 minutes before rolling again.
5. Pro Tips for Achieving Perfect Dough Consistency
- Keep ingredients cold—always use cold milk, butter, and water to prevent over-activation of gluten and yeast.
- Avoid adding too much flour—excess flour can make the dough too stiff, affecting its ability to laminate properly.
- Use controlled kneading—knead just until the dough is smooth and slightly elastic, stopping before it becomes too tight.
- Allow proper resting time—refrigeration between steps is key to achieving the ideal texture.
By following these kneading techniques, you’ll create a well-structured, pliable croissant dough that is easy to roll, layers beautifully, and bakes into perfectly flaky, buttery pastries!
Resting Time: Why Resting the Dough Is Essential for the Best Results
Resting the dough is one of the most important steps in making a professional croissant recipe. This process allows the gluten to relax, the yeast to develop, and the butter to stay at the right consistency for lamination. Skipping or shortening the resting periods can lead to a dough that is too elastic, making it difficult to roll out, or a croissant that lacks the signature flaky texture.
In this section, we’ll explore why resting time is crucial, how long to rest the dough at each stage, and how to optimize the process for the best results.
1. Why Resting Dough Is Crucial for Croissants
Resting the dough serves several essential functions:
- Gluten Relaxation: After kneading, gluten strands are tight and elastic. Resting allows them to loosen, making the dough easier to roll out without shrinking back.
- Flavor Development: As the dough rests, fermentation continues, creating deeper, more complex flavors in the final croissants.
- Proper Butter Distribution: Resting keeps the butter layers firm but pliable, ensuring they don’t melt into the dough and instead create distinct, flaky layers.
- Better Rise and Texture: Allowing the dough to rest helps the yeast develop, leading to a light, airy interior.
Without adequate resting, the dough will be too tough to roll out, the layers may blend together, and the final croissants may turn out dense rather than flaky.
2. Key Resting Stages and Ideal Timing
In a professional croissant recipe, the dough goes through multiple resting periods. Each stage plays a crucial role in ensuring the final croissants have the perfect texture, structure, and flavor.
First Resting Period: After Kneading
- Time: 1 to 2 hours at room temperature or overnight in the refrigerator
- Purpose: Allows the yeast to begin fermentation and makes the dough more elastic for rolling.
- Best Practice: If resting overnight, cover the dough tightly with plastic wrap to prevent drying.
Second Resting Period: After Incorporating Butter
- Time: At least 1 hour in the refrigerator
- Purpose: Ensures the butter remains cold and firm, which is essential for proper lamination.
- Best Practice: The dough should be chilled enough that the butter stays in distinct layers but not so cold that it cracks when rolled.
Third Resting Period: Between Folds (Lamination Process)
- Time: 30 to 45 minutes between each fold
- Purpose: Allows gluten to relax, preventing the dough from springing back when rolled out.
- Best Practice: Wrap the dough and chill it in the fridge between folds to maintain butter integrity.
Final Resting Period: After Shaping the Croissants (Proofing)
- Time: 2 to 3 hours at room temperature
- Purpose: The yeast continues fermenting, creating air pockets that lead to a light, airy texture.
- Best Practice: Proof at a controlled temperature (around 75°F to 80°F) to prevent the butter from melting too soon.
3. Common Resting Mistakes and How to Avoid Them
- Skipping or Rushing Resting Periods: Leads to tough, dense croissants with poor lamination. Always follow the recommended timing.
- Letting the Dough Rest at the Wrong Temperature: If the dough is too warm, the butter can melt and ruin the layers. If it’s too cold, the dough becomes too stiff to roll.
- Under-Proofing: If the shaped croissants are not proofed long enough, they won’t rise properly, resulting in a dense, chewy texture.
4. Pro Tips for the Best Resting Process
- Plan Ahead: Since croissants require multiple resting stages, it’s best to prepare the dough a day in advance for the best flavor and texture.
- Use the Refrigerator to Your Advantage: If the dough ever feels too soft or sticky, chilling it for an extra 15 to 20 minutes can make it easier to handle.
- Monitor the Dough, Not Just the Clock: Depending on room temperature and humidity, the dough may need more or less resting time. Look for visual cues such as slight puffiness and relaxed texture.
By allowing the dough to rest at the right intervals, you’ll ensure that your croissants come out perfectly flaky, buttery, and light—just like a professional bakery! 🥐
The Dough’s First Rise: How Long to Let It Rise for Optimal Texture
The first rise is a critical phase in creating perfect croissants. This initial fermentation period allows the yeast to activate and begin producing carbon dioxide, which causes the dough to rise. If timed properly, it helps create the light, airy texture and subtle flavor that croissants are known for. However, too short a rise can lead to dense, flat croissants, while too long a rise can over-ferment the dough and compromise its structure.
In this section, we’ll delve into why the first rise matters, the ideal timing for it, and how to control the process for the best texture and flavor in your croissants.
1. Why the First Rise is Essential for Croissant Dough
The first rise, also known as bulk fermentation, is the first stage of fermentation after kneading the dough. This step is essential for several reasons:
- Yeast Activation: The yeast consumes the sugars in the dough and begins to produce carbon dioxide, which causes the dough to expand and become lighter in texture.
- Gluten Development: The rise allows the gluten strands to relax and strengthen, which is important for achieving the right dough consistency.
- Flavor Development: During this rise, the dough begins to develop its characteristic flavor. Longer rises, especially when done in the fridge, lead to more complex and deeper flavors in the final croissant.
By giving the dough the right amount of time to rise, you ensure that the croissants will have the perfect fluffiness, flavor, and texture.
2. How Long Should the Dough Rise?
The length of the first rise varies depending on the temperature and environment. Here’s a breakdown of how long you should let your croissant dough rise for optimal results:
Room Temperature Rise
- Time: 1 to 2 hours
- Ideal Conditions: If the kitchen temperature is around 70°F (21°C), the dough should rise at a moderate pace, roughly doubling in size. This rise will produce a dough with a good texture and flavor, without over-fermenting.
Cold Rise (Overnight in the Refrigerator)
- Time: 8 to 12 hours
- Ideal Conditions: For a cold fermentation rise, place the dough in the refrigerator for an extended period, typically overnight. This slower rise enhances the dough’s flavor and texture, resulting in croissants with a richer, more complex flavor profile and a lighter, airier crumb.
- Best Practice: If you opt for a cold rise, make sure to cover the dough tightly with plastic wrap or a damp cloth to prevent it from drying out.
3. Signs the Dough is Ready for the Next Step
It’s important to know when the dough has completed its first rise, so you don’t risk over-fermenting. Here are some visual and tactile signs that indicate the dough is ready to move on to the next phase:
- Doubling in Size: The dough should be visibly larger, typically doubling in volume. This indicates that the yeast has been active and has generated sufficient gas to lift the dough.
- Slightly Puffy Texture: When gently pressed with a finger, the dough should feel slightly puffy and should spring back slowly (a sign of proper yeast activity).
- No Over-fermentation: If the dough begins to collapse or feel overly soft and sticky, this can be a sign of over-fermentation. At this point, you may need to reshape the dough and let it rest for a shorter time.
4. Room Temperature vs. Cold Rise: Which Is Best?
Both room temperature and cold rises have their advantages, so the choice depends on the time available and the desired flavor and texture of your croissants.
Room Temperature Rise Benefits:
- Faster process, great for when you’re short on time.
- Produces croissants with a lighter, slightly less complex flavor profile.
- Ideal for same-day baking, if you need croissants sooner.
Cold Rise Benefits:
- More complex, deep flavor due to the slower fermentation process.
- The dough is easier to handle and roll out after a cold rise, as the cooler temperature prevents the butter from melting too quickly during the lamination process.
- It’s often preferred by professional bakers because it allows for better control over the fermentation process and a more consistent result.
5. Common Mistakes to Avoid During the First Rise
- Not allowing enough time: If the dough doesn’t rise long enough, it will remain dense, making it difficult to create the light, flaky texture you’re aiming for.
- Over-proofing: Leaving the dough to rise too long, especially at room temperature, can result in an over-fermented dough, causing it to collapse and lose its structure.
- Not covering the dough properly: If the dough is exposed to air during the first rise, it can dry out, leading to an uneven rise and tough texture. Always ensure the dough is covered securely.
6. Pro Tips for Perfect First Rise Results
- Temperature Matters: Keep the dough in a warm (but not hot) environment for room temperature rising. Around 70°F (21°C) is ideal.
- Use a Proofing Box: If you have one, a proofing box with controlled temperature and humidity can ensure the dough rises evenly and consistently.
- Chill Dough If Necessary: If the dough is rising too quickly (if the room is very warm), place it in the fridge to slow down the process and prevent over-fermentation.
- Don’t Rush: If you have the time, an overnight cold rise will result in croissants with superior flavor and texture.
By understanding the importance of the first rise and giving the dough the time it needs to ferment and develop, you’ll be on your way to creating croissants with the perfect texture and flavor, ready for lamination and baking! 🥐
Lamination Techniques in a Professional Croissant Recipe for Perfect Layers
What Is Lamination?: Explanation of the Technique for Creating Flaky Layers
Lamination is the heart of creating professional croissants, and it’s the technique responsible for the delicate, flaky texture that defines this beloved pastry. The process involves folding layers of butter and dough together, creating multiple thin, buttery layers that puff up when baked, forming the croissant’s signature crisp and airy texture. It’s a complex and precise method that, when done correctly, results in a croissant with perfect layers and a melt-in-your-mouth, buttery finish.
In this section, we’ll break down what lamination is, why it’s so important for croissants, and the steps involved in achieving flawless layers in your croissant dough.
1. The Science Behind Lamination
Lamination is more than just a fancy baking technique—it’s a scientific process that involves the interaction of dough and butter. Here’s how it works:
- Buttery Layers: When you roll butter into dough and fold it several times, you create alternating layers of dough and butter. The butter acts as a barrier between layers of dough.
- Steam Generation: As the croissants bake, the butter inside the layers melts, releasing steam. This steam expands, causing the layers of dough to puff up and separate, creating the iconic flaky, airy texture.
- The Importance of Cold Butter: The key to successful lamination is keeping the butter cold. If the butter becomes too soft or melts during the process, it can mix with the dough, leading to a greasy, dense texture instead of a flaky one. Keeping the dough and butter at the right temperatures is essential for achieving perfectly distinct, crisp layers.
The result is the beautiful, delicate layers you see in croissants, and this lamination technique is what elevates them from an ordinary pastry to a showstopper.
2. Step-by-Step Lamination Process
Achieving the perfect laminated croissant dough requires precision and patience. Here are the essential steps to master lamination:
Step 1: Prepare the Dough and Butter
- Dough Preparation: After the first rise, roll out your dough into a large rectangle.
- Butter Block: While the dough is resting, prepare the butter. This involves flattening chilled butter into a rectangular block that will be easy to incorporate into the dough. You want the butter to be cold but pliable, similar in consistency to the dough.
2: Enclosing the Butter
- Incorporating Butter: Place the cold butter block on one half of the rolled-out dough and fold the dough over the butter to enclose it completely. The dough should cover the butter like an envelope, ensuring no butter is exposed.
3: The First Fold
- Rolling and Folding: Roll the dough out into a large rectangle again, being careful not to let the butter escape from the dough. Once it’s rolled out, fold the dough into thirds, like a letter (also called a single fold). This is where the first set of layers begins to form.
- Resting: Chill the dough in the refrigerator for at least 30 minutes to allow the butter to firm up again and relax the gluten, making it easier to roll out.
4: Repeat the Folds
- More Layers: After chilling, roll out the dough again and repeat the fold. Depending on the recipe, this process is usually done 3–4 times. Each fold creates more layers, and with every turn, the dough becomes flakier.
- Rest Between Folds: It’s essential to chill the dough between folds to prevent the butter from melting and to ensure that the layers remain distinct.
3. The Role of Temperature in Lamination
The temperature of both the dough and butter plays a crucial role in the lamination process. Here’s why it matters:
- Cold Butter: Butter that is too warm will melt into the dough and lose the ability to create layers. If the butter isn’t cold enough, it will mix with the dough and you’ll lose the flaky texture. Always use cold butter that is pliable but firm.
- Chilling the Dough Between Folds: After every fold, it’s essential to chill the dough to ensure the butter doesn’t melt. If the dough becomes too soft, it will be difficult to create layers. Keep the dough and butter cool throughout the entire lamination process to ensure success.
- Room Temperature Consideration: The dough should not be too warm or it will become sticky, making it hard to work with. On the other hand, if the dough is too cold, it can be difficult to roll out. Finding the right balance of temperature is crucial for achieving flaky croissant layers.
4. Common Lamination Mistakes to Avoid
Lamination is a delicate process, and small mistakes can affect the final result. Here are some common mistakes to avoid:
- Butter Melting into the Dough: If your butter melts into the dough during the folding process, it will compromise the layers and result in a dense, greasy texture. Always chill your dough and butter between folds.
- Inconsistent Rolling: Unevenly rolling out the dough can lead to uneven layers, making your croissants puff up irregularly. Roll the dough evenly and consistently.
- Skipping Resting Time: Don’t skip the resting times between folds. Allowing the dough to relax gives the gluten time to unwind, making it easier to roll out and ensuring better layers.
5. Why Lamination Is the Key to Flaky Croissants
The lamination technique is the defining factor that differentiates croissants from other pastries. Without this method, your dough would not have those signature crispy, flaky layers. The process builds upon the repetition of folding and chilling, gradually creating thousands of layers of dough and butter. The result is a croissant with a delicate, airy crumb and a crisp, golden-brown exterior.
Lamination is a bit of an art form—it takes practice to perfect. But once you master this technique, you’ll be able to create croissants with a buttery, flaky texture that rivals those from the best bakeries.
By understanding and mastering lamination, you can create croissants that have a light, flaky texture and layers that beautifully separate when baked. The technique may take time and precision, but the delicious, tender layers you’ll achieve make it all worth it! 🥐
How to Fold the Dough: Step-by-Step Folding Process
The folding process is at the heart of creating the flaky layers in croissants. Each fold you make builds on the layers of butter and dough, ensuring that the croissant will rise beautifully in the oven, with distinct, crispy layers. Mastering this process is essential for achieving the ideal croissant texture—crispy on the outside, tender on the inside.
Here, we’ll break down the step-by-step folding process to guide you through achieving perfect layers with every turn of the dough.
1. Preparing the Dough for the First Fold
Before starting the folding process, it’s crucial to have the dough at the right consistency and temperature. Follow these key steps:
- Rest the Dough: After the first rise, punch the dough down to release excess air, then roll it out into a rectangle on a lightly floured surface. Ensure the dough is cold but pliable for the best results.
- Chill the Butter Block: Your butter should be cold and firm, but pliable. Flatten it into a rectangular shape that is about two-thirds the size of the dough, so that it fits easily into the dough when folded.
2. Enclosing the Butter (The First Step in Folding)
This step is crucial for starting the lamination process. The butter must be fully enclosed by the dough to prevent it from leaking out during the folding process.
- Position the Butter: Place the cold butter block onto the center of your rolled-out dough. The butter should be cold and slightly firm, with a consistency similar to that of the dough.
- Fold the Dough Over the Butter: Gently fold the edges of the dough over the butter to fully enclose it. You should have a “dough package” with butter sealed inside. Make sure the edges of the dough meet and that no butter is exposed. This is crucial because exposed butter can melt into the dough during the folding process, compromising your layers.
3. Rolling Out the Dough (The First Roll)
Now that the butter is safely enclosed, you need to roll the dough out to create the first set of layers:
- Roll the Dough Into a Rectangle: On a lightly floured surface, gently roll the dough into a long rectangle, about 1/2 inch thick. Make sure you don’t roll it too thin or unevenly, as this could tear the dough or result in uneven layers.
- Apply Even Pressure: When rolling, use even pressure to ensure that the butter doesn’t break through the dough. If the dough starts to feel too soft or sticky, pop it in the fridge for 20–30 minutes to chill it and make it easier to handle.
4. The First Fold (Single Fold)
This is the first “turn” in the lamination process, where you will start building the layers. It’s also referred to as a single fold because you’ll be folding the dough into thirds, like a letter:
- Fold the Dough Into Thirds: Once the dough is rolled out into a rectangle, fold the top third of the dough down toward the center, then fold the bottom third up over it, similar to folding a letter. This creates a layered rectangle.
- Seal the Edges: Pinch the edges of the dough together to seal the folds, ensuring that no butter escapes. You should now have a thick, folded rectangle with multiple layers of dough and butter.
5. Resting the Dough Between Folds
After each fold, it’s important to let the dough rest to ensure that the gluten relaxes and the butter stays firm. This makes it easier to roll the dough out and helps maintain the integrity of the layers.
- Chill the Dough: Wrap the dough tightly in plastic wrap and place it in the fridge for 30 minutes to 1 hour. Chilling the dough prevents the butter from melting into the dough and allows it to firm up, making the next fold easier.
6. The Second Fold (Double Fold)
After the dough has rested and chilled, it’s time for the next fold, also called a double fold:
- Roll the Dough Again: Once the dough has chilled, roll it out again into a large rectangle, ensuring the edges are even.
- Fold the Dough in Half: This time, fold the dough in half, then fold the dough in half again (like folding it into quarters). This double fold will give you more layers and help build the characteristic flakiness of your croissants.
- Rest and Chill Again: Once again, wrap the dough and allow it to chill for another 30–60 minutes to ensure the butter stays cold and the dough remains elastic.
7. Repeat the Folding Process (Third or Fourth Fold)
For the best croissants, you’ll need to repeat the rolling and folding process at least 3-4 times to create layers of butter and dough. After each fold, allow the dough to rest and chill.
- Roll and Fold: Roll out the dough into a rectangle again, then fold it into thirds, rest, and repeat. The more folds you do, the more layers you will create, resulting in a lighter, flakier croissant.
8. Final Rest Before Shaping
Once you’ve completed the necessary folds (usually 3–4 turns), let the dough rest one final time before shaping your croissants. This final rest gives the dough time to relax fully, which will make it easier to shape and roll into croissants:
- Rest Time: After the last fold, chill the dough in the fridge for at least 30 minutes before shaping it into individual croissants. This helps to firm up the dough and allows the butter to settle into the layers.
9. Tips for Perfect Folding
- Don’t Rush: The lamination process requires time and patience. Rushing the folds or skipping the resting periods can lead to greasy or dense croissants.
- Work in a Cool Environment: Make sure the kitchen isn’t too warm, as the butter can soften too quickly. If the butter starts to soften during rolling, chill the dough for 10–15 minutes.
- Consistent Thickness: Ensure that the dough remains an even thickness when rolling it out, as uneven dough can lead to irregular layers and inconsistent results.
- Use Even Pressure: Apply even pressure when rolling out the dough to ensure that the butter remains intact and the dough rolls out smoothly.
10. Why the Folding Process Is Crucial for Croissant Texture
The folding process is vital to achieving the iconic flaky texture of croissants. Every fold creates additional layers of dough and butter, which puff up during baking, creating a crispy, airy structure.
Lamination and the folding process are essential for creating that layered perfection. A well-executed fold helps separate the layers of dough, making the final product light, flaky, and delicious. The more you practice this technique, the better your croissants will be.
Mastering the folding technique is key to baking croissants like a professional. With the right combination of technique, timing, and patience, you’ll be able to create croissants with a delicate, flaky texture that’s sure to impress! 🥐
Rolling the Dough: How to Properly Roll the Dough for the Right Thickness
Rolling the dough correctly is a crucial step in creating professional croissants with the perfect flaky layers. The dough must be rolled to the right thickness and consistency to ensure the layers are even, and the butter stays properly sealed between the dough. If the dough is rolled unevenly or too thick, the resulting croissants may have dense layers or be lacking the characteristic puff and flakiness.
In this section, we’ll explore how to roll the dough for croissants with the right thickness and consistency to achieve perfectly layered, buttery croissants.
1. Preparing the Dough Before Rolling
Before you begin rolling, it’s essential to ensure the dough is in the right condition for this step. The dough should be cold, but not too firm, and should have completed its first rise.
- Chill the Dough: If the dough feels soft or sticky, chill it in the fridge for about 20-30 minutes before rolling. Cold dough is easier to handle and will prevent the butter from melting into the dough.
- Lightly Flour the Surface: Lightly flour your work surface to prevent the dough from sticking, but be careful not to use too much flour, as this can make the dough too dry.
- Roll Evenly: Aim for an even thickness across the dough, as this will ensure the layers remain uniform, which is essential for the final texture of your croissants.
2. Rolling the Dough into a Rectangle Shape
Once your dough is properly chilled, it’s time to begin rolling it out into a large rectangle. The shape of the dough is just as important as the thickness, as the evenness of the rectangle ensures a consistent layering process.
- Start from the Center: Begin rolling from the center of the dough, working your way out towards the edges. This helps keep the dough even and prevents the edges from becoming thinner than the middle.
- Roll in One Direction: Roll the dough out in one direction to maintain a uniform thickness. Avoid rolling back and forth, which can cause the dough to stretch unevenly.
- Maintain Consistency: Roll the dough into a rectangle that is about 1/2 inch thick (roughly 1.3 cm). Be sure to keep the edges straight and avoid stretching the dough as you roll it out.
3. Maintaining the Right Thickness
Achieving the right thickness for the dough is key to ensuring your croissants will rise and bake to perfection. If the dough is rolled too thin, the layers may become too delicate and collapse during baking. On the other hand, if the dough is rolled too thick, it could result in heavy, dense croissants.
- Use a Rolling Pin with Consistent Pressure: When rolling the dough, apply even pressure on the rolling pin to keep the thickness consistent throughout the entire dough. This ensures that the butter layers will be evenly distributed throughout.
- Check for Uniformity: Periodically check the thickness of the dough by gently lifting it or pressing it lightly with your fingers. The dough should be an even 1/2-inch thickness, and it should feel smooth and elastic.
- Maintain the Rectangle Shape: As you roll, make sure to keep the dough’s shape as a rectangle. This ensures the folds will create even layers and that the croissants will have the proper shape when finished.
4. Managing the Dough’s Elasticity
Croissant dough is very delicate and may resist rolling out evenly due to the elasticity of the gluten. If the dough springs back when you try to roll it, it may be too tense or warm.
- Rest the Dough If Needed: If the dough starts to shrink back as you roll it, don’t panic! Simply let it rest for 10–15 minutes in the fridge. This resting period allows the gluten to relax and makes it easier to roll the dough out to the proper thickness.
- Roll in Stages: If the dough feels too resistant to rolling, try rolling in stages. Roll it out slightly, then chill it, and repeat the process until you reach the desired thickness. This gradual approach will prevent the dough from over-stretching and will help achieve an even texture.
5. Rolling to the Right Dimensions for Croissants
Once the dough is rolled to the proper thickness, it’s time to shape it. The dimensions of the dough will play a significant role in shaping your croissants and ensuring they bake evenly.
- Rectangle Dimensions: After rolling, the dough should be a large rectangle, approximately 12 inches wide by 24 inches long (30 x 61 cm). These dimensions may vary depending on your recipe, but this general size allows you to cut the dough into the proper triangles for shaping the croissants.
- Trim the Edges: If necessary, trim any uneven edges of the dough to ensure you have clean lines. This makes it easier to cut the dough into neat triangles for croissant shaping and ensures a more polished end product.
6. Avoiding Common Rolling Mistakes
While rolling the dough seems straightforward, it’s easy to make some common mistakes that can affect the final croissant texture:
- Rolling Too Thin: Rolling the dough too thin can result in croissants that lack layers or texture. Stick to the recommended thickness (1/2 inch) for best results.
- Uneven Thickness: An unevenly rolled dough will lead to uneven layers and inconsistencies in the finished croissant. Keep your rolling pin movements smooth and even.
- Not Resting the Dough: If the dough becomes too warm or soft while rolling, the butter will start to melt, compromising the lamination process. Always chill the dough between rolls if necessary to keep the butter firm.
7. How Proper Rolling Affects the Croissant’s Texture
Rolling the dough properly is essential for creating croissants with the perfect texture. If done correctly, rolling ensures that the butter is evenly distributed, which leads to crispy, flaky layers when baked.
- Layers Formation: The rolling process helps distribute the butter between the layers of dough, creating pockets that puff up when baked. Proper thickness ensures that the layers are not too thin, preventing them from collapsing during baking.
- Even Rise: By maintaining even thickness throughout the dough, you ensure that the croissants will rise evenly, creating a more consistent texture and appearance.
8. Final Tips for Perfect Rolling
- Be Patient: Rolling dough takes time and attention. Don’t rush the process—take your time to ensure an even and consistent thickness.
- Keep Your Work Surface Clean: Periodically scrape any excess flour off your work surface to keep the dough from becoming too dry.
- Use the Right Tools: A good-quality rolling pin is important to ensure even pressure and smooth rolling. Some bakers prefer a marble rolling pin because it stays cool, but any rolling pin will do as long as it’s smooth and even.
The way you roll your dough directly affects the final texture and layering of your croissants. By following the correct process, paying attention to consistency, and maintaining the right thickness, you’ll be able to achieve perfectly flaky, golden croissants that are sure to impress!
Chilling the Dough: The Role of Chilling in Maintaining Layers
Chilling the dough is a crucial step in the process of making professional croissants, as it directly affects the development of the flaky layers and the overall texture of the finished product. The role of chilling goes beyond just cooling the dough; it is integral in creating the distinct, light, and airy layers that make croissants so irresistible. Here, we will explore the importance of chilling the dough and why this step is essential for the perfect croissant.
1. Preventing the Butter from Melting
One of the primary reasons for chilling the dough during the croissant-making process is to keep the butter firm. Butter plays a critical role in the lamination process, which involves layering the dough and butter repeatedly to create the characteristic flakiness of croissants. If the butter melts into the dough prematurely, the layers will not form correctly, resulting in dense, greasy croissants instead of the desired light, flaky texture.
- Butter Integrity: Chilling the dough helps maintain the integrity of the butter, ensuring that it remains cold and solid between layers of dough. This prevents the butter from being absorbed into the dough, allowing it to form the delicate layers that will puff up during baking.
- Even Lamination: When the dough is chilled, it’s easier to roll out and fold without the butter softening too much. This ensures that the layers of butter and dough remain separate, creating the distinct, delicate layers that make croissants light and airy.
2. Relaxing the Gluten
Croissant dough contains gluten, which gives the dough its structure and elasticity. However, too much tension in the dough can lead to difficulties when rolling it out or folding it. The process of chilling helps relax the gluten, making it more pliable and easier to work with. Without resting and chilling, the dough would become too tough to roll out evenly, which could affect the lamination process and result in less desirable texture in the final product.
- Relaxed Gluten for Easier Rolling: Resting the dough in the fridge for a short period helps to relieve any tension in the gluten network, making it easier to roll out without the dough springing back. This makes it easier to achieve a uniform thickness and consistent layers.
- Improved Texture: By allowing the dough to rest, the gluten has time to relax, which results in a dough that’s easier to shape, roll, and fold. This ultimately contributes to a tender, flaky texture after baking.
3. Maintaining the Right Dough Consistency
The consistency of croissant dough is critical for shaping and rolling. If the dough is too soft or sticky, it will be difficult to work with, and the butter may leak out, ruining the layers. Chilling the dough helps to keep it at the right consistency for handling, making it firmer and more manageable. Without proper chilling, the dough could become overly sticky, leading to uneven layers or poor final results.
- Firm but Not Hard: After each fold and roll, the dough should be firm, but not hard. If the dough becomes too soft or the butter starts to melt, chilling the dough between folds ensures it stays at the ideal consistency for further shaping and lamination.
- Preventing Sticking: Chilled dough is also easier to handle because it’s less likely to stick to your rolling pin or the work surface. It helps create smooth, even layers and ensures that you can roll the dough without tearing it.
4. Setting the Layers for Better Rise
The goal of croissant dough is to create distinct layers of dough and butter, and chilling the dough helps to set these layers before baking. As the dough chills, the butter stays solid and the layers become more defined, which results in better puffing and a more pronounced flakiness when baked.
- Even Distribution of Butter: When the dough is chilled, the butter stays in layers, rather than blending with the dough. This allows the croissants to rise properly in the oven and form crispy, airy layers.
- Ensuring a Good Rise: Chilling the dough helps the layers of butter and dough stay intact, allowing them to puff up evenly in the oven. The more evenly the layers are distributed, the better the croissants will rise, creating the signature flaky, golden texture.
5. Chilling After Each Fold for Consistency
It’s not just the initial chilling that matters; you’ll need to chill the dough between every fold to ensure proper lamination. After each series of folds, the dough should be returned to the fridge for at least 30–60 minutes. This resting period helps maintain the cold temperature of the dough and butter, ensuring that the butter doesn’t soften or melt during the folding process.
- Resting Between Folds: Chilling between folds allows the dough to relax and the butter to solidify, making it easier to roll and fold without the layers becoming disrupted. This also helps to maintain a consistent dough texture throughout the entire lamination process.
- Avoiding Butter Leakage: Chilling the dough helps ensure that the butter stays trapped inside each layer, preventing it from oozing out when the dough is rolled or folded. If the dough is not chilled enough, the butter may leak out, leading to greasy croissants with poor layers.
6. How Long to Chill the Dough
The amount of time required for chilling varies throughout the croissant-making process:
- After Initial Mixing and Kneading: Chill the dough for 30 minutes to 1 hour after the first kneading and before the first fold to help relax the dough and firm up the butter.
- Between Folds: After each fold and roll, rest the dough in the fridge for 30 to 60 minutes. This ensures the butter remains solid and that the dough can be rolled out smoothly without sticking.
- Final Rest Before Shaping: After the final fold, chill the dough for at least 30 minutes to allow the layers to firm up before cutting and shaping the croissants.
It’s important to note that while chilling the dough is essential for the right consistency and texture, over-chilling can also be a problem. If the dough is left in the fridge for too long, it can become too hard to roll, which may lead to cracks in the dough when you try to shape the croissants. Always ensure the dough is chilled enough to maintain its structure but still soft enough to roll and shape easily.
7. Chilling vs. Freezing: What’s the Difference?
In some cases, freezing the dough for a short period is recommended for even better results. Freezing can help to further preserve the integrity of the layers and provide even more definition to the layers when baked. However, freezing should only be done if you plan to shape and bake the croissants later. Freezing the dough overnight can actually help in creating a better rise and more distinct layers in some recipes.
- Freezing for Convenience: If you want to prepare croissant dough in advance, you can freeze it after the folding and chilling process. When you’re ready to bake, simply let the dough thaw in the fridge overnight. This helps maintain the structure of the dough and gives you more time for lamination without compromising quality.
8. The Importance of Temperature Control
Ultimately, temperature control is one of the most important aspects of making croissants. Ensuring that the dough and butter are kept at the right temperature throughout the process is key to achieving perfectly flaky layers.
- Keep Ingredients Cool: It’s essential to use cold butter, chilled dough, and even a cold rolling surface to prevent the butter from melting. Too much warmth will ruin the lamination process, leading to dense, greasy croissants.
- Work in a Cool Environment: Try to work in a cooler environment when making croissants, especially during warmer months. If your kitchen is warm, consider chilling the dough more frequently or using a chilled marble countertop to keep the dough cool.
By chilling the dough at the correct times during the croissant-making process, you help ensure that the layers of butter and dough stay intact, that the dough remains pliable and easy to roll, and that the croissants rise beautifully in the oven. This critical step is one of the key factors in making croissants that have the perfect texture—crispy on the outside, soft and airy on the inside.
Baking Tips for a Professional Croissant Recipe: The Final Step to Perfection

Shaping the Croissants: How to Shape Your Dough into Classic Croissant Forms
Shaping the croissants is a delicate and essential step that brings the dough to its signature form while ensuring it maintains its flaky layers and airy texture. The way you shape your croissants not only impacts their appearance but also influences how they bake and rise in the oven. When done correctly, the shaping process will yield beautiful, golden croissants with perfectly puffed layers. Here’s how to shape your dough into the classic croissant form and perfect your technique.
1. Roll Out the Dough to the Right Thickness
Before you start shaping, make sure that your dough is rolled out to the right thickness. The dough should be rolled out into a rectangular shape, about 1/8 inch thick (3-4 mm). A uniform thickness is essential for even lamination and puffing, and helps the croissants bake with consistent layers.
- Tip for Even Rolling: Use a rolling pin to gently roll out the dough, and be sure to rotate it slightly after every roll to ensure an even rectangle shape. If the dough is too thick, it might not puff as much; too thin, and the layers might collapse during baking.
- Chill if Needed: If the dough becomes too soft or sticky while rolling, return it to the fridge for a short rest (about 10-15 minutes) to firm up before continuing.
2. Cutting the Dough into Triangular Sections
Once your dough is rolled out to the right thickness, it’s time to cut it into triangles. Croissant dough is traditionally shaped into triangles for a reason—the triangle shape helps the dough expand into layers as it bakes, forming the classic croissant.
- How to Cut the Dough: Using a sharp knife or pizza cutter, cut the dough into triangular wedges. The size of the triangles will depend on how large you want your croissants to be. Typically, a base of about 3–4 inches (8–10 cm) for each triangle works well, but you can adjust based on your preference for smaller or larger croissants.
- Angle of the Triangle: Make sure the angles of the triangles are consistent, with the base being the widest part of the triangle, which will become the croissant’s edge. The pointed tip of the triangle will be rolled toward the center to form the shape.
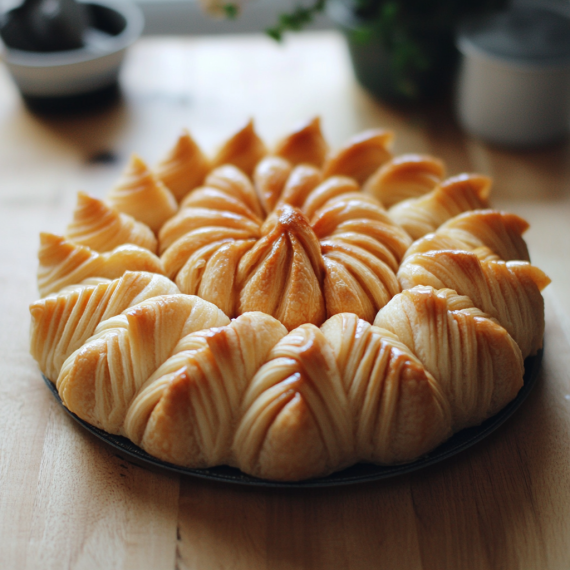
3. Adding a Twist of Creativity (Optional)
While the classic croissant is often rolled into a simple crescent shape, you can experiment with slightly different forms to give your croissants a bit of creativity. For example, pain au chocolat, a popular variation, can be made by placing a small piece of chocolate in the center of each triangle before rolling it up.
- Sweet and Savory Variations: If you want to try different fillings, you can add a variety of sweet fillings, like almond paste or fruit preserves, or savory fillings, such as cheese or ham, before rolling the dough. Just ensure that the filling doesn’t get too close to the edges to prevent it from oozing out during baking.
- Braided or Spiral Shapes: If you want to give your croissants a unique twist, consider shaping them into braids or spirals. For braids, divide the dough into strips and braid them before baking. For spiral shapes, cut the dough into rectangles and roll them into a spiral pattern.
4. Rolling the Dough into a Classic Croissant Shape
Now comes the critical step: rolling the dough into a crescent shape. This is what gives croissants their classic appearance, with the dough curled into a soft, golden curve after baking.
- How to Roll the Croissants: Take the base of each triangle and gently roll it toward the point of the triangle. As you roll, try to keep the dough tight enough to ensure the layers will puff up but not so tight that the dough feels constricted. The tip of the triangle should be tucked underneath the croissant to keep the shape secure during baking.
- Aligning the Rolls: As you roll each croissant, make sure to place it on the baking sheet with the seam side down to help hold the shape together while it bakes.
5. Shaping the Ends for the Perfect Crescent Curve
The final step to achieving the perfect crescent shape is to gently curve the ends of the croissant into a crescent moon shape. This gives the croissant its iconic appearance and helps to evenly bake the edges.
- How to Shape the Ends: After rolling each croissant, gently curve the ends of the dough towards the center. The dough should form a crescent shape, with the pointed ends curling towards the middle.
- Don’t Overdo It: Be careful not to over-curvature the croissants as this can lead to cracks in the dough or make it difficult for the layers to bake evenly. A slight curve is enough to give them their distinct shape without compromising the texture.
6. Resting the Croissants Before Baking
After shaping the croissants, it’s essential to give them time to rest and rise before baking. This resting period allows the dough to relax, which helps with the rise and contributes to a fluffier croissant with more defined layers.
- How Long to Rest: Let the shaped croissants rest on a baking sheet at room temperature for about 1–2 hours, or until they’ve doubled in size. If you’re not baking immediately, you can refrigerate them overnight for a slower rise. This extended rest helps with flavor development and improves the texture.
- Cover to Prevent Drying: If you’re resting the croissants for a while, cover them loosely with a clean towel or plastic wrap to prevent the dough from drying out while it rises.
7. Final Touch: Egg Wash Before Baking
Before baking, you can brush the croissants with an egg wash to give them a shiny, golden finish. This is especially important for creating that professional bakery look.
- How to Apply Egg Wash: Use a pastry brush to lightly brush the top of each croissant with a mixture of beaten egg and a small amount of water or milk. This will give the croissants a glossy sheen and help achieve a beautifully crisp crust.
- Optional Enhancements: You can also sprinkle a bit of sugar on top of the egg wash if you want a slight sweetness and added texture on the surface.
By following these steps to shape your croissants, you’ll be able to achieve the classic crescent form that is synonymous with this beloved pastry. Whether you choose to keep it traditional or experiment with unique shapes, the shaping process is key to creating perfect layers and ensuring that your croissants turn out flaky, golden, and irresistible.
Proofing the Croissants: How Long and at What Temperature to Proof Before Baking
Proofing, also known as the second rise, is a crucial step in making professional croissants. It allows the dough to fully expand and develop its delicate, flaky layers before baking. Proper proofing will ensure your croissants are light, airy, and have the perfect texture. Here’s a deeper look into the proofing process and how to get it just right.
1. Why Proofing Is Essential for Croissants
Proofing croissants is necessary for two main reasons: it allows the dough to rise and become airy and it helps the yeast develop the flavor. During this stage, the yeast ferments, producing carbon dioxide, which makes the dough rise. This fermentation also enhances the flavor profile of the croissant, giving it a slightly tangy taste that is characteristic of well-made croissants.
Without proper proofing, your croissants might be dense and lack the desired flakiness. Skipping or rushing through this step could result in flat, underbaked croissants that don’t have the characteristic layers or fluffiness.
2. The Right Time for Proofing
After you’ve shaped your croissants, the dough needs a final rise before baking. The duration of proofing will depend on various factors, such as room temperature, the size of your croissants, and the condition of your dough.
- Standard Proofing Time: Typically, croissants should proof for about 1 to 2 hours at room temperature. This gives the dough enough time to expand and rise, but it’s important to watch the dough carefully. The dough should double in size and feel soft to the touch when gently pressed.
- Over-proofing Risk: If you let the dough proof for too long, the yeast can exhaust its food supply and cause the dough to collapse or become overly slack. You’ll notice that the croissants won’t hold their shape during baking, leading to poor texture.
3. Proofing Temperature: The Sweet Spot for Perfect Croissants
The temperature at which you proof your croissants is critical. The optimal range for proofing is around 75-80°F (24-27°C), a comfortable room temperature that promotes the right yeast activity without causing overproofing. Warmer temperatures can speed up the process, but they may also lead to a less controlled rise.
- Room Temperature Proofing: If your kitchen is at a moderate temperature, proofing at room temperature is the most straightforward method. Place your shaped croissants on a lined baking sheet and cover them loosely with plastic wrap or a damp kitchen towel to keep the moisture in.
- Cold Proofing for Deeper Flavor: Alternatively, for a slower proofing process and more complex flavor development, you can proof your croissants in the fridge overnight. Cold proofing not only enhances the flavor but also makes the dough more manageable by slowing down the fermentation process. If you choose this method, let your croissants proof in the fridge for about 8–12 hours, then bring them to room temperature for about 30 minutes to 1 hour before baking.
4. Signs That Your Croissants Are Ready to Bake
It’s crucial to know when your croissants have finished proofing to ensure the best results. Here are the key indicators that your dough is ready for the oven:
- Doubling in Size: Your croissants should have visibly doubled in size and appear slightly puffed up. If you gently poke the dough with your finger, it should leave a slight indentation that doesn’t bounce back immediately.
- Soft and Pillowy Texture: The dough should feel soft, slightly airy, and a little wobbly to the touch. If it feels firm or resistant, it likely needs more time to proof.
- Smooth, Not Overly Sticky: The dough should not be overly sticky or tacky. If it sticks to your fingers, it may need a little more time to proof. However, if it starts to tear or deflate, it might be over-proofed.
5. How to Proof Croissants in a Warm Environment (If Needed)
If you’re making croissants in cooler environments or want to speed up the proofing process, you can create a warm proofing area. Here’s how:
- Use Your Oven’s Light: One popular method is to turn on your oven light, which provides a warm environment without turning on the oven itself. Place your croissants inside the oven with the door closed, allowing the warm, draft-free air to aid in the rise. Make sure the oven is off to avoid direct heat.
- Use a Proofing Box: For more precise temperature control, you can use a proofing box, which is a device that maintains consistent temperature and humidity levels, helping your dough rise evenly.
6. The Final Proofing Check: Ready to Bake!
Before you pop your croissants into the oven, double-check that they’ve reached their peak proofed state. If they’re ready, they will appear light, airy, and slightly wobbly, with distinct layers visible from the outside.
By giving your dough the time it needs to proof properly, you’ll set the stage for croissants that are golden brown on the outside and tender and flaky on the inside, just like those found in a professional bakery.
In conclusion, proofing is an essential part of making croissants that have the right texture and flavor. The time and temperature at which you proof your dough directly impacts the final outcome of your croissants. By giving your dough the right environment and attention, you’ll be able to bake flaky, buttery croissants with a perfect rise, every time.
Baking Tips: Optimal Temperature and Timing for Golden, Flaky Croissants
Baking is the final and arguably most critical step in creating professional-quality croissants. The perfect croissant has a golden-brown, crisp exterior with a soft, flaky interior, achieved by following precise baking techniques. Getting the temperature, timing, and even the placement of your croissants in the oven just right can make the difference between a croissant that’s okay and one that’s exceptional. Here’s how to perfect your baking process for crispy, flaky croissants every time.
1. Preheating the Oven: The Key to Perfect Croissants
Before you even think about placing your croissants in the oven, ensure that it’s fully preheated. This is crucial because an oven that’s too cool can cause the croissants to bake unevenly, resulting in less puff and more density. On the other hand, a properly preheated oven gives the croissants an initial burst of heat, causing the dough to rise quickly and form the delicate layers we’re aiming for.
- Optimal Temperature Range: Preheat your oven to 400°F (200°C). This temperature strikes a balance between getting a beautifully browned crust and ensuring the dough inside has enough time to cook through. For fan-assisted or convection ovens, you may want to lower the temperature to 375°F (190°C) to prevent overbaking.
- Preheat for a Full 15-20 Minutes: Allow the oven to preheat thoroughly for at least 15–20 minutes to reach the desired temperature. If you’re using a pizza stone or baking steel for an extra-crispy bottom, place it in the oven during the preheating process.
2. Baking Time: Finding the Sweet Spot
Once your oven is ready, the next step is getting the baking time right. The size of your croissants will influence the baking time, so keep an eye on them to avoid over- or under-baking. For the best results, focus on visual cues such as color and texture.
- Standard Baking Time: Generally, croissants will take between 15 to 20 minutes to bake, depending on their size. The dough should be fully puffed up, golden-brown on the outside, and crispy to the touch.
- Watch for Color: Around the 12-minute mark, start checking your croissants. They should be turning a deep golden-brown color. If they’re still too pale, give them a few extra minutes, but be careful not to let them over-bake, as this will dry out the layers.
3. Oven Positioning: The Right Placement for Even Baking
Where you place your croissants in the oven can make a noticeable difference in how evenly they bake. Heat distribution is key for getting an even rise and preventing over-browning on one side.
- Center Rack Placement: The middle rack of your oven is typically the best place to bake croissants. This allows the heat to circulate evenly around the dough and ensures the croissants get the right amount of heat without burning on top or the bottom.
- Avoid Crowding: While it might be tempting to bake a lot of croissants at once, try to avoid crowding them on the baking sheet. Each croissant needs space to expand, so give them enough room to breathe. A well-spaced croissant will puff up more evenly, forming distinct, flaky layers.
4. Using Steam for Extra Flakiness
Professional bakeries often use steam during the baking process to achieve the signature crisp, golden crust that’s so beloved in croissants. The steam helps to prevent the outer layer from hardening too quickly, allowing the dough to continue expanding during the initial baking phase, resulting in better puff.
- How to Add Steam: To introduce steam into the oven, you can place a small, oven-safe pan of water on the lower rack of the oven while it’s preheating. Alternatively, when you put the croissants in, quickly spray the oven walls with water using a spray bottle before closing the door. The moisture in the oven will create steam, encouraging the dough to rise and brown evenly.
- Steam Timing: Use steam only during the first 5-10 minutes of baking to give the croissants a good initial rise. After that, the steam isn’t needed, and you can bake the croissants normally.
5. Golden Finish: Achieving a Perfectly Glossy Top
For an extra-professional touch, brush your croissants with an egg wash just before baking. This will create a glossy, golden finish that’s visually appealing and gives the croissants that classic bakery look.
- How to Make Egg Wash: Combine one egg with 1 tablespoon of water or milk and whisk until smooth. Using a pastry brush, apply a thin, even layer of the egg wash over the top of each croissant. Be sure not to get any on the edges, as it can cause the dough to seal and prevent the layers from puffing up properly.
- Optional Glaze for Sweet Croissants: For sweet croissants or pain au chocolat, you can sprinkle a bit of sugar on top after applying the egg wash to create a sugary crust.
6. Cooling: Let Your Croissants Rest Before Enjoying
Once your croissants have achieved their golden-brown glory, it’s time to remove them from the oven. However, resist the urge to eat them immediately—croissants need a few minutes to cool so that the layers set properly.
- Allow for Cooling: Let the croissants cool for 10-15 minutes on a wire rack. This helps them maintain their crispy texture while the steam escapes, leaving the inside airy and soft.
- Avoid Over-Cooling: If you let your croissants sit too long, they can become stale, so be sure to enjoy them while they’re still warm, but not too hot to handle.
7. Troubleshooting Common Baking Issues
Even with the right temperature and time, there are a few common problems that can occur while baking croissants. Here’s how to troubleshoot:
- Croissants Are Too Flat: If your croissants come out flat instead of puffy, it could be due to insufficient proofing or too little steam. Double-check the proofing time and temperature before baking, and ensure you’re using steam at the beginning of the baking process.
- Croissants Are Over-Browned: If your croissants are browning too quickly on the outside but not baking through, try lowering the oven temperature slightly and covering the croissants loosely with aluminum foil halfway through the baking process.
- Croissants Are Dry: Dry croissants could be a result of overbaking. Make sure to keep a close eye on them and remove them from the oven as soon as they achieve the desired color.
In Conclusion: Baking Croissants to Perfection
Baking croissants requires a balance of precise temperature control, timing, and techniques. By preheating your oven to the right temperature, following the optimal baking time, and using steam and egg wash, you’ll create croissants with a golden-brown, crispy exterior and a soft, flaky interior. With these tips in mind, you’ll be able to bake professional-quality croissants in your own kitchen, impressing everyone with your culinary skills.
Finishing Touches: Brushing with Butter for a Beautiful, Glossy Finish
The finishing touches are what elevate your homemade croissants from good to great, and brushing with butter is a technique that adds both visual appeal and extra flavor. This step not only enhances the golden-brown color of your croissants but also creates a glossy, shiny exterior that makes them look like they’ve just come out of a professional bakery. Here’s how to perfect this final step and give your croissants that polished, mouthwatering look.
1. Why Butter? The Role of Butter in the Finishing Process
While most of the flavor from butter comes from the lamination process (the folding and layering of butter between dough), brushing your croissants with melted butter after baking adds a rich, buttery sheen to the final product. The butter forms a beautiful, smooth glaze on top, helping to lock in moisture and give your croissants that irresistibly glossy look.
- Flavor Enhancement: Butter brushed on after baking doesn’t just contribute to the visual appeal—it also deepens the rich, buttery flavor that’s synonymous with croissants. The buttery finish ties in seamlessly with the internal layers, giving the croissants an overall luxurious mouthfeel.
- Glossy and Shiny Appearance: Brushing butter after baking enhances the color contrast between the crispy exterior and the soft, flaky layers inside. The slight shine it gives the surface makes the croissants look even more inviting, tempting anyone who lays eyes on them.
2. Timing: When to Brush the Croissants with Butter
Timing is everything when it comes to brushing butter on your croissants. If you apply it at the wrong stage, it could either interfere with the texture of the dough or fail to achieve that perfect glossy finish. Here’s the best approach:
- After Baking: The ideal time to brush butter is right after you take the croissants out of the oven, while they are still hot. The warmth allows the butter to melt quickly and evenly, giving the croissants that shiny, golden finish.
- Wait for Cooling: However, don’t wait too long to apply the butter—while the croissants should have some time to cool, they should still be warm enough for the butter to melt into the surface. 5 minutes of cooling time should be sufficient to avoid burning your fingers and ensure a perfectly glossy top.
3. How to Apply the Butter: The Right Tools and Technique
To achieve the best results, the way you apply the butter matters. Here’s how to do it properly:
- Use Melted Butter: The butter should be melted but not overly hot. You can either microwave it in a bowl for 20-30 seconds or melt it in a small saucepan on low heat. Make sure the butter is fully liquid, as solid butter won’t spread evenly across the croissants.
- Brush with a Pastry Brush: A pastry brush is the best tool for this job, as it allows you to gently coat the croissants with a thin layer of butter. Use soft, even strokes to cover the top of each croissant. Be sure to brush the surface lightly and avoid overapplying, as too much butter can make the croissants greasy instead of shiny.
- Gentle, Even Coating: Focus on brushing the entire surface of each croissant, ensuring that every visible part gets a glossy finish. Pay attention to the edges and tips of the croissants to make them look more uniform.
4. Optional Enhancements for Extra Flavor
While melted butter on its own is delicious, there are some optional enhancements you can add for a touch of extra flavor or visual appeal:
- Honey or Maple Syrup: For an extra hint of sweetness, you can mix a bit of honey or maple syrup with the melted butter. This creates a subtle glaze that gives the croissants an even shinier, golden hue and adds complexity to the flavor.
- Salted Butter: If you prefer a sweet-savory contrast, use salted butter for brushing. The slight saltiness will balance out the sweetness of the croissant, creating a more well-rounded taste. This is especially delicious for croissants that will be served with savory fillings like ham and cheese.
- Sprinkle of Sugar: For an added sweet crunch, lightly sprinkle some granulated sugar on top of the buttered croissants. This gives the croissants a bit of sparkle and enhances their bakery-style appeal. It’s particularly great if you’re making almond croissants or chocolate croissants.
5. Alternative Finishing Techniques
While butter is the classic choice for a shiny finish, there are a few other options you can explore for different effects:
- Egg Wash with Butter: For a richer finish, you can apply an egg wash (a mixture of beaten egg and a little water or milk) before baking, and then brush the croissants with butter afterward for that glossy, buttery effect. The egg wash creates a firmer, more structured crust, while the butter ensures a glossy sheen.
- Butter and Milk Mixture: If you want a softer, less oily finish, you can mix milk with melted butter in a 1:1 ratio. This will give the croissants a light gloss without too much of a buttery sheen.
6. Enjoying the Croissants: The Final Reward
Once the butter has been brushed onto the croissants and they’ve had time to cool slightly, it’s time to enjoy the fruits of your labor. The butter not only enhances the croissants’ appearance but also makes them tender, moist, and delicious.
The moment you break into one of your freshly baked croissants, the buttery, flaky layers will melt in your mouth, and the beautiful golden-brown color will be a testament to your hard work and attention to detail. By adding this final buttery step, you’ll ensure that your croissants are as visually appealing as they are tasty.
In Conclusion: Brushing Butter for Perfection
Brushing your croissants with melted butter after baking is a simple but essential finishing touch that makes all the difference. It adds a glossy finish, enhances flavor, and elevates your croissants to bakery-quality perfection. With just a few extra minutes of effort, your croissants will look as though they came from a professional pastry chef, and taste just as incredible too.
Common Mistakes to Avoid in Your Professional Croissant Recipe
Under or Over Proofing: How to Identify and Fix Common Proofing Issues
Proofing is one of the most crucial steps in making croissants, as it directly impacts their rise, texture, and final structure. If croissants are under-proofed, they may turn out dense and lack the delicate, airy layers that make them so special. On the other hand, over-proofed croissants may collapse or lose their shape during baking, leading to disappointing results. Understanding how to identify and fix proofing issues will ensure that your croissants achieve the perfect flaky, golden, and airy consistency.
1. What Happens When Croissants Are Under-Proofed?
Under-proofing occurs when the dough hasn’t had enough time to rise before baking. Since croissants rely on both yeast fermentation and the expansion of butter layers, insufficient proofing leads to the following problems:
- Dense Texture – Instead of a light and airy interior, under-proofed croissants turn out compact and heavy.
- Poor Layer Definition – Because the dough hasn’t had enough time to expand, the laminated layers may not be as distinct.
- Limited Oven Spring – Croissants rise further in the oven due to steam and yeast activity, but without proper proofing, they won’t have enough internal gas to expand fully.
- Hard or Tough Exterior – The crust may become too thick or chewy instead of crisp and delicate.
✅ How to Fix Under-Proofing:
- Extend the proofing time – If your croissants haven’t doubled in size or don’t jiggle slightly when moved, they need more time. Let them sit at room temperature for another 30–60 minutes.
- Check for visual signs – Properly proofed croissants should be plump, slightly wobbly, and visibly expanded. If they still look dense, they need more time.
- Adjust room temperature – If your kitchen is too cold (below 75°F/24°C), proofing will take longer. Try placing the croissants in a warmer spot, like inside a turned-off oven with a bowl of warm water.
2. What Happens When Croissants Are Over-Proofed?
Over-proofing occurs when the croissants sit for too long, causing the yeast to overproduce gas. This can lead to:
- Collapsed Structure – The dough becomes too fragile, and instead of rising properly in the oven, it may collapse or deflate.
- Irregular or Blown-Out Layers – Too much fermentation can weaken the laminated layers, resulting in croissants that look misshapen or have uneven textures.
- Overly Large Air Pockets – Instead of delicate, even layers, over-proofed croissants may develop large, uneven holes.
- Weak Gluten Structure – The dough may feel too soft or sticky, making it hard to handle.
✅ How to Fix Over-Proofing:
- Perform the “Poke Test” – Gently press a finger into the dough. If the indentation doesn’t bounce back or deflates completely, it’s over-proofed.
- Reduce proofing time next time – If you notice over-proofing before baking, reduce the proofing time by 15–30 minutes for your next batch.
- Chill the croissants slightly – If they’re overly soft and difficult to handle, placing them in the refrigerator for 10–15 minutes can firm them up before baking.
- Avoid excessive heat during proofing – If you used a very warm proofing environment (above 85°F/29°C), reduce the temperature next time to prevent over-fermentation.
3. How to Tell When Croissants Are Perfectly Proofed
To avoid both under- and over-proofing, look for these key signs of a well-proofed croissant:
Visual Indicators:
- The croissants should have visibly expanded and look plump but still hold their defined shape.
- The layers should appear more pronounced, but not melted or blurred together.
The Jiggle Test:
- Lightly shake the tray—proofed croissants should wobble slightly but still maintain their shape. If they’re stiff, they need more time; if they collapse easily, they’re over-proofed.
The Finger Test:
- Gently press your finger into the dough. If it springs back slowly, they’re ready to bake.
- If the indentation stays deep, they’re over-proofed.
- If it immediately springs back, they’re under-proofed.
4. Preventing Proofing Mistakes in the Future
To ensure your croissants proof properly every time:
- Use a kitchen thermometer to maintain an optimal proofing temperature of 75–78°F (24–26°C).
- Monitor proofing time carefully—croissants usually take 2–3 hours at room temperature, but this can vary.
- Cover croissants lightly with plastic wrap or a damp towel to prevent drying out.
- Watch for changes in texture and shape rather than relying on a strict timeline.
By mastering the proofing process, you’ll achieve croissants with fluffy interiors, crisp flaky layers, and the perfect rise, making them truly professional quality!
Laminating Mistakes: Troubleshooting Uneven Layers or Dough Sticking
Laminating the dough is one of the most technical steps in making a professional croissant recipe. This process involves folding butter into the dough through a series of rolling and folding steps to create multiple thin layers of butter and dough. When done correctly, lamination results in the flaky, airy texture that defines a great croissant. However, if mistakes occur during lamination, the croissants may turn out dense, greasy, or uneven. Below, we’ll explore common lamination mistakes and how to fix them.
1. Uneven Layers: Why They Happen and How to Fix Them
Uneven layers can cause croissants to bake with irregular textures, poor rise, or inconsistent flakiness. Here’s why this happens:
❌ Common Causes of Uneven Layers:
- Butter is too cold or too hard – If the butter is too firm when laminating, it may break apart instead of rolling smoothly, leading to gaps in the layers.
- Butter is too warm or melted – Soft butter absorbs into the dough instead of forming distinct layers, resulting in a greasy, dense texture.
- Uneven rolling – If the dough is not rolled evenly, some areas will have thick butter patches while others lack butter, leading to inconsistent layers.
- Too much pressure while rolling – Pressing too hard can force the butter out of the dough, breaking the layers.
✅ How to Fix Uneven Layers:
- Ensure butter and dough are at the same temperature – The butter should be pliable but cold, around 55°F (13°C), so it rolls smoothly without breaking.
- Roll gently and evenly – Use steady, even pressure when rolling out the dough to avoid breaking or merging the layers.
- Let the dough rest if needed – If the dough resists rolling or shrinks back, let it rest in the fridge for 10–15 minutes before continuing.
- Trim edges after each fold – This ensures the layers remain clean and well-defined.
2. Dough Sticking: Why It Happens and How to Fix It
Dough that sticks to the surface or rolling pin can ruin the lamination process by tearing layers or pulling butter out of place.
❌ Common Causes of Dough Sticking:
- Dough is too warm – Heat softens the butter and dough, making it sticky and hard to handle.
- Not enough flour on the work surface – Without light dusting, the dough can stick and tear.
- Too much humidity in the environment – Moisture in the air can make the dough sticky and harder to work with.
✅ How to Fix Dough Sticking:
- Keep everything cold – If the dough starts sticking, chill it for 10–15 minutes before continuing. Work in a cool room (ideally below 72°F/22°C).
- Lightly dust with flour – Use a minimal amount of flour to prevent sticking without making the dough too dry. Brush off excess flour before folding.
- Use parchment paper – Rolling the dough between sheets of parchment helps prevent direct contact with the work surface.
- Roll in short intervals – If the dough starts to stick, stop and chill it before continuing to prevent tearing.
3. Butter Leaking Out During Rolling or Baking
One of the biggest lamination failures is when butter seeps out from the dough while rolling or baking. This leads to greasy croissants that lack layers and crispiness.
❌ Common Causes of Butter Leakage:
- Butter layer is too thick – If the butter block isn’t rolled evenly, some areas will have too much butter, which can melt and leak.
- Dough is rolled too thin – This can tear the butter layer, exposing it and causing it to melt out.
- Overhandling the dough – Excessive rolling or stretching can damage the layers, making it harder to trap the butter inside.
✅ How to Prevent Butter Leakage:
- Make sure butter and dough are evenly rolled – Both should be the same thickness to ensure smooth lamination.
- Chill between folds – Rest the dough in the refrigerator for at least 20–30 minutes between folds to keep the butter firm.
- Check for butter exposure – If you see butter peeking through, sprinkle a little flour over the exposed area and fold the dough over to seal it.
- Roll in one direction – Always roll from the center outward, keeping pressure even to prevent the butter from being pushed out.
4. Dough Tearing or Shrinking: What Causes It and How to Fix It
Laminated dough should be strong yet elastic, but sometimes it tears while rolling or shrinks back when folded.
❌ Common Causes of Dough Tearing or Shrinking:
- Over-kneading the dough – Too much gluten development makes the dough too tight and resistant to rolling.
- Not enough resting time – If the dough doesn’t rest between rolling, it will shrink back and fight against shaping.
- Rolling too aggressively – Applying too much force can cause the dough to stretch unevenly and tear.
✅ How to Fix Tearing or Shrinking:
- Allow the dough to relax – Let it rest in the fridge for 15–30 minutes before rolling again.
- Roll gently and evenly – Avoid overstretching the dough; use smooth, even movements with the rolling pin.
- Limit handling – The more you touch the dough, the more it warms up, making it harder to roll properly.
5. How to Ensure Perfect Lamination Every Time
To achieve flawless layers and professional-quality croissants, follow these best practices:
Use high-quality butter – European-style butter (82% fat or higher) creates the best lamination.
Keep everything cold – Refrigerate the dough between every step to prevent butter from melting.
Use gentle, consistent pressure – Avoid pressing too hard while rolling to maintain distinct layers.
Work quickly – The longer the dough stays out, the higher the risk of butter melting or absorbing into the dough.
Monitor the environment – If your kitchen is warm, work in small batches and chill the dough frequently.
By troubleshooting these lamination mistakes, you’ll create croissants with light, airy layers, a crisp exterior, and a buttery, flaky texture—just like those from a professional bakery!
Baking Issues: What to Do If Your Croissants Don’t Rise or Brown Properly
Baking is the final and most crucial step in achieving the perfect professional croissant recipe. After hours of careful preparation, lamination, and proofing, croissants should emerge from the oven with a golden, flaky crust, airy layers, and a light, buttery texture. However, if they turn out flat, pale, or overly dense, something may have gone wrong during the baking process.
In this section, we’ll explore common baking issues and how to fix them to ensure your croissants bake beautifully every time.
1. Croissants Didn’t Rise Properly: Why It Happens and How to Fix It
A well-proofed croissant should puff up significantly in the oven, creating an airy interior with distinct layers. If your croissants turn out flat, dense, or heavy, it’s likely due to an issue with yeast activity, proofing, or oven temperature.
❌ Common Causes of Poor Rising:
- Under-proofing – If croissants haven’t proofed long enough, they won’t have enough air pockets to expand during baking.
- Yeast is inactive – Old or improperly stored yeast may not be strong enough to create a good rise.
- Dough was overworked – Too much kneading can develop excessive gluten, making the dough too tight to expand properly.
- Oven wasn’t hot enough – If the oven temperature is too low, croissants won’t get the strong initial burst of heat (oven spring) needed for rising.
✅ How to Fix It:
- Make sure your croissants proof fully – They should be visibly puffy and slightly jiggly when gently shaken. A well-proofed croissant should take about 2–3 hours at 75–80°F (24–27°C).
- Test your yeast before using it – If in doubt, mix a teaspoon of yeast with warm water and sugar. If it doesn’t foam up in 5–10 minutes, it’s too weak.
- Check oven temperature accuracy – Use an oven thermometer to ensure your oven reaches the correct baking temperature (typically 375–400°F / 190–200°C).
- Let dough rest if it feels too tight – If rolling the dough is difficult, allow it to rest in the fridge for 10–15 minutes to relax the gluten.
2. Croissants Are Pale and Don’t Brown: Causes and Solutions
A properly baked croissant should have a deep golden-brown color, with a crisp, flaky crust. If your croissants come out pale, soft, or doughy-looking, there may be an issue with your egg wash, oven settings, or baking time.
❌ Common Causes of Pale Croissants:
- Oven temperature is too low – Without enough heat, croissants won’t develop a golden crust.
- Egg wash wasn’t applied correctly – An uneven or missing egg wash can result in spotty browning or pale croissants.
- Too much moisture in the oven – High humidity (or improper venting) can prevent proper browning.
- Baking time was too short – Croissants need at least 18–22 minutes to fully brown and develop a crisp crust.
✅ How to Fix It:
- Increase oven temperature slightly – If croissants are taking too long to brown, raise the oven temperature by 10–15°F (5–8°C).
- Use a proper egg wash – Whisk one egg yolk with a tablespoon of milk or cream, then brush evenly over the croissants before baking.
- Ensure proper airflow in the oven – If using a convection oven, ensure the fan is circulating hot air evenly. For conventional ovens, avoid overcrowding the baking tray.
- Bake croissants fully – If they still look pale after 18 minutes, leave them in for 2–4 more minutes, checking frequently.
3. Croissants Are Browning Too Quickly or Burning
On the flip side, croissants that brown too fast or burn before fully baking can be a result of high oven temperatures, incorrect rack placement, or too much sugar in the dough.
❌ Common Causes of Over-Browning or Burning:
- Oven is too hot – If your croissants are browning in under 10 minutes, your oven is likely too hot.
- Too much sugar in the dough – Excess sugar causes croissants to caramelize too fast and burn.
- Croissants were placed too high in the oven – Heat rises, and croissants placed on the top rack may brown too quickly.
✅ How to Fix It:
- Lower oven temperature by 15–25°F (7–12°C) – If your croissants brown too quickly, reduce the temperature to 360°F (182°C) and extend baking time slightly.
- Place croissants on the middle or lower rack – This helps them bake more evenly without burning the tops.
- Use a foil tent – If croissants are browning too fast but aren’t fully baked inside, loosely cover them with aluminum foil for the last 5–7 minutes of baking.
4. Croissants Have a Soggy or Doughy Interior
Croissants should have a light, airy crumb with well-defined layers. If the inside is dense, wet, or doughy, it may be due to undercooking, improper proofing, or butter melting into the dough.
❌ Common Causes of Soggy Croissants:
- Under-baking – Taking croissants out too soon leaves the interior doughy.
- Over-proofing – If proofed too long, croissants can collapse and turn out dense inside.
- Butter leaked out during baking – If the lamination failed and butter seeped out, the croissants will bake up greasy instead of flaky.
✅ How to Fix It:
- Bake longer if needed – If the tops brown too fast but the inside is still raw, lower the temperature slightly and bake for 5–7 more minutes.
- Check proofing time – Aim for 2–3 hours of proofing at 75–80°F (24–27°C). If proofed too long, the dough may collapse.
- Ensure proper lamination – If butter leaked out during baking, revisit the lamination process to ensure the layers remain intact.
Final Tips for Baking Perfect Croissants
To ensure your croissants bake perfectly every time, follow these final pro tips:
✅ Use an oven thermometer – Home ovens often have inaccurate temperature readings. A separate oven thermometer ensures precision.
Proof at the right temperature – Ideal proofing conditions are 75–80°F (24–27°C) with moderate humidity.
Apply egg wash evenly – Brush gently and avoid dripping onto the edges, as this can seal layers and prevent proper rise.
Test for doneness – A fully baked croissant should be golden brown, crispy, and sound hollow when tapped on the bottom.
By troubleshooting these common baking issues, you’ll achieve beautifully risen, golden, and flaky croissants that look and taste like they came straight from a professional bakery! 🥐✨
Storage Tips: How to Store Your Croissants to Maintain Freshness
Freshly baked croissants are best enjoyed right out of the oven, with their crisp, flaky exterior and soft, buttery layers inside. However, if you need to store them for later, it’s important to use the right storage methods to preserve their texture, flavor, and freshness. Croissants can lose their crispness quickly due to moisture absorption, so the key is to protect them from air exposure while avoiding excessive humidity.
In this section, we’ll cover the best ways to store croissants for short-term and long-term freshness, whether at room temperature, in the fridge, or in the freezer.
1. Storing Croissants at Room Temperature (Short-Term Storage – 1 to 2 Days)
If you plan to eat your croissants within a day or two, the best way to store them is at room temperature in a way that maintains their crispiness and prevents them from going stale too quickly.
✅ How to Store at Room Temperature:
- Let them cool completely – Storing warm croissants will cause condensation, making them soggy. Always let them cool for at least 30–60 minutes before storing.
- Wrap them loosely in parchment paper or a paper bag – Avoid plastic wrap or airtight containers, as they trap moisture and make croissants soft instead of crisp.
- Keep them in a dry place – Store them in a breadbox or a cool, dry kitchen counter, away from direct sunlight and heat sources.
❌ What to Avoid:
- Storing in a plastic bag or airtight container (this traps moisture and makes them soggy).
- Leaving them completely uncovered (they will dry out quickly and become stale).
- Placing them near the stove or in a humid environment (which affects texture).
2. Storing Croissants in the Fridge (Medium-Term Storage – Up to 1 Week)
While refrigeration is not ideal for croissants, it can help preserve their freshness for up to a week. However, refrigeration can dry them out, so proper wrapping is essential.
✅ How to Store in the Fridge:
- Wrap croissants in plastic wrap or foil – This prevents them from drying out too quickly.
- Place them in an airtight container – To reduce exposure to air and odors from other foods in the fridge.
- Warm them up properly before eating – Since refrigeration makes croissants slightly dry, reheating helps restore their flaky texture.
❌ What to Avoid:
- Storing croissants in the fridge without wrapping them, as this leads to rapid drying.
- Expecting them to stay crispy straight from the fridge—they must be reheated to regain their texture.
3. Freezing Croissants (Best for Long-Term Storage – Up to 2 Months)
If you want to preserve croissants for longer, freezing is the best option. When done correctly, frozen croissants retain their texture and flavor and can be easily reheated when needed.
✅ How to Freeze Croissants Properly:
- Allow them to cool completely – Never freeze warm croissants, as condensation will form and create ice crystals.
- Wrap each croissant individually – Use plastic wrap or aluminum foil to prevent freezer burn.
- Place wrapped croissants in a freezer bag – Squeeze out excess air and seal tightly. Label with the date.
- Freeze for up to 2 months – For best quality, consume croissants within this timeframe.
❌ What to Avoid:
- Freezing croissants without wrapping them properly (this leads to freezer burn and dryness).
- Keeping croissants in the freezer for longer than 2 months, as their texture may degrade.
4. How to Reheat Croissants for the Best Texture
Whether stored at room temperature, in the fridge, or frozen, croissants need proper reheating to regain their fresh-baked crispness and flakiness.
🔥 Best Reheating Methods:
1 For Room-Temperature Croissants:
- Preheat the oven to 325°F (160°C).
- Place croissants on a baking sheet and heat for 5–7 minutes until warm and crispy.
2 For Refrigerated Croissants:
- Preheat the oven to 325°F (160°C).
- Wrap croissants loosely in foil and heat for 8–10 minutes.
- Remove foil for the last 2 minutes to crisp up the exterior.
3 For Frozen Croissants:
- Preheat the oven to 350°F (175°C).
- Place frozen croissants directly on a baking sheet (no need to thaw).
- Bake for 12–15 minutes until warmed through and flaky.
❌ What to Avoid When Reheating:
- Microwaving croissants (this makes them soft and chewy instead of crisp).
- Overheating at high temperatures (this can dry them out or burn the edges).
- Skipping the reheating process (cold croissants will taste stale and dense).
Final Tips for Keeping Croissants Fresh
To enjoy bakery-quality croissants at home, follow these simple tips:
Consume croissants fresh whenever possible – They taste best on the same day they are baked.
Use proper wrapping techniques – Avoid plastic for short-term storage but use airtight methods for longer storage.
Freeze if needed – Croissants freeze well and reheat beautifully when stored correctly.
Always reheat before eating – This brings back the crispy, flaky layers and buttery aroma.
By following these storage and reheating methods, you can keep your croissants fresh, flaky, and delicious for days—or even weeks—after baking! 🥐✨
Conclusion
Mastering a professional croissant recipe at home may take patience and practice, but the reward is flaky, buttery, and golden croissants that rival those from a French bakery. By carefully selecting high-quality ingredients, following precise techniques like lamination and proper proofing, and paying attention to details such as resting time and oven temperature, you can achieve perfectly crisp and airy croissants every time.
If you’re looking for a simpler version to get started, check out our Easy Croissant Recipe: A Step-by-Step Guide for Perfect Results and start baking your way to delicious croissants!
Remember, croissant-making is an art and a science. Mistakes like under-proofing, improper lamination, or incorrect baking temperatures can affect the final result, but with troubleshooting tips and practice, you’ll continue to improve. Don’t be discouraged by small imperfections—each batch will get better as you refine your technique.
Once your croissants are baked to perfection, be sure to store them properly to maintain their freshness and crispness, whether at room temperature, in the fridge, or frozen for later enjoyment. And, of course, don’t forget to savor them warm, with a cup of coffee or hot chocolate, for the ultimate indulgence.
Now that you have all the knowledge to create bakery-quality croissants at home, it’s time to roll up your sleeves and start baking! 🥐✨ Happy baking!