
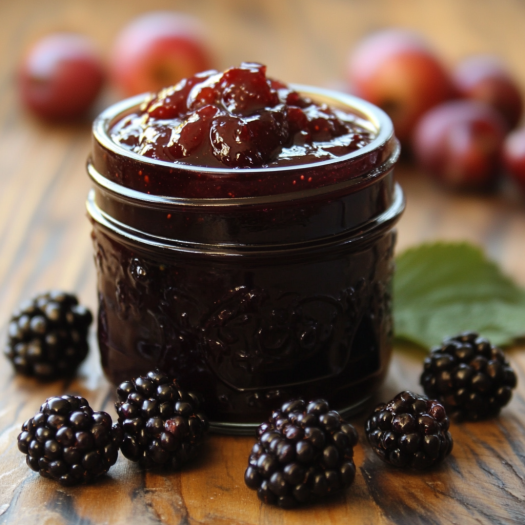
There’s nothing quite like the rich, fruity flavor of homemade blackberry jam. Whether spread over warm toast, swirled into yogurt, or used as a filling for pastries, this sweet and tangy preserve is a must-have in any kitchen. Unlike store-bought versions, making your own blackberry jam means you can control the ingredients, skip artificial preservatives, and enjoy a fresher, more flavorful spread.
In this guide, we’ll walk you through how to make homemade blackberry jam with a simple and delicious recipe. You’ll learn about the best ingredients, essential tools, and step-by-step instructions to ensure perfect results every time. Plus, we’ll share tips on storing blackberry jam and creative ways to use it beyond just breakfast.
Ready to make the best blackberry jam at home? Let’s get started!
Why Homemade Blackberry Jam is the Best Choice
Health Benefits of Blackberry Jam – No Preservatives, Fresh Ingredients
No Artificial Preservatives or Additives
Store-bought jams often contain preservatives like potassium sorbate to extend shelf life. These chemicals can alter taste and texture. Homemade blackberry jam is free from additives, ensuring a natural, fresh flavor without unnecessary chemicals.
Packed with Nutrients
Blackberries are rich in vitamin C, fiber, and antioxidants. These nutrients boost immunity, support digestion, and fight inflammation. Using fresh blackberries in your jam helps retain these health benefits, unlike processed versions that may lose nutrients during manufacturing.
Control Over Sugar Content
Many commercial jams contain high-fructose corn syrup or excessive refined sugar. Making jam at home lets you adjust sweetness and use healthier alternatives like honey or maple syrup. You can also create low-sugar or sugar-free versions, making it a better option for a balanced diet.
Better for Digestion
Some jams rely on pectin-based thickeners, which may require added sugar. If you make homemade blackberry jam without pectin, it retains more natural fiber and enzymes, supporting gut health. The natural pectin in blackberries also helps achieve the perfect jam consistency.
No Artificial Colors or Flavors
Many store-bought jams contain synthetic coloring and flavor enhancers to maintain uniformity. With homemade blackberry jam, you get a naturally rich, vibrant color and deep fruit flavor without artificial ingredients. The freshness of the berries provides all the taste you need.
Final Thoughts
Making your own blackberry jam ensures you’re eating a healthier, more nutritious spread. With fresh ingredients and no preservatives, it’s a simple way to enjoy the real taste of blackberries while avoiding processed additives. Plus, you can customize it to fit your dietary needs!
Cost Savings with Homemade Blackberry Jam – More Affordable Than Store-Bought
Making homemade blackberry jam isn’t just about better flavor and quality—it’s also a smart way to save money. Store-bought jams can be pricey, especially if you’re buying premium, organic, or artisanal brands. By making it at home, you can cut costs while enjoying a fresher, healthier product. Here’s how:
1. Lower Cost of Ingredients
When you buy blackberry jam from the store, you’re not just paying for the ingredients—you’re also covering packaging, branding, transportation, and retailer markups. Instead of spending $5 to $10 per jar, you can make homemade blackberry jam for a fraction of the cost using fresh or frozen blackberries, sugar, and lemon juice.
2. Buy in Bulk & Save
Purchasing blackberries in bulk—especially during peak season—can significantly reduce the cost per batch. Farmer’s markets, local fruit stands, or pick-your-own farms often offer better deals than grocery stores. If fresh blackberries are expensive, frozen ones work just as well and are often available at a lower price.
3. Avoid Paying for Unnecessary Additives
Many store-bought jams include preservatives, stabilizers, and artificial flavors. Not only do these reduce the natural quality of the jam, but they also increase the price. When you make jam at home, you’re paying only for real ingredients, skipping the unnecessary extras.
4. Make Large Batches & Store for Later
Homemade jam has a long shelf life when properly stored. By making a large batch and canning it, you create multiple jars for the cost of one or two store-bought jars. This means you’ll have a stockpile of fresh jam ready to enjoy without having to buy more later.
5. Reduce Waste & Repurpose Ingredients
When making homemade blackberry jam, you can use imperfect or overripe berries, which might otherwise go to waste. Grocery stores discard fruit that doesn’t look perfect, but you can turn those slightly soft or bruised blackberries into a delicious jam. This saves money while reducing food waste.
6. Reuse Jars & Packaging
Another hidden cost in store-bought jams is packaging. By reusing glass jars from previous jams or other kitchen items, you eliminate the need to purchase new containers. Many people also opt for canning and preserving, which allows them to store jam for months without buying extra supplies.
Final Thoughts
Homemade blackberry jam is a cost-effective and rewarding way to enjoy a delicious, preservative-free spread. By using affordable ingredients, buying in bulk, and making larger batches, you can cut costs significantly while ensuring a healthier and tastier product. Plus, you get to customize flavors and avoid unnecessary additives—all while saving money!
Rich Flavor of Homemade Blackberry Jam – Fresher and More Natural Taste
One of the biggest advantages of making homemade blackberry jam is the rich, authentic flavor you get compared to store-bought versions. When you use fresh blackberries, you experience the true essence of the fruit without artificial flavors, preservatives, or excessive sugars dulling the taste. Here’s why homemade jam offers a superior flavor:
1. Made with Fresh, High-Quality Ingredients
Homemade blackberry jam is crafted with real, ripe blackberries, ensuring a bold, fruity taste. Unlike commercial jams, which may contain concentrated fruit purees, artificial flavors, or fillers, homemade versions rely on the natural sweetness and tartness of fresh berries. This results in a vibrant, well-balanced flavor that’s both rich and refreshing.
2. No Artificial Preservatives or Flavors
Many store-bought jams include preservatives, stabilizers, and artificial flavor enhancers to maintain consistency and extend shelf life. These additives can sometimes create an overly sweet, processed taste. Homemade jam, on the other hand, keeps it simple—just fruit, sugar, and natural thickening agents—allowing the real blackberry flavor to shine.
3. Control Over Sweetness & Ingredients
Most commercial jams are loaded with high-fructose corn syrup or excessive refined sugar, which can overpower the natural taste of blackberries. When making your own jam, you can:
- Adjust the sweetness to suit your preference.
- Use natural sweeteners like honey, maple syrup, or coconut sugar.
- Make a low-sugar or sugar-free version for a healthier alternative.
This customization ensures that the true fruit flavor remains the star of the jam rather than being masked by artificial sweetness.
4. A More Intense & Fresh Fruit Taste
Since homemade blackberry jam is often made in small batches, it retains more of the natural fruit essence. Large-scale jam production requires heating at high temperatures for long periods, which can diminish the natural taste and aroma of the fruit. Homemade jam, however, allows you to cook the fruit gently, preserving its deep, rich flavor and vibrant color.
5. Enhanced Texture & Consistency
Store-bought jams are often uniform in texture, sometimes overly smooth due to processing. With homemade jam, you get to control the consistency:
- Leave small chunks of fruit for a rustic, textured feel.
- Blend it smooth for a silky, spreadable jam.
- Adjust the thickness to your liking by modifying cooking time or adding natural pectin.
This ability to personalize the texture adds to the overall homemade experience, making each bite more enjoyable.
Final Thoughts
Homemade blackberry jam provides a superior, fresher taste compared to store-bought alternatives. By using real fruit, skipping artificial ingredients, and controlling sweetness, you get a jam that is bursting with authentic blackberry flavor. Whether spread on toast, swirled into yogurt, or paired with cheese, homemade jam elevates any dish with its rich, natural taste.
Essential Ingredients and Tools for Making Blackberry Jam
Must-Have Ingredients for the Perfect Blackberry Jam
To create the perfect blackberry jam, selecting the right ingredients is crucial for achieving the ideal flavor and texture. While the ingredients are simple, each one plays a vital role. Here’s a breakdown of the must-have ingredients for a perfect batch of blackberry jam:
1. Fresh Blackberries
The key ingredient, fresh blackberries, should be ripe and sweet for the best flavor. Opt for plump, dark-colored berries to ensure a balance of sweetness and tartness. If fresh berries aren’t available, frozen blackberries work as a great alternative.
2. Granulated Sugar
Sugar is essential for balancing the tartness of the blackberries. It acts as a preservative and helps your jam set. Granulated sugar is commonly used, but you can substitute it with natural sweeteners like honey or maple syrup, though they may slightly alter the flavor and texture.
3. Lemon Juice
Lemon juice not only adds a tangy flavor but also helps activate pectin in the fruit, ensuring the jam sets properly. It’s essential for achieving the right consistency and enhancing the flavor profile of your jam.
4. Pectin
Pectin is a natural thickening agent found in fruits. Since blackberries contain lower pectin, you’ll likely need to add commercial pectin to help the jam thicken. Liquid or powdered pectin is used, depending on your preference, to achieve the perfect consistency.
5. Butter (Optional)
Adding a small amount of unsalted butter towards the end of the cooking process helps create a smooth, glossy finish. It also reduces foam and enhances the overall texture of your jam, making it velvety.
Final Thoughts
Using these key ingredients—fresh blackberries, granulated sugar, lemon juice, pectin, and optional butter—ensures your blackberry jam turns out with the perfect balance of sweetness, texture, and flavor. These components work together to create a jam that is rich, smooth, and absolutely delicious.
Tools You Need to Make Blackberry Jam at Home
Making homemade blackberry jam requires a few essential tools to ensure the process goes smoothly and the result is perfect. Having the right equipment makes all the difference in achieving a jam with the ideal consistency, flavor, and shelf life. Below are the key tools you need to make delicious blackberry jam at home:
1. Large Heavy-Bottomed Pot
A large heavy-bottomed pot is essential for even heat distribution while cooking your blackberry jam. The thick base helps prevent burning or scorching the sugar and fruit, which is common in thinner pans. A wide, heavy pot also allows the jam to cook down evenly, ensuring that the mixture thickens properly without sticking to the bottom. It’s best to use a pot with high sides to avoid any spills during the cooking process, especially when it begins to bubble.
2. Wooden Spoon or Silicone Spatula
A wooden spoon or silicone spatula is essential for stirring the jam as it cooks. A wooden spoon is particularly useful because it won’t conduct heat, allowing you to handle it safely, and it’s gentle on the pot. Stirring regularly ensures that the fruit breaks down properly and the sugar dissolves evenly. A silicone spatula is also helpful, especially for scraping any jam off the sides of the pot, ensuring no waste.
3. Jar Lifter or Tongs
When it comes to preserving your homemade blackberry jam, you’ll need to sterilize your jars. After cooking the jam, the hot jars need to be handled carefully to avoid burns. A jar lifter or tongs is a tool designed specifically for this purpose, allowing you to safely lift hot jars in and out of the boiling water. Using a jar lifter also helps to prevent cracking or damage to the glass jars during the canning process.
4. Canning Jars with Lids
Canning jars are the ideal containers for storing blackberry jam because they are designed to create a vacuum seal during the canning process. Mason jars are the most popular choice for jam-making. They come in various sizes, but the half-pint or pint-sized jars are typically used for jam. It’s crucial to use new lids each time you can jam to ensure a proper seal and prevent contamination.
5. Ladle or Funnel
A ladle or funnel is necessary for transferring the hot jam into the jars. This tool helps you avoid spills while keeping the jars clean and free from jam residue that could interfere with the sealing process. A funnel with a wide opening will ensure that the jam flows easily from the pot to the jar without making a mess.
6. Candy or Jam Thermometer
A candy or jam thermometer is essential for making sure your jam reaches the right temperature to set properly. Jam typically needs to cook to about 220°F (104°C), the point at which it will begin to gel. A thermometer ensures you’re cooking the jam to the correct temperature and prevents it from being undercooked or overcooked.
7. Clean Towels or Cloths
Having a few clean towels or cloths on hand is useful for wiping down the rim of the jars after filling them with jam. Any jam residue on the rim can prevent the lid from sealing properly. Keeping towels nearby is also handy for cleaning up any spills or drips as you work.
8. Pressure Canner (Optional)
If you plan to make large batches of jam or want to store your jam for extended periods, you may want to invest in a pressure canner. A pressure canner allows you to safely preserve the jam in airtight jars, ensuring a long shelf life. However, this is optional for beginners, and you can start with water-bath canning if you’re new to the process.
Final Thoughts
Having the right tools is key to making homemade blackberry jam. A large pot, wooden spoon, jar lifter, and canning jars are the main essentials you’ll need for the job. If you’re aiming for the most efficient and safe process, using a thermometer and ladle can help you achieve the perfect texture and consistency for your jam. By ensuring you have the proper tools, you’ll be on your way to making delicious, high-quality homemade jam in no time.
Optional Additions for Unique Blackberry Jam Flavors
While the classic blackberry jam recipe is simple and delicious on its own, you can easily experiment with optional additions to create unique, customized flavors that add a personal twist to your jam. Whether you’re looking for a tangy, spicy, or aromatic kick, these additions can transform your homemade blackberry jam into something truly special. Here are some ideas to try:
1. Citrus Zest (Lemon, Orange, or Lime)
Adding citrus zest is a great way to elevate the flavor of your blackberry jam. The bright, fresh notes of lemon, orange, or lime zest will complement the sweetness of the blackberries and add a refreshing twist. Zest is often preferred over juice in jam-making because it infuses the jam with a stronger citrus aroma without thinning the consistency. You can experiment with one or a combination of these zests to find your perfect citrus blend.
2. Spices (Cinnamon, Cloves, or Ginger)
For those who enjoy a little warmth in their jam, adding spices like cinnamon, cloves, or ginger can enhance the depth of flavor. A small stick of cinnamon, a pinch of ground cloves, or freshly grated ginger can infuse your blackberry jam with cozy, aromatic notes. Spices like these are particularly great if you want to create a fall-inspired blackberry jam that pairs perfectly with toast or as a topping for desserts like pies and cakes.
3. Vanilla Bean or Extract
Vanilla is another excellent option to enhance the sweetness and complexity of your blackberry jam. Adding a vanilla bean (split and scraped) or a few drops of vanilla extract can give your jam a rich, smooth flavor that balances out the tartness of the berries. Vanilla pairs wonderfully with blackberries, creating a more luxurious jam that’s perfect for spreading on pastries or using in desserts.
4. Herbs (Mint, Basil, or Lavender)
For an unexpected, herbaceous twist, try incorporating fresh herbs like mint, basil, or lavender into your blackberry jam. Mint can give your jam a refreshing, cooling sensation, while basil adds a savory, peppery element that contrasts nicely with the sweetness of the blackberries. Lavender introduces a gentle, floral fragrance, perfect for those looking for a gourmet-style jam. Be careful to use herbs sparingly, as their flavor can be quite potent.
5. Alcohol (Rum, Brandy, or Wine)
To create a grown-up version of your blackberry jam, you can experiment with adding a splash of alcohol such as rum, brandy, or wine. Rum adds a tropical, slightly caramelized note, while brandy deepens the jam’s flavor with hints of oak and spice. Red wine pairs wonderfully with berries and enhances their richness. Just be sure to cook the jam long enough for the alcohol to evaporate, leaving only the subtle flavors behind.
6. Sweeteners (Honey, Maple Syrup, or Agave)
Instead of traditional granulated sugar, you can opt for natural sweeteners like honey, maple syrup, or agave syrup to add a distinct flavor to your blackberry jam. Honey can introduce a floral sweetness, while maple syrup adds a woodsy richness that pairs perfectly with berries. Agave syrup is a great alternative for a low-glycemic option, offering a milder sweetness that lets the blackberry flavor shine through.
7. Balsamic Vinegar (for a Tangy Twist)
For a sophisticated, savory-sweet combination, try adding a splash of balsamic vinegar to your jam. This addition creates a complex flavor profile with both tangy and slightly sweet notes that bring out the richness of the blackberries. It’s a great choice for those who want a gourmet blackberry jam that pairs beautifully with cheese boards, meats, or roasted vegetables.
8. Nutmeg or Allspice
If you enjoy warm, spicy undertones, adding a dash of nutmeg or allspice can give your blackberry jam a subtle warmth that complements its natural sweetness. Nutmeg offers a slightly sweet and aromatic flavor, while allspice brings a hint of cloves, cinnamon, and nutmeg all in one. Both spices work wonderfully when added in small amounts to avoid overwhelming the jam’s berry flavor.
Final Thoughts
The beauty of homemade blackberry jam lies in its versatility. By incorporating optional additions like citrus zest, spices, herbs, or even a splash of alcohol, you can create a truly unique jam tailored to your tastes. These additions allow you to experiment and discover new flavor combinations that turn your simple blackberry jam into a gourmet treat. Whether you prefer it spicy, sweet, or aromatic, there’s no limit to the possibilities when it comes to customizing your homemade jam.
For a detailed and trusted recipe on making homemade blackberry jam, check out this easy guide on AllRecipes. It’s a great way to get started with a simple, delicious version of blackberry jam! Click here to view the recipe.
Step-by-Step Guide to Making Blackberry Jam
Preparing the Blackberries for Jam Making
Before you can make your homemade blackberry jam, it’s essential to properly prepare the blackberries. Proper preparation ensures that the berries are clean, free from debris, and ready to yield the best flavor and texture in your jam. Here’s a step-by-step guide on how to prepare your blackberries for the jam-making process:
1. Wash the Blackberries Thoroughly
Start by washing your blackberries thoroughly to remove any dirt, pesticides, or residue from the fruit. While blackberries are often sold pre-washed, it’s always a good idea to give them a rinse. Gently place the berries in a colander and rinse them under cool water. Be careful not to crush the berries, as they can be quite delicate. You can also soak the berries briefly in a bowl of cold water to remove any hidden dirt, especially if they were picked from the wild. Afterward, gently pat them dry with a clean towel or paper towels to remove excess moisture.
2. Inspect for Damaged or Overripe Berries
As you wash the blackberries, inspect them closely for any damaged, overripe, or moldy berries. Overripe or bruised blackberries can affect the texture and flavor of your jam. Simply discard any berries that are overly soft, mushy, or show signs of mold. These berries can introduce an unpleasant taste or spoil your jam. It’s important to use only fresh, firm, and ripe berries for the best results. You’ll want to use fully ripe blackberries that have reached their peak flavor, as underripe berries can cause your jam to taste tart and lack sweetness.
3. Remove Any Stems or Leaves
While blackberries are generally easy to clean, sometimes they can have small stems or leaves attached to them. Carefully remove any stems, leaves, or other debris that may be caught between the berries. You can do this by hand or use tweezers for a more precise removal. Even though these parts aren’t harmful, leaving them in the jam can affect the texture and purity of your final product.
4. Crush the Blackberries for Better Flavor Release
Once the blackberries are cleaned, you need to break them down to release their juices and flavors. Use a potato masher, fork, or immersion blender to gently crush the berries in a large bowl or directly in your cooking pot. Crushing the blackberries will help release the pectin, which is key to making the jam set. You can crush the blackberries until they are a chunky puree or to your desired consistency. For a smoother jam, you can blend the blackberries until they form a thick puree, but if you prefer a chunkier texture, leave them slightly crushed.
5. Measure the Blackberries for Accurate Proportions
Once the blackberries are crushed or pureed, it’s important to measure the fruit so you know how much sugar and other ingredients to use. Measure the crushed fruit carefully according to your recipe, as different amounts of fruit will require slightly different quantities of sugar, pectin, or other additives. Accurate measurement ensures that your jam will have the right consistency and sweetness.
6. Macerate the Blackberries (Optional)
Some jam recipes call for macerating the blackberries before cooking them. This process involves allowing the blackberries to sit with sugar for a period of time, usually 30 minutes to an hour, so the sugar draws out the natural juices of the fruit. This step isn’t strictly necessary, but it can help create a sweeter and juicier mixture, as it allows the sugar to dissolve into the fruit, making it easier to cook down into a thicker consistency. If you’re using a high-sugar recipe or want to ensure your jam is perfectly sweet, macerating is a helpful technique.
7. Add Lemon Juice (Optional for Better Gelling)
To help your jam set and develop a nice texture, lemon juice is often added. Lemon juice is rich in pectin and acid, which help the jam gel properly. The acidity in lemon juice also enhances the natural flavor of the blackberries and can brighten the overall taste. Add freshly squeezed lemon juice to the crushed blackberries, ensuring you have a good balance of acidity and sweetness. For every 4 cups of crushed blackberries, add about 1 tablespoon of lemon juice.
8. Prepare for Cooking
Once your blackberries are properly prepared and ready, you’re all set for the cooking stage. Make sure your cooking equipment, including your pot, ladle, and canning jars, are prepped and ready for use. Before cooking, double-check your ingredients to ensure you have everything on hand, such as sugar, pectin, and any additional flavorings you may be using.
Final Thoughts
Properly preparing your blackberries is an essential step to ensure your jam turns out perfectly. Washing, removing debris, and crushing the berries help release their juices and natural pectin, which contribute to a smooth texture and rich flavor. Whether you choose to macerate the berries or simply crush them, taking the time to prep them carefully will make your homemade blackberry jam even more delicious.
Cooking Blackberry Jam to the Perfect Consistency
Cooking your blackberry jam to the right consistency is essential for achieving the perfect spreadable texture. It requires a careful balance of heat, timing, and regular testing. Here’s how to do it:
1. Combine Blackberries, Sugar, and Pectin
Start by placing your crushed blackberries in a large pot and adding the appropriate amount of sugar and pectin. Mix them together well to ensure the sugar dissolves and the pectin is evenly distributed. This is the base for your jam, which will later thicken as it cooks.
2. Heat the Mixture on Medium Heat
Place the pot over medium heat and stir regularly to prevent the sugar from sticking to the bottom of the pot. The mixture will start to bubble as the sugar dissolves, signaling that it’s beginning to cook. Stir constantly to avoid burning the jam.
3. Bring to a Full Boil
Increase the heat slightly to bring the mixture to a full rolling boil. This means the jam will continue to bubble even when stirred. Let it boil for a few minutes, making sure to stir constantly to prevent it from sticking. This phase activates the pectin, helping the jam to thicken.
4. Test for Consistency
To ensure the jam is the right thickness, perform the cold plate test. Place a plate in the freezer before cooking and, once the jam is boiling, drop a small amount on the cold plate. After a minute, run your finger through it. If the jam wrinkles, it’s ready. If it runs, keep boiling it and test again after a few minutes.
5. Adjust the Consistency
If the jam is too runny, allow it to cook longer until it thickens. If it’s too thick, add a bit more water to reach the right spreadable texture. Once the jam passes the consistency test, remove it from the heat, and it’s ready to be stored or canned.
Testing and Jarring Your Homemade Blackberry Jam
Once your blackberry jam has reached the perfect consistency, it’s time to test it one final time and prepare it for storage. Proper testing and jarring ensure your jam will set properly and remain safe for long-term use. This stage involves testing for the right texture and sealing the jam in jars while it’s still hot. Here’s how to go about it:
1. Final Consistency Check
Before you jar your jam, it’s essential to ensure that the blackberry jam has the perfect consistency. You can use several methods to test this, but one of the easiest is the cold plate test. To do this, place a few small plates in your freezer before you begin cooking the jam. Once you think it’s done, drop a spoonful of the jam onto one of the cold plates. Let it sit for a minute, then run your finger through it. If the jam wrinkles and holds its shape, it’s ready to jar. If it’s too runny, continue cooking for a few more minutes, and test again. Alternatively, use a thermometer to check that the jam has reached 220°F (104°C), which is the optimal temperature for setting jam.
2. Prepare Your Jars
Before you begin jarring the jam, you must properly prepare your jars and lids. Sterilizing your jars is crucial to prevent contamination and ensure that your jam remains fresh. You can sterilize jars by boiling them for 10 minutes or running them through a dishwasher on a hot cycle. Be sure to also sterilize the lids to create a proper seal. Once the jars are sterilized, keep them hot until you’re ready to fill them to avoid any temperature shock.
3. Filling the Jars
Once your jam has passed the consistency test, it’s time to jar it. Using a funnel (preferably a wide-mouth one), ladle the hot blackberry jam into the prepared jars. Leave about 1/4 inch of space at the top of the jar to allow for expansion during the sealing process. This ensures that your jam doesn’t spill over when sealed. Fill each jar carefully, wiping away any spills on the rim of the jar with a clean cloth or paper towel. A clean rim is essential for a secure seal.
4. Sealing and Processing
After filling your jars, place the sterilized lids on top and screw on the rings until they’re snug, but not too tight. At this point, you can either use the water bath canning method or just allow the jam to cool and store it in the fridge for immediate use.
For long-term storage, it’s essential to process the jars using a water bath. Place the jars into a large pot of boiling water, ensuring that the water covers the jars by at least an inch. Boil the jars for about 10 minutes to ensure a proper seal. Once the jars are removed from the water, let them cool at room temperature. If the lids “pop” and seal tightly, your jam is safely jarred and ready for storage.
5. Storage and Shelf Life
After sealing and cooling, you can store your homemade blackberry jam in a cool, dark place for up to one year. Once opened, refrigerate the jar and use it within a few weeks. If you notice any bubbling, leaking, or foul odors, discard the jam immediately as these can be signs of spoilage. Proper storage ensures that your homemade jam remains safe to eat and tastes delicious for months to come.
Testing and jarring your blackberry jam is the final step in preserving your hard work and enjoying the sweet, natural flavor of fresh fruit. By following these steps, you can ensure that your jam not only tastes great but also lasts as long as possible while maintaining quality.
Storing and Using Blackberry Jam
The Best Ways to Store Blackberry Jam
Storing homemade blackberry jam correctly is essential for preserving its flavor, texture, and quality over time. The right storage methods will keep your jam fresh and safe to eat, allowing you to enjoy it throughout the year. Whether you’re planning to store it long-term or use it soon, here’s how to ensure that your blackberry jam stays in optimal condition.
1. Room Temperature Storage (For Sealed Jars)
If you’ve properly sealed your blackberry jam using the canning process, you can store it at room temperature for up to one year. Choose a cool, dark place like a pantry, cupboard, or basement to store the jars. Avoid storing the jam in areas where sunlight, heat, or humidity can damage the jars or cause them to spoil. A consistent temperature of around 70°F (21°C) is ideal for long-term storage. Properly sealed jars will remain fresh, and the jam’s texture will be maintained until you open the jar.
2. Refrigeration (Once Opened or for Quick Use)
Once you’ve opened a jar of blackberry jam, it’s important to refrigerate it to prevent spoilage. Even though the canning process kills off harmful bacteria, once the jar is opened and exposed to air, the natural sugars and fruit components can attract bacteria and mold. Make sure the lid is securely closed after each use, and store the jar in the coldest part of your refrigerator. Opened jars of jam should be consumed within 3 to 4 weeks to ensure the best flavor and safety.
3. Freezing Blackberry Jam for Extended Storage
For long-term storage or if you want to keep your blackberry jam for more than a year, freezing is an excellent option. While canning provides a shelf life of up to a year, freezing can extend this. To freeze your jam, place it in freezer-safe containers or jars, leaving about an inch of space at the top to allow for expansion as it freezes. If you plan to use glass jars, ensure they’re freezer-safe, as regular glass can break in the cold temperatures. Be sure to label the containers with the date you made the jam for easy reference. You can freeze blackberry jam for up to one year.
When you’re ready to use your frozen jam, thaw it in the refrigerator overnight. Freezing may cause a slight change in the jam’s texture, but the flavor should remain delicious.
4. Check for Seals and Signs of Spoilage
Before you store your blackberry jam, always check the seals. After canning, ensure the lids have popped to indicate a secure seal. If the lid is still loose or pops back when pressed, it may mean the jar didn’t seal properly, and it should be refrigerated and used soon. Even with proper sealing, always inspect your jam for signs of spoilage, such as mold, bubbling, or an off-smell. If any of these signs are present, discard the jam immediately.
5. Organizing Jam for Easy Access
Once your blackberry jam is stored, organizing your jars can help you keep track of what you have. Arrange your jam in a way that allows easy access, rotating jars so you use older ones first. Consider using storage bins, a lazy Susan, or stackable shelves to make the most of your storage space. Be sure to regularly check the jars for any signs of leakage or spoilage, especially if you’re storing them for an extended period.
Proper storage ensures that your blackberry jam retains its fresh taste and is safe to enjoy for months. Whether you’re preserving it for the season or using it daily, these storage tips will help you enjoy your homemade jam at its best.
Shelf Life of Blackberry Jam: How Long Does It Last?
Knowing how long blackberry jam lasts can help you enjoy it at its best and avoid spoilage. The shelf life depends on storage conditions, preservation methods, and whether the jar has been opened. Here’s a detailed look at how long your jam will last and how to store it properly.
1. Unopened Canned Blackberry Jam (Shelf Life)
If you’ve canned your blackberry jam properly, it can last up to one year at room temperature. The canning process creates a seal that prevents bacteria and contaminants from spoiling the jam. Store the jars in a cool, dark place like a pantry or cupboard. Avoid heat and humidity, which can compromise the seal. Always check that the jars are sealed correctly before storing them.
2. Opened Blackberry Jam (Shelf Life in the Refrigerator)
Once you open a jar, it should be refrigerated to prevent bacterial growth. Opened blackberry jam typically lasts 3 to 4 weeks in the fridge. Always ensure the jar is tightly sealed, and store it in the coldest part of the fridge. Avoid leaving it out at room temperature for extended periods.
3. Homemade Jam Stored in the Freezer
For long-term storage, freeze your blackberry jam in freezer-safe containers or jars. Freezing preserves the flavor for up to one year, although it may slightly alter the texture. When you’re ready to use it, thaw the jam overnight in the refrigerator for the best results.
4. Signs Your Blackberry Jam Has Gone Bad
Even within its shelf life, it’s important to check for signs of spoilage. Watch for mold, an off smell, bubbling, or a sour taste. Any of these signs mean the jam should be discarded to ensure safety.
5. Extending Shelf Life
Proper sealing, refrigeration, and storage are key to extending the shelf life of your homemade blackberry jam. Properly canned jam can last for months, while freezing it will allow you to enjoy it for up to a year.
Creative Ways to Use Blackberry Jam
Blackberry jam is incredibly versatile, and its rich, sweet-tart flavor makes it the perfect ingredient for many delicious dishes. Beyond spreading it on toast, there are countless creative ways to incorporate blackberry jam into both savory and sweet recipes. Here are some innovative ideas for using blackberry jam that will add a burst of flavor to your meals and desserts.
1. Spread on Toast, Biscuits, and Scones
The simplest way to enjoy blackberry jam is by spreading it on warm toast, biscuits, or scones. Its sweet and tangy flavor complements the richness of buttered bread, creating a perfect breakfast or snack. You can even add a little cream cheese or mascarpone cheese to the toast for a more decadent experience. Try pairing it with cinnamon rolls for a flavorful twist!
2. Pairing with Cheese for a Tasty Appetizer
Blackberry jam makes a fantastic pairing with cheese. Spread it on a cracker or a small piece of baguette and top it with your favorite cheese, such as brie, cream cheese, or goat cheese. The sweetness of the jam balances out the richness of the cheese, making it a great appetizer for parties or gatherings. You can also serve it alongside a cheese board with an assortment of cheeses and crackers.
3. Mixing Into Yogurt or Oatmeal
Add a spoonful of blackberry jam to plain yogurt or overnight oats for a burst of flavor. The jam will sweeten the yogurt naturally and give your breakfast an extra dose of fruity goodness. If you prefer something more refreshing, mix the jam with a bit of lemon zest or mint for a unique twist. You can also drizzle it over granola for added sweetness and texture.
4. Using as a Filling for Pastries and Cakes
Blackberry jam can be used as a filling in pastries, croissants, or even cakes. Spread it inside a buttery croissant or use it as a layer in a layer cake for a fruity surprise. You can make blackberry jam-filled doughnuts, or swirl the jam into pancakes or waffles for a sweet touch. It’s perfect for creating layers in shortcakes or adding flavor to crumb cakes.
5. Glaze for Meats
Surprisingly, blackberry jam can also be used as a glaze for meats. It pairs exceptionally well with roast pork, chicken, or duck. Simply combine the jam with a little balsamic vinegar, soy sauce, or Dijon mustard to make a flavorful glaze. Brush it over the meat as it roasts or grills for a sweet, tangy finish. The richness of the jam creates a perfect balance with the savory flavors of the meat.
6. Drizzle Over Ice Cream or Desserts
Blackberry jam makes an amazing topping for ice cream, sorbet, or even frozen yogurt. Swirl the jam into a bowl of creamy ice cream or drizzle it over a sundae. You can also combine it with whipped cream and use it as a topping for pies, cakes, or tarts. It adds vibrant color and a deep berry flavor to any dessert.
7. Use as a Marinade for Grilled Vegetables
For a unique twist, use blackberry jam as a base for a marinade for grilled vegetables. Combine it with olive oil, garlic, and herbs like thyme or rosemary to create a savory-sweet marinade for grilled squash, eggplant, or bell peppers. The jam will add a rich sweetness that pairs beautifully with the smokiness of the grilled vegetables.
8. Incorporate into Smoothies or Milkshakes
If you love smoothies or milkshakes, add a spoonful of blackberry jam to the mix for extra flavor. The jam blends smoothly into any smoothie base and gives it a burst of fruity goodness. Combine it with berries, banana, or even yogurt for a refreshing treat. A milkshake made with vanilla ice cream and a touch of blackberry jam will give you a rich, creamy beverage with a fruity kick.
9. Create a Blackberry Jam Cocktail
For an adult twist, you can use blackberry jam in cocktails. Mix it into cocktail shaker with gin, vodka, or rum, and shake it well with ice. You can create a blackberry mojito by combining the jam with mint, lime, and rum. Or, blend it with Prosecco for a sparkling, fruity drink.
10. Make a Fruit Dip
Blackberry jam can be used to create a simple, sweet dip. Mix it with cream cheese or marshmallow fluff for a creamy dip that’s perfect for fruits like apples, pears, and strawberries. This dip can also serve as a delightful spread for graham crackers or cookies.
Whether you’re using it for breakfast, appetizers, or dessert, blackberry jam is a versatile ingredient that adds natural sweetness and a burst of flavor to any dish. With these creative ideas, you can experiment with different ways to enjoy your homemade jam.
Conclusion
Making homemade blackberry jam is a simple and rewarding process that anyone can enjoy. From selecting fresh blackberries to following a few easy steps, you can create a delicious, preservative-free treat that tastes so much better than store-bought versions. With just a few basic ingredients, you can customize the flavor to your liking and have a jar of jam ready to use for weeks to come.
We encourage you to give it a try and share your results! Whether you’re spreading it on toast, mixing it into your favorite desserts, or pairing it with savory dishes, blackberry jam will bring a fresh burst of flavor to any meal. Let us know your favorite ways to enjoy blackberry jam in the comments below – we’d love to hear your ideas and experiences!