
The Victoria Sponge Cake, also known as Victoria Cake, is a beloved British dessert with a rich history dating back to the 19th century. Named after Queen Victoria, the cake is thought to have been a favorite of hers and was often served during afternoon tea, a tradition that became popular during her reign. Its light and fluffy sponge, paired with sweet jam and fresh cream, makes it a timeless treat enjoyed by many today.
This cake is quintessentially British, celebrated not only for its delicious simplicity but also for its place in the country’s culinary heritage. While its origins are tied to the royal court, the Victoria Sponge has become a symbol of British baking, commonly enjoyed at tea time, birthdays, and celebrations across the UK and beyond.
In this post, you will discover everything you need to know to make the perfect Victoria Sponge Cake. We’ll dive into its fascinating history, provide a step-by-step recipe, and share expert tips to help you achieve a perfect sponge every time. Plus, we’ll explore creative variations to suit different tastes, ensuring that you can make this classic cake your own. Whether you’re a beginner or an experienced baker, this guide will help you master this iconic dessert.
Key Features of Victoria Sponge Cake
Light and Airy Texture of the Sponge
One of the defining characteristics of a Victoria Sponge Cake is its light and airy texture, which makes each bite melt in your mouth. Achieving this perfect texture requires the right balance of ingredients and technique. Here’s a closer look at what makes the Victoria Sponge so irresistibly light and fluffy:
1. The Role of Self-Raising Flour
A key ingredient in the Victoria Sponge is self-raising flour, which contains a leavening agent like baking powder. This is essential for creating the cake’s lightness. Self-raising flour helps the batter rise while baking, resulting in a soft, airy sponge. While you can use plain flour and add baking powder, self-raising flour is often preferred for its convenience and consistent results.
2. The Importance of Whisking the Butter and Sugar
When preparing the cake batter, it’s important to properly cream together the butter and sugar. This process, known as “creaming,” involves beating the two ingredients together until the mixture is light and fluffy. Whisking incorporates air into the batter, which helps create a lighter texture once baked. Overbeating or underbeating the mixture can affect the cake’s texture, so it’s essential to find the right balance.
3. Beating the Eggs Into the Batter
Incorporating the eggs into the batter is another crucial step in achieving a light sponge. The eggs should be added one at a time, ensuring they are fully mixed into the butter and sugar before adding more. It’s important to beat the eggs well to further introduce air into the batter. Some bakers even recommend beating the eggs separately before folding them into the mixture to achieve the best results.
4. Folding in the Flour
After adding the wet ingredients, it’s time to fold in the flour. This step requires a gentle folding technique to ensure the flour is evenly distributed without deflating the air bubbles you’ve worked so hard to incorporate. Stirring too aggressively can cause the batter to lose its airy quality, resulting in a denser sponge. Use a folding motion, gently lifting the flour from the bottom of the bowl and turning it over until just combined.
5. The Importance of Baking Temperature and Time
Finally, achieving the perfect texture depends on baking the cake at the right temperature. If the oven is too hot, the cake might rise too quickly and then collapse. If it’s too cool, the sponge may not rise properly, leading to a dense texture. Typically, the Victoria Sponge should be baked at 350°F (175°C) for around 20-25 minutes. Checking for doneness by lightly pressing the top of the cake or inserting a skewer is crucial to ensure the right consistency.
By following these steps, you can ensure that your Victoria Sponge Cake has the perfect light and airy texture that defines this classic British dessert. It’s the combination of well-chosen ingredients and precise techniques that make this cake both delicate and delicious.
Simple Ingredients That Make the Cake So Delicious
The beauty of a Victoria Sponge Cake lies in its simplicity. Unlike some elaborate desserts that require complex ingredients and techniques, this classic British cake is made with just a handful of basic ingredients. However, each of these ingredients plays a crucial role in creating the delicate, flavorful sponge that has made the Victoria Sponge a beloved dessert for over a century.
1. Butter: The Foundation of Flavor and Texture
The primary fat used in a Victoria Sponge is butter, which contributes to both the flavor and texture of the cake. Butter adds richness and a creamy taste that is essential to the cake’s overall flavor profile. It helps create a moist, tender crumb and is key to the light, airy texture when creamed with sugar. For the best results, use unsalted butter to control the amount of salt in your cake, allowing the sweetness to shine through.
2. Sugar: Balancing Sweetness and Texture
Caster sugar is typically used in Victoria Sponge recipes because its fine texture dissolves easily into the butter, resulting in a smooth, fluffy batter. The sugar not only adds sweetness but also helps to aerate the mixture during the creaming process. This contributes to the cake’s lightness. It’s important to use the correct type of sugar, as granulated sugar could lead to a grainy texture in the final product, whereas caster sugar ensures a smoother consistency.
3. Eggs: The Binding Agent and Leavening Aid
Eggs serve as a binding agent in the batter, holding the ingredients together and ensuring the structure of the cake. Additionally, eggs play a role in the leavening process by providing moisture and helping the cake rise. They also contribute to the cake’s golden color and rich texture. The eggs should be at room temperature when incorporated into the batter for optimal results, as this helps them blend seamlessly with the other ingredients, promoting a light and fluffy consistency.
4. Self-Raising Flour: The Secret to a Fluffy Sponge
The key to achieving a light, airy texture in Victoria Sponge is self-raising flour. This type of flour already contains a leavening agent, such as baking powder, which helps the cake rise. Self-raising flour ensures that the batter remains light and fluffy while baking. The right amount of rising agent is crucial—too little will result in a dense sponge, while too much can cause the cake to rise unevenly or collapse. Self-raising flour makes the process simpler, as you don’t need to measure out additional leavening agents.
5. Jam: The Sweet and Tangy Filling
The jam used in a Victoria Sponge adds both sweetness and a bit of tartness, creating a delicious contrast to the rich cake. The traditional filling is raspberry jam, which provides a tangy edge that complements the sweetness of the cake. However, strawberry jam, apricot jam, or any other fruit preserves can be used as alternatives depending on personal preference. The jam should be spread evenly between the cake layers, offering a moist and flavorful bite in every slice.
6. Fresh Cream: The Perfect Complement
No Victoria Sponge would be complete without a generous helping of fresh cream, which adds a luxurious, creamy texture to balance the sweetness of the sponge and the tartness of the jam. Traditionally, double cream is used, which has a rich, thick consistency that enhances the cake’s indulgent feel. For a lighter alternative, whipped cream can be used, but it should be whipped just enough to hold its shape without becoming too stiff. The cream is spread between the layers of the cake, often with a dusting of powdered sugar on top for added sweetness.
7. Powdered Sugar: The Finishing Touch
While powdered sugar (or icing sugar) is not an essential ingredient in the cake itself, it’s often used as a light dusting on top of the finished cake. This finishing touch adds an elegant look and a subtle sweetness without overpowering the other flavors. It’s a simple yet effective way to present the Victoria Sponge and enhance its visual appeal.
Why Simplicity Works
The simplicity of these ingredients is what makes the Victoria Sponge Cake so delightful. Each ingredient serves a specific purpose, contributing to the perfect balance of flavors and textures. The cake’s relatively few components allow the natural taste of butter, eggs, and jam to shine through, while the ease of preparation makes it a favorite among bakers of all skill levels. Despite its simplicity, the Victoria Sponge Cake remains a timeless dessert—proof that sometimes, the best things in life are the simplest.
The Classic Jam and Cream Filling
One of the most beloved features of the Victoria Sponge Cake is its iconic jam and cream filling. This simple yet indulgent combination elevates the cake, adding layers of flavor, texture, and richness. It’s what truly makes the Victoria Sponge a classic dessert, and the balance of the sweet jam with the creamy richness is what many people love most about this treat. Here’s a deeper look into what makes this filling so special:
1. The Role of Jam in the Filling
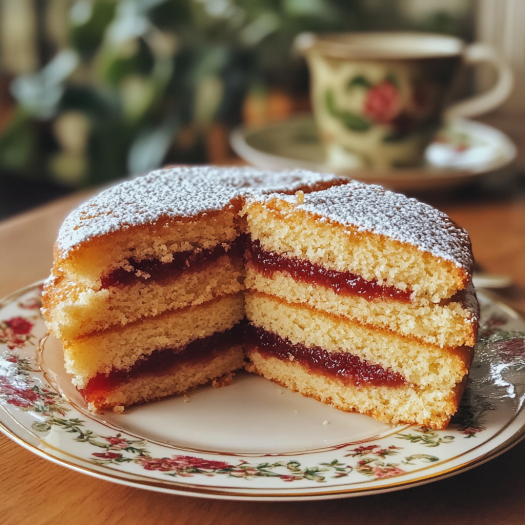
Jam is the heart of the Victoria Sponge’s filling, providing a burst of sweet and slightly tart flavor that contrasts beautifully with the soft, buttery sponge. The jam not only adds flavor, but also moisture, keeping the cake from being too dry and enhancing the overall experience of eating it.
- Traditional Jam Choices: The most common and traditional choice is raspberry jam. Its tangy sweetness cuts through the richness of the sponge and cream, adding a delightful contrast. Other popular jams include strawberry and apricot, each offering its own distinct flavor. The choice of jam can be a personal preference, and sometimes a combination of jams is used to balance sweetness and tartness.
- Jam Quality Matters: For the best Victoria Sponge, it’s important to choose a good-quality jam, preferably one with a higher fruit content. This ensures that the jam isn’t overly sweet or artificial in taste. Homemade jams or high-quality preserves can also take your cake to the next level, offering a more authentic, fresh flavor.
2. Fresh Cream: The Rich and Silky Counterpart
The cream filling is what gives the Victoria Sponge its luxurious, indulgent texture. It balances out the sweetness of the jam and complements the light sponge. The type of cream used is critical to achieving the perfect filling.
- Double Cream: Traditionally, double cream is used in the Victoria Sponge. With a rich, thick texture, double cream adds a decadent, silky feel that pairs wonderfully with the sponge and jam. Double cream has a higher fat content than single cream, which makes it perfect for creating a smooth, velvety filling.
- Whipped Cream: If you prefer a lighter alternative, whipped cream is often used in place of double cream. Whipped cream adds air and volume, making it less dense than double cream while still offering that creamy texture. It’s important to not overwhip the cream, as it can become stiff and lose its smooth consistency.
- Clotted Cream: In some variations, clotted cream is used, especially when serving the cake at special occasions like afternoon tea. Clotted cream is thicker and richer than double cream, with a slightly caramelized flavor that enhances the overall experience. However, it can be very rich, so it’s often used in moderation.
3. Balancing the Jam and Cream
The ratio of jam to cream in the filling is essential for achieving the right flavor balance. Too much jam can make the cake overly sweet and sticky, while too much cream can overpower the other elements. The filling should be spread evenly, with a moderate amount of jam in the center of the cake layers, followed by a generous but not overwhelming layer of cream.
- Layering: The classic method involves spreading the jam on the bottom layer of the cake and then adding the cream on top of it, so the jam is sandwiched between the cream and sponge. This ensures that the jam doesn’t seep into the sponge and makes it easier to slice.
- Topping and Presentation: After assembling the cake with jam and cream, a light dusting of powdered sugar is typically added to the top of the cake for a finished, polished look. This not only enhances the appearance of the cake but also adds a touch of sweetness to the final bite.
4. Creative Variations of the Jam and Cream Filling
While the classic jam and cream filling is beloved, there’s plenty of room for creativity. You can experiment with different jams, creams, or even add extra flavorings to make the cake your own.
- Fruit Variations: In addition to the traditional fruit jams, consider using fresh berries like strawberries, raspberries, or blueberries for a more textured filling. You can either combine the fresh fruit with cream or jam, or layer the fruit directly onto the cake along with the jam and cream.
- Flavored Cream: To add a unique twist, you can infuse the cream with flavors like vanilla, lemon zest, or almond extract. Whipped cream can also be mixed with a bit of mascarpone for a creamier filling with more body. You can even fold in a bit of chocolate for a rich and indulgent treat.
- Nutty Additions: Some variations include a handful of chopped nuts like toasted hazelnuts or almonds sprinkled on top of the cream, adding texture and a touch of savory flavor to complement the sweetness of the jam.
- Lemon Curd or Custard: For a more indulgent twist, you can swap out the jam for lemon curd or custard, creating a richer, creamier filling with a citrusy kick. These options work particularly well in the summer or for special occasions.
5. Presentation of the Jam and Cream Filling
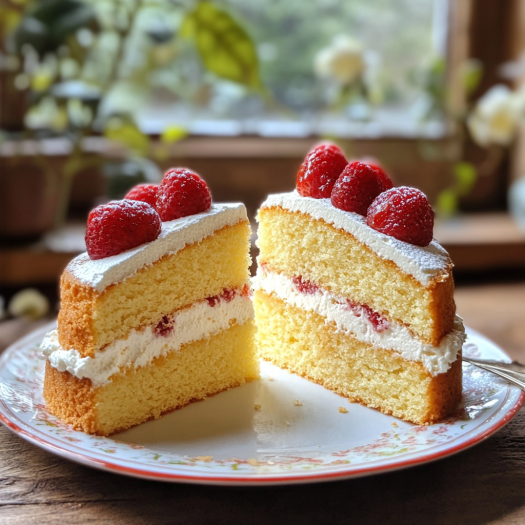
The classic jam and cream filling also contributes to the visual appeal of the Victoria Sponge. The cream provides a smooth, glossy surface, while the jam creates a vibrant contrast of color. When you slice into the cake, the layers of jam and cream should be visible, showcasing the beautiful balance of textures and flavors.
Why the Jam and Cream Filling Works So Well
The combination of jam and cream in the Victoria Sponge Cake is more than just a flavorful filling—it’s a perfect balance of textures and flavors. The sweet and tart jam cuts through the richness of the creamy filling, while the light, airy sponge provides a delicate base that supports the bold flavors without overwhelming them. This simple, yet effective filling is part of what has made the Victoria Sponge a timeless British classic, perfect for any occasion, from casual afternoon tea to celebratory events.
How the Cake is Typically Served for Afternoon Tea
The Victoria Sponge Cake holds a special place in British culture, particularly during the tradition of afternoon tea. Known for its elegance and simplicity, it is one of the quintessential cakes served as part of this midday treat, which traditionally occurs between 3:30 PM and 5 PM. The cake’s light texture, coupled with its rich filling of jam and cream, makes it the perfect companion for tea. Here’s how the Victoria Sponge is typically served during afternoon tea:
1. Slicing the Cake
The first step in serving the Victoria Sponge at afternoon tea is slicing it into even portions. Because the cake is light and airy, the slices should be cut carefully to ensure that the layers of sponge, jam, and cream remain intact. It’s common to cut the cake into even wedges or square slices, depending on the shape of the cake. The slices should be thick enough to showcase the layers but not so large that they become overwhelming.
- Presentation Tip: For a more formal presentation, the cake can be sliced into neat wedges, making it easy for guests to pick up and enjoy. Alternatively, cutting the cake into smaller, bite-sized pieces can allow for a more relaxed and sharing-oriented experience.
2. Pairing with Tea
The Victoria Sponge Cake is almost always served alongside a pot of tea, which is the centerpiece of an afternoon tea experience. The type of tea chosen can greatly influence the overall experience, as it complements the cake’s lightness and richness.
- Black Tea: The traditional choice for pairing with Victoria Sponge is a robust black tea, such as English Breakfast or Earl Grey. These teas are strong enough to balance the sweetness of the cake and refresh the palate between bites.
- Herbal Tea: For a lighter option, many people enjoy pairing the cake with herbal teas, like chamomile or peppermint. These can add a refreshing contrast to the richness of the sponge and the cream filling.
- Green Tea: For those who prefer a less traditional option, green tea can be a great choice. Its lighter, slightly grassy flavor offers a delicate balance to the cake’s sweetness without overpowering it.
3. Accompaniments and Garnishes
While the Victoria Sponge Cake is delicious on its own, it’s often served with a few simple accompaniments to enhance the experience. These can include:
- Fresh Fruit: Slices of fresh berries, such as strawberries, raspberries, or blackberries, are a common addition. Their tartness complements the sweetness of the cake and jam, providing a fresh contrast that cuts through the richness of the cream. Berries also add color and elegance to the table, making it visually appealing.
- Clotted Cream or Butter: While the cake already has cream filling, it’s sometimes served with an extra dollop of clotted cream or a pat of butter on the side, especially for those who enjoy extra richness. Some variations of afternoon tea serve the cake with a little extra filling or topping for guests to enjoy as they wish.
- Cucumber Sandwiches and Savories: In a more traditional afternoon tea spread, the Victoria Sponge would be paired with savory items such as cucumber sandwiches, egg and cress sandwiches, or scones with jam and cream. This creates a balance of sweet and savory that elevates the tea experience, allowing guests to enjoy a variety of flavors.
4. Tea Service Etiquette
Afternoon tea is not just about the food but also about the experience and etiquette. When serving the Victoria Sponge Cake, the process is usually quite formal, especially in a traditional setting:
- Serving on Fine China: The cake is often served on fine china or elegant tea plates, contributing to the atmosphere of sophistication that is central to afternoon tea. The cake should be served on a small plate alongside a cup of tea, ensuring that the portions are just right for guests to enjoy without feeling rushed.
- Accompanied by Teacups and Saucers: In keeping with tradition, tea is served in teacups and saucers, and a teapot is used to pour the tea. This formality adds to the elegance of the experience and encourages guests to take their time, savoring each bite of the Victoria Sponge along with their tea.
5. Timing and Atmosphere
Afternoon tea is meant to be a relaxing and leisurely occasion, where the cake is enjoyed slowly, accompanied by conversation. The Victoria Sponge Cake should be served as part of a multi-course tea, with the cake typically appearing after savory snacks or sandwiches and before other sweets, such as scones or pastries.
- Relaxed Enjoyment: The beauty of afternoon tea is that there’s no rush—guests can savor each bite of the cake, sip their tea, and engage in conversation. The Victoria Sponge is often seen as the highlight of the cake portion of the tea, offering a satisfying yet not too heavy conclusion to the savory part of the meal.
- Decor and Setting: The cake is often displayed at the center of the table on a cake stand or serving platter, drawing attention as a centerpiece. The table is typically set with fresh flowers, elegant napkins, and fine china, creating an inviting and cozy atmosphere that enhances the overall enjoyment of the tea.
6. Cultural Tradition
The tradition of afternoon tea began in the early 19th century, and the Victoria Sponge Cake quickly became a staple of this social occasion, which was often attended by the British upper class. Today, afternoon tea remains a cultural tradition in the UK and beyond, with the Victoria Sponge Cake being a symbol of British culinary heritage.
Why It’s the Perfect Cake for Afternoon Tea
The Victoria Sponge Cake is the ideal dessert for afternoon tea due to its balanced, light flavor and satisfying texture. The simplicity of the cake complements the intricate and varied nature of an afternoon tea spread, while its iconic jam and cream filling pairs beautifully with the rich flavors of tea. Whether served with fresh berries, extra cream, or simply on its own, the Victoria Sponge is a timeless choice that elevates the afternoon tea experience.
Essential Ingredients for a Perfect Victoria Sponge
The Role of Self-Raising Flour and Eggs in Achieving the Perfect Sponge
The Victoria Sponge Cake is known for its light, airy, and delicate texture, and two essential ingredients play a critical role in achieving this perfect sponge: self-raising flour and eggs. Both ingredients work together to give the cake its characteristic rise, softness, and tender crumb. Here’s how each ingredient contributes to creating the ideal sponge:
1. The Role of Self-Raising Flour
Self-raising flour is a key component in creating the light and fluffy texture of a Victoria Sponge. Unlike regular all-purpose flour, self-raising flour contains a leavening agent, typically baking powder, that helps the cake rise as it bakes. This means that you don’t have to add additional baking powder to the recipe—self-raising flour already has the right balance of leavening agents to create the perfect sponge texture.
Aeration and Rise
The baking powder in the self-raising flour reacts with the moisture and heat during baking, releasing carbon dioxide gas. This gas forms tiny bubbles within the batter, causing it to rise. These bubbles create the airy texture that is the hallmark of a good Victoria Sponge. If the flour is sifted properly, it ensures that the baking powder is evenly distributed throughout the flour, contributing to a consistent rise across the entire cake.
Soft and Tender Crumb
Self-raising flour is finely milled, which helps to produce a smooth, even batter. This fine texture results in a tender crumb when baked. The flour’s composition provides just the right amount of structure to hold the cake together while still allowing it to remain soft and light.
Consistency and Convenience
Using self-raising flour simplifies the baking process by eliminating the need to measure and mix in separate leavening agents like baking powder or soda. This makes it an ideal ingredient for beginners, as it ensures consistent results without having to worry about precise measurements of leavening agents.
2. The Role of Eggs in Achieving the Perfect Sponge
Eggs are another crucial ingredient that plays a dual role in achieving the desired texture and structure of the Victoria Sponge. They contribute not only to the flavor and richness of the cake but also to the sponge’s rise, moisture, and overall consistency.
Structure and Binding
Eggs act as a binding agent in the cake batter. When mixed with the other ingredients, eggs help hold everything together, ensuring that the flour and fats blend properly to form a smooth batter. The proteins in eggs coagulate during baking, contributing to the structure and stability of the cake. This helps the sponge maintain its shape and prevents it from collapsing as it cools.
Moisture and Tenderness
Eggs add moisture to the batter, which is crucial for keeping the Victoria Sponge cake soft and tender. The egg yolks, in particular, are rich in fats and contribute to the cake’s smooth texture, preventing it from being dry or crumbly. The combination of moisture from the eggs and the aeration from the self-raising flour creates a perfect balance for a light, moist cake.
Leavening and Rise
Beyond acting as a binding agent, eggs also assist with the leavening process. When eggs are beaten into the batter, they trap air, which contributes to the cake’s rise. The combination of beaten eggs and self-raising flour helps the cake achieve a fluffy, spongy texture without the need for additional leavening agents like baking soda or yeast.
Color and Flavor
The eggs contribute to the cake’s golden color and also enhance the flavor. The egg yolks give the sponge a rich, slightly sweet taste that complements the buttery texture of the cake. The richness of the eggs balances the sweetness of the sugar and the tanginess of the jam and cream filling.
3. How Self-Raising Flour and Eggs Work Together
When combined, self-raising flour and eggs complement each other perfectly, working together to produce a light and fluffy Victoria Sponge. The self-raising flour provides the necessary rise, while the eggs create the structure, moisture, and texture needed for a perfect sponge. Here’s how the two ingredients work in harmony:
Batter Texture
When you cream the butter and sugar together, and then beat in the eggs, the mixture becomes airy and light. As you gradually fold in the self-raising flour, the batter should remain light and smooth, without becoming too dense. The flour’s leavening action ensures that the batter doesn’t deflate when mixed, while the eggs help maintain moisture and tenderness throughout the cake.
Even Rise
The air incorporated during the creaming of the butter, sugar, and eggs, combined with the leavening action of the self-raising flour, ensures an even rise during baking. This even distribution of air pockets results in a uniform sponge that doesn’t have uneven holes or overly dense sections. It’s important to be gentle when mixing the flour into the batter, as overworking it can deflate the air and result in a denser cake.
4. Choosing the Right Type of Eggs and Flour
To achieve the best possible Victoria Sponge, it’s important to use fresh, high-quality eggs. Free-range eggs are a great option, as they tend to have a richer flavor and more vibrant yolks, which enhance both the taste and color of the cake.
Self-Raising Flour Selection
Choosing a good-quality self-raising flour ensures that the flour contains the proper balance of leavening agents for consistent results. If you can’t find self-raising flour, you can substitute it by adding a small amount of baking powder (about 2 teaspoons per 250g of flour) to plain flour, but using self-raising flour directly is the most convenient option.
Why These Ingredients Matter
Together, self-raising flour and eggs are essential for achieving the light, fluffy texture that defines a Victoria Sponge Cake. Self-raising flour provides the necessary lift, while eggs contribute to the structure, moisture, and richness of the cake. By understanding the role each ingredient plays, bakers can create the perfect sponge with a soft crumb, balanced rise, and a melt-in-the-mouth texture that is the hallmark of this classic British dessert. Whether you’re a novice or an experienced baker, mastering the combination of these two ingredients is key to achieving a Victoria Sponge that’s as delicious as it is beautiful.
For more tips and tricks on perfecting your sponge cake, check out our in-depth guide Victoria Cake Mastery: Tips for the Best Sponge Cake Ever.
Choosing the Right Jam: Raspberry, Strawberry, and Other Varieties
One of the most delightful aspects of a Victoria Sponge Cake is the classic jam filling. Traditionally, raspberry jam is used, but there are a variety of jams you can choose from to add your personal touch to the cake. The right jam not only enhances the flavor but also complements the sponge and cream filling, making the dessert irresistible. Here’s how to choose the best jam for your Victoria Sponge:
1. Traditional Raspberry Jam
Raspberry jam is often considered the classic choice for a Victoria Sponge Cake. The tartness of raspberries balances out the sweetness of the sponge and cream, providing a vibrant contrast in flavor.
- Tartness and Sweetness Balance: The natural tartness of raspberry jam cuts through the richness of the sponge and cream, making the cake less overwhelming in terms of sweetness. This balance is essential, as it keeps the dessert refreshing and not too sugary.
- Bright Color and Flavor: Raspberry jam offers a vibrant red color, which contrasts beautifully against the light golden sponge and white cream. The bold raspberry flavor also complements the delicate, buttery taste of the cake.
- Thick Consistency: Raspberry jam has a nice, thick consistency that allows it to spread easily without running or making the cake soggy. This makes it an ideal choice for maintaining the structure of the cake.
2. Strawberry Jam
While raspberry jam is the traditional option, strawberry jam is also a popular choice for many bakers. It offers a sweeter, milder flavor than raspberry and is particularly loved for its smooth, fruity taste.
- Milder Sweetness: Strawberry jam tends to be sweeter than raspberry jam, which may be preferable for those who enjoy a sweeter cake. The subtle sweetness also pairs nicely with the cream and sponge, offering a more delicate flavor profile.
- Smooth and Easy to Spread: Strawberry jam typically has a smoother texture than raspberry jam, which some people prefer. Its spreadable consistency ensures it is easy to apply without making the sponge soggy.
- Flavor Variety: Strawberry is a universally loved fruit, and its flavor evokes a sense of nostalgia and familiarity. The slightly milder flavor is perfect for those who might find raspberry too tart.
3. Other Varieties of Jam
While raspberry and strawberry are the most traditional, there are many other varieties of jam that can elevate your Victoria Sponge with unique flavors and characteristics. Here are some options to consider:
- Blackcurrant Jam: Blackcurrant jam has a bold, tangy flavor that can add depth and complexity to your cake. Its deep, dark color also provides a striking visual contrast to the lighter sponge, making it a good choice for an elegant and distinctive twist on the classic Victoria Sponge.
- Apricot Jam: Apricot jam offers a sweet and slightly tart flavor, but it’s much milder than raspberry or blackcurrant jam. This jam is a great option for those who want a more understated filling that still adds a rich, fruity note to the cake.
- Peach or Nectarine Jam: For a more summery and sweet option, peach or nectarine jam can provide a fragrant, soft flavor with a natural sweetness. These jams are excellent when paired with lighter or citrusy cream fillings.
- Plum Jam: With a balance of sweet and slightly tart flavors, plum jam can work beautifully in a Victoria Sponge Cake. Its rich, dark color provides a dramatic look, and its fruitiness complements the cream and sponge without overwhelming them.
- Mixed Fruit Jam: If you’re looking for a complex flavor profile, you can opt for mixed fruit jam, which combines several fruits like apples, strawberries, and raspberries. This provides a layered flavor that can add depth to your cake filling, making it unique and flavorful.
4. Choosing Based on Personal Preference
Ultimately, the choice of jam should be based on personal taste and the overall flavor experience you want to create. If you prefer a tangy contrast to balance the richness of the cake, raspberry jam is ideal. If you want a milder, sweeter experience, strawberry jam might be more your style. For a more adventurous twist, try blackcurrant, apricot, or any of the other varieties mentioned above.
5. Tips for Using Jam in Your Victoria Sponge
- Avoid Excess Moisture: To prevent the cake from becoming soggy, use a thicker jam or ensure that the jam is spread in a thin, even layer. If the jam is too runny, it can seep into the sponge, causing it to lose its light and airy texture.
- Room Temperature Jam: Make sure the jam is at room temperature before spreading it on the cake. Cold jam can make the sponge hard and difficult to work with, while room temperature jam spreads more evenly and smoothly.
- Layering with Cream: Consider layering the jam with whipped cream or clotted cream to add richness and texture to your filling. The cream can also help offset any overly tart or sweet flavors, ensuring a balanced overall taste.
6. Consider Seasonal Fruit
Seasonal fruits can inspire your choice of jam. For example, in the summer, you might enjoy making a Victoria Sponge with homemade strawberry or raspberry jam. In the colder months, plum or blackcurrant jams could be more appropriate, as they tend to have richer, deeper flavors that match the season’s offerings.
Why the Right Jam Matters
Choosing the right jam for your Victoria Sponge Cake is crucial to achieving the perfect balance of sweetness and tartness. The jam serves as the heart of the filling, and its flavor profile should complement the light, airy texture of the sponge and the richness of the cream. Whether you stick with the classic raspberry jam or experiment with other varieties, your choice of jam can elevate the overall taste and presentation of the cake, making it a showstopper at any occasion.
Importance of Fresh Cream and Clotted Cream as the Filling
The creamy filling is one of the defining features of a Victoria Sponge Cake, and the choice between fresh cream and clotted cream plays a significant role in determining the cake’s texture, flavor, and overall richness. Both types of cream offer unique characteristics that can enhance your cake in different ways, and choosing the right cream is crucial to getting the perfect balance of flavors and texture.
1. Fresh Cream: Light and Velvety
Fresh cream is one of the most commonly used fillings in Victoria Sponge Cake. Known for its smooth, light, and airy texture, fresh cream is an essential ingredient that brings richness and moisture to the cake without overpowering the delicate sponge and jam.
Smooth and Light Texture
Fresh cream is light in texture and has a silky smooth consistency when whipped. When added as a filling, it doesn’t weigh down the cake but instead provides a soft, velvety contrast to the fluffiness of the sponge. Its natural sweetness complements the tartness of the jam, creating a well-balanced flavor profile.
Mild Flavor
The mild flavor of fresh cream makes it a versatile filling that works well with any type of jam, from raspberry to strawberry, and even more unconventional flavors like apricot or peach. The cream’s subtle taste enhances the overall experience without dominating the other ingredients. For those who prefer a less rich or heavy filling, fresh cream is an ideal choice.
Versatility and Accessibility
Fresh cream is easily accessible and often more affordable than other types of cream, such as clotted cream. It’s also incredibly easy to work with, making it a great choice for bakers of all experience levels. Simply whipping it to soft peaks provides a light texture that spreads easily without becoming too firm or greasy.
2. Clotted Cream: Rich and Decadent
Clotted cream, on the other hand, is a much richer and denser cream that adds a luxurious, indulgent touch to the Victoria Sponge. It’s traditionally used in the South West of England and is often associated with Cornwall, where it’s a staple for serving with scones during afternoon tea.
Rich, Thick Consistency
Clotted cream has a thick, almost butter-like consistency due to its high fat content. This makes it more indulgent and creamy than fresh cream. Its richness means that only a small amount is needed, making it a perfect addition for those who enjoy a more decadent cake experience.
Bold Flavor
Clotted cream offers a stronger, more intense flavor than fresh cream. Its naturally sweet and creamy taste pairs beautifully with the tartness of raspberry or strawberry jam, offering a delightful contrast. The richness of clotted cream balances out the sweetness of the jam and sponge, giving the entire cake a fuller, more luxurious mouthfeel.
Traditional and Elegant
Clotted cream is often seen as a more traditional choice, particularly for special occasions or celebrations. It adds an air of elegance to the cake, making it feel more refined. For those looking to elevate their Victoria Sponge to a new level of luxury, clotted cream is a standout choice that adds depth and richness.
3. Combining Fresh Cream and Clotted Cream: The Best of Both Worlds
While fresh cream and clotted cream each have their own unique characteristics, some bakers choose to combine the two for a balanced, dynamic filling. By blending the lightness of fresh cream with the richness of clotted cream, you can create a filling that has the best of both worlds—smooth, velvety, and light, with a touch of decadence and luxury.
- Whipping Fresh Cream with Clotted Cream: To achieve this combination, you can gently fold fresh cream into clotted cream after whipping the fresh cream to soft peaks. This creates a filling that retains the light, airy texture of fresh cream while benefiting from the richness of clotted cream. It’s a great way to offer a more complex flavor and texture to your Victoria Sponge.
- Layering with Jam: When using this combination, be mindful of how much jam you add, as the richness of the cream can complement the jam without becoming overwhelming. A thin layer of raspberry or strawberry jam can provide the perfect level of sweetness, enhancing the cream’s luxuriousness while allowing the sponge and jam flavors to shine through.
4. Serving and Storing
- Storage Considerations: Both fresh cream and clotted cream require careful storage to maintain their texture and flavor. Fresh cream should be kept in the fridge and used within a few hours of whipping to prevent it from becoming too soft or separating. Clotted cream, due to its higher fat content, tends to hold its consistency better and can be stored for a longer period. However, it should still be kept refrigerated to ensure freshness.
- Serving Tips: When serving a Victoria Sponge Cake with cream, it’s best to do so shortly after assembling, as both fresh cream and clotted cream can start to soften and separate over time. If making the cake in advance, it’s a good idea to store the layers separately and assemble the cake just before serving. This ensures that the cream filling remains intact and fresh for optimal texture and taste.
5. Which Cream to Choose for Your Victoria Sponge?
The decision between fresh cream and clotted cream ultimately depends on the desired flavor profile, texture, and occasion for which you’re baking. If you’re looking for a light, airy cake that’s easy to eat and serves as a crowd-pleaser for casual gatherings, fresh cream is the perfect choice. It’s ideal for everyday occasions, family tea times, or whenever you want a delicate filling that enhances the cake without overwhelming it.
If you’re preparing for a special occasion, such as a birthday, celebration, or afternoon tea, clotted cream provides a rich, indulgent experience that’s perfect for impressing guests. Its luxurious texture and flavor elevate the cake and make it feel extra special.
For a more balanced and dynamic filling, combining both fresh cream and clotted cream can offer a versatile solution that caters to different tastes and elevates the overall flavor profile of the Victoria Sponge Cake.
Why Fresh Cream and Clotted Cream Matter
Both fresh cream and clotted cream serve as essential elements in creating the perfect Victoria Sponge Cake. They contribute not only to the flavor and texture of the filling but also to the overall experience of the cake. The choice of cream can enhance the sweetness, richness, and overall appeal of the cake, making it a true delight for any occasion. Whether you opt for the lightness of fresh cream or the indulgence of clotted cream, both choices will help you achieve a decadent, mouthwatering dessert that’s sure to impress.
The Best Type of Butter for a Moist, Fluffy Victoria Sponge Cake
When it comes to baking a Victoria Sponge Cake, the choice of butter is crucial in achieving that signature moist, fluffy texture that makes this classic dessert irresistible. The type of butter you use can greatly influence both the taste and texture of the cake, so understanding the role of butter and selecting the best option will elevate your baking to perfection. Here’s how to choose the best butter for your Victoria Sponge:
1. The Role of Butter in a Victoria Sponge
Butter is a key ingredient in a Victoria Sponge Cake, contributing to its rich flavor, tender crumb, and light, airy texture. When creamed with sugar, butter creates small pockets of air that expand during baking, helping the cake rise and become fluffy. It also helps to keep the sponge moist, preventing it from becoming dry or crumbly.
Moisture and Richness
Butter has a high fat content, which helps retain moisture within the cake. This is particularly important in a Victoria Sponge Cake, where the texture should be tender yet light, and not dry or dense. The moisture in the butter keeps the sponge soft, even after it cools, ensuring the cake is enjoyable for longer.
Air Incorporation
When you cream the butter with sugar, you are incorporating air into the batter, which is essential for the cake’s lightness. The more air you can incorporate into the butter and sugar mixture, the fluffier the sponge will be. This step requires using the right type of butter to achieve the desired airy texture.
2. Types of Butter for the Best Results
While there are many types of butter available, not all are suitable for a light and fluffy Victoria Sponge. Here’s a breakdown of the best options:
A. Unsalted Butter
- Best Choice for Control Over Flavor: Unsalted butter is typically the best option for baking a Victoria Sponge. Without the salt, you have full control over the flavor of the cake, allowing the sweetness of the sugar and the flavor of the cream or jam to shine through without being overpowered by salt. Additionally, unsalted butter can be easily blended with the other ingredients, leading to a smooth batter and light sponge.
- Consistency and Texture: Unsalted butter provides the ideal balance between fat and moisture, which is key to creating a sponge with the right texture. It has a slightly firmer consistency than salted butter, which helps maintain the structural integrity of the cake while keeping it soft.
- Room Temperature Butter: For the best results, ensure the unsalted butter is at room temperature before creaming it with sugar. Cold butter will not cream as effectively and could result in a lumpy batter. Softened butter will allow for better air incorporation, ensuring a light, fluffy texture.
B. European-Style Butter
- Higher Fat Content: European-style butter, such as Kerrygold or Lurpak, has a higher fat content than American butter, typically around 82% fat compared to the standard 80% fat in regular butter. This extra fat creates a richer, more tender cake that is moist and decadent. The high-fat content also helps maintain a soft texture for longer, making it an excellent choice for cakes that need to hold up over time.
- Richer Flavor: European-style butter has a creamier, more intense flavor, which can enhance the overall taste of the Victoria Sponge. The richer taste also complements the sweetness of the jam and cream filling, providing a more luxurious mouthfeel.
- Buttery Texture: The high fat content also contributes to an even more fluffy texture. The extra moisture helps create a soft crumb, which is especially important for the delicate nature of a Victoria Sponge Cake.
C. Grass-Fed Butter
- Flavor and Nutritional Benefits: Grass-fed butter, made from the milk of cows that have been fed a diet of grass, tends to be richer in flavor and contains higher levels of beneficial fats like omega-3s and conjugated linoleic acid (CLA). This butter often has a slightly yellow hue due to the increased presence of beta-carotene, and it offers a distinct, creamy flavor that’s perfect for enhancing the taste of your sponge.
- Moisture Retention: Grass-fed butter has a high fat content, much like European-style butter, so it helps create a moist and tender crumb. It’s an excellent choice if you want to add a rich, creamy flavor to your cake while ensuring it retains its moistness.
D. Margarine (Alternative Option)
- Not Ideal for Traditional Victoria Sponge: While margarine is often considered a more affordable option for baking, it doesn’t yield the same quality of texture as butter. Margarine can create a more dense and heavier cake, which is generally not ideal for a Victoria Sponge, which should have a light, airy crumb.
- Less Flavor: Margarine lacks the rich, buttery flavor that traditional butter provides, and it’s also not as effective at incorporating air into the batter. As a result, cakes made with margarine may not have the same level of lightness or flavor as those made with high-quality butter.
- Use in a Pinch: If you’re in a pinch and don’t have access to butter, margarine can be used, but expect a slightly different texture and flavor. For the best results, opt for butter when making a classic Victoria Sponge.
3. Butter Storage Tips for Optimal Performance
The way you store your butter can affect its performance in baking, so here are some tips to ensure it stays in top condition:
- Keep It Cool: If you’re not using your butter immediately, store it in the fridge. However, be sure to let it come to room temperature before baking, as cold butter will not cream properly with sugar.
- Use Fresh Butter: Always check the expiry date on your butter to ensure it’s fresh. Rancid butter will negatively affect the flavor of your cake and could result in an unpleasant aftertaste. Fresh butter will create the best results for your Victoria Sponge Cake.
4. The Importance of Butter Quality
Not all butters are created equal, and choosing the highest-quality butter will pay off in the final result. Higher-fat butters like unsalted, European-style, or grass-fed butter produce cakes with better flavor, texture, and moisture retention. For the best Victoria Sponge, choose a premium butter that’s suitable for baking, and be sure to treat it properly to achieve the fluffiest, most delicious sponge possible.
Why Butter Matters for Your Victoria Sponge
The choice of butter is integral to achieving the perfect Victoria Sponge Cake. It influences the moisture, fluffiness, and richness of the cake, as well as the overall flavor. Whether you opt for unsalted, European-style, or grass-fed butter, selecting a high-quality option will ensure your sponge is light, airy, and irresistibly delicious. The key to success lies in using the right butter for the job and handling it properly to create a soft, moist crumb that melts in your mouth.
Step-by-Step Instructions: How to Make Victoria Sponge
Preparing the Cake Batter: Mixing the Ingredients
Creating the perfect Victoria Sponge Cake starts with the batter. Properly mixing the ingredients is essential for achieving the light, fluffy texture that this classic British dessert is known for. The way you mix the ingredients not only influences the taste but also the consistency of the cake. Here’s how to prepare the batter step by step to ensure a successful Victoria Sponge:
1. Creaming Butter and Sugar Together
The first and most important step in preparing your Victoria Sponge batter is creaming the butter and sugar. This step is crucial for creating a light, fluffy texture and ensuring the proper air incorporation.
Butter at Room Temperature
- Room temperature butter is a must for this process. It should be soft, but not melted. When butter is at room temperature, it blends smoothly with sugar, allowing you to incorporate air more effectively.
- If your butter is too hard, it won’t mix well with the sugar, and if it’s too soft, it could become greasy and difficult to aerate.
Mixing with Sugar
- Start by placing the softened butter and caster sugar (or superfine sugar) into your mixing bowl. Using a hand mixer or stand mixer, begin beating the butter and sugar together at a low speed, gradually increasing the speed to medium-high.
- Cream for about 4-5 minutes until the mixture is pale and fluffy. This process is known as aeration—incorporating air into the mixture so that the batter will rise well when baked, leading to a light, soft cake.
Why This Step Matters
The sugar crystals help to break up the fat molecules in the butter, creating a smooth, aerated mixture that traps air. This results in a light, spongy cake when baked, as the air pockets expand during the baking process. The smoother and fluffier the creamed butter and sugar mixture, the lighter your sponge will be.
2. Adding the Eggs
Once the butter and sugar are well creamed, it’s time to add the eggs. Eggs play a crucial role in both the structure and moisture of the cake. They help bind the ingredients together and create a soft, yet sturdy structure that holds the cake’s shape.
Adding Eggs One at a Time
- Add the eggs one at a time to the creamed butter and sugar mixture. This gradual incorporation allows the eggs to blend smoothly without curdling the mixture.
- After adding each egg, mix thoroughly to ensure it’s fully incorporated before adding the next. If you add the eggs all at once, the mixture can separate and become greasy, resulting in a less-than-ideal batter.
- If you’re using large eggs, two large eggs should be sufficient for a standard Victoria Sponge recipe. Be sure to beat the eggs lightly before adding them to make sure they’re evenly distributed in the mixture.
Preventing Curdling
In case the mixture starts to curdle, you can add a tablespoon of flour (from the recipe) to help bind the mixture. This will prevent the batter from becoming lumpy or separating and ensure a smooth, cohesive texture.
3. Sifting the Dry Ingredients
Next, sift the self-raising flour and baking powder together to ensure that the flour is evenly aerated and free from clumps. Self-raising flour already contains baking powder, so it helps your cake rise without requiring additional leavening agents.
Why Sift the Dry Ingredients?
- Sifting helps to aerate the flour and ensures that it’s evenly distributed throughout the batter, which results in a smooth, even texture in the final cake.
- It also helps to remove any lumps from the flour and baking powder, which could otherwise cause uneven rising and inconsistent texture.
Adding the Flour to the Mixture
- Once your dry ingredients are sifted, add them gradually to the butter, sugar, and egg mixture. It’s best to add the flour in two or three parts, mixing gently after each addition. This helps prevent the flour from being overworked, which could result in a dense cake.
- Use a spatula or a folding technique to gently incorporate the flour into the batter. This folding action helps maintain the air that was incorporated during the creaming process, ensuring the batter remains light and fluffy.
4. Adding the Liquid: Milk or Water
In many recipes, a small amount of liquid, such as milk or water, is added to loosen the batter and give it the right consistency. Liquid helps to ensure that the batter is smooth and can be poured easily into the cake pans.
Milk for Moisture and Flavor
- If you’re using milk, it adds extra moisture and enhances the flavor of the cake, making it richer and softer. You can use full-fat milk for a richer taste, or semi-skimmed milk for a lighter option.
- If you want a more neutral flavor, water can also be used to achieve the right consistency without altering the flavor profile of the sponge.
Adding Milk Gradually
- Gradually add the milk, a little at a time, while continuing to mix. The goal is to achieve a smooth, slightly thick batter that holds its shape but isn’t too stiff. If the batter is too thick, your cake may be dense and heavy. If it’s too thin, it could spread too much and lose its light, airy texture.
5. The Final Mixing Step
Once the flour and liquid have been incorporated, it’s time for the final mixing. This step should be done gently and carefully, as you want to avoid knocking out the air that has been incorporated into the batter.
Consistency Check
- The batter should be smooth, with no lumps or streaks of flour. It should also have a soft, droppable consistency, meaning it will fall off the spoon easily but still hold its shape.
- If the batter seems too thick, you can add a little more milk, one teaspoon at a time, until it reaches the right consistency.
Avoid Overmixing
- Once everything is combined, stop mixing. Overmixing the batter can cause the cake to become tough and dense, as it will over-develop the gluten. Gently fold the mixture until it’s just combined to ensure a light, delicate sponge.
6. The Batter Is Ready for Baking
Once the batter is fully mixed, it’s ready to be poured into your prepared cake pans. Be sure to preheat your oven to the correct temperature and grease the pans well to ensure that the sponge comes out easily after baking. Pour the batter into the pans, leveling the top with a spatula, and then place them in the oven to bake.
Why the Mixing Method Matters
The method of mixing the batter is critical for achieving the perfect Victoria Sponge. Properly creaming the butter and sugar, adding the eggs gradually, sifting the flour, and incorporating the liquid all contribute to a light, moist, and fluffy texture that makes the Victoria Sponge Cake so beloved. By following these steps carefully and mixing gently, you’ll ensure that your cake rises beautifully and has the right fluffiness and moisture for a perfect dessert every time.
Tips for Perfect Cake Layers: Baking and Cooling
The process of baking and cooling your Victoria Sponge Cake is just as important as mixing the ingredients. Properly handling the baking and cooling stages will ensure your cake layers come out light, moist, and even. Mistakes at this stage can result in a dense, uneven, or cracked sponge, so following these tips will help you achieve perfect cake layers every time.
1. Preheat Your Oven Correctly
Before you even begin preparing your cake, ensure that your oven is preheated to the proper temperature. Preheating is critical to ensure that the cake starts baking immediately after being placed in the oven, which helps it rise properly.
Correct Temperature
- For a Victoria Sponge Cake, the typical baking temperature is around 350°F (175°C). However, always refer to your recipe, as slight variations may apply.
- Oven temperatures can vary, so if you have an oven thermometer, it’s a good idea to use one to ensure the temperature is accurate. Baking at the right temperature ensures the cake cooks evenly and doesn’t dry out or become undercooked in the middle.
Even Heating
- Place your cake in the center of the oven to ensure the heat circulates evenly around the layers. This helps the cake rise uniformly without browning too quickly on one side.
2. Prepare the Cake Pans Properly
Properly preparing your cake pans will prevent the batter from sticking and ensure that the layers come out smoothly and evenly.
Greasing and Lining
- Grease your pans with butter or oil, and then line them with parchment paper or baking paper. The parchment paper should fit snugly inside the pan, covering the bottom and sides, to allow the cake to come out easily after baking.
- If you’re making a layered Victoria Sponge, use two separate pans of equal size for even layers. This ensures that both layers bake simultaneously and are of the same height.
Flouring the Pans
- After greasing and lining, dust the pans with a light sprinkling of flour. Tap the pans to remove excess flour. This step creates a non-stick surface, further ensuring that the cake layers release easily after baking.
3. Avoid Opening the Oven Door Too Soon
Once the cake is placed in the oven, avoid opening the oven door in the first 20 minutes of baking. Opening the door too early can cause temperature fluctuations, which could cause the cake to sink in the middle or result in an uneven rise.
Why Temperature Stability is Important
- Consistency is key when baking. The oven’s heat must remain constant for the batter to set and rise evenly. Opening the door can cause the oven to lose heat, which may prevent the cake from rising properly.
- If you need to check the cake, use the oven light or a timer to gauge the time. If you do open the door, do so gently and quickly to minimize temperature loss.
4. Know When the Cake is Ready
Knowing when your Victoria Sponge Cake is fully baked is essential to avoid undercooking or overcooking.
Baking Time
- The typical baking time for a Victoria Sponge Cake is around 20 to 25 minutes, depending on the size and thickness of your layers. However, the exact time may vary based on your oven and the recipe you’re following, so keep an eye on the cake.
- Check the cake’s doneness by gently pressing the center with your finger. If it springs back, it’s done. If it leaves an indentation, it needs more time to bake.
- Another test is to insert a skewer or toothpick into the center of the cake. If it comes out clean, your cake is ready. If it comes out with wet batter, bake for a few more minutes and test again.
Even Rising
- As the cake bakes, it should rise evenly and slowly in the center, forming a slight dome. If the cake rises unevenly or sinks in the middle, it could be an indication of an issue with the batter, oven temperature, or pan preparation.
5. Cooling the Cake Properly
After the cake is baked, the cooling process is crucial for preventing a soggy or dense texture.
Let the Cake Rest in the Pan
- Allow the cake to cool in the pan for about 10 minutes after baking. This allows the cake to firm up slightly, making it easier to remove from the pan without breaking.
- If you try to remove the cake too early, it may crumble or stick to the pan. Letting it rest briefly gives the structure time to set.
Remove the Cake from the Pan
- After the initial cooling period, carefully run a knife around the edge of the cake to loosen it from the sides of the pan.
- Flip the pan gently onto a cooling rack, tapping the bottom to release the cake. Then, carefully peel off the parchment paper. Allow the cakes to cool completely before moving on to the next step.
6. Cooling Completely Before Assembling
Allow your cake layers to cool completely on a wire rack before assembling the Victoria Sponge. This is especially important if you’re going to add filling, as a warm cake can cause the jam and cream to melt, leading to a soggy filling and less-than-ideal texture.
Why Cooling Matters
- Even cooling helps the cake firm up and set the crumb, preventing it from being too crumbly when you slice it. It also prevents the jam and cream from becoming runny when added.
- If you try to assemble the cake while it’s still warm, the heat can also cause the sponge to collapse or lose its shape.
7. Storing and Handling the Layers
If you’re not assembling the cake right away, store the cooled cake layers carefully to preserve their freshness and texture.
Wrap for Freshness
- Once completely cooled, wrap the cake layers tightly in plastic wrap or cling film. Store them at room temperature, away from direct sunlight. This will help retain moisture and prevent the cake from drying out.
Avoid Refrigeration (unless necessary)
- While it’s okay to refrigerate the cake once it has been assembled, it’s best not to store the individual layers in the fridge before assembly, as the cold can make the sponge become dry and dense.
Why Proper Baking and Cooling are Key
Proper baking and cooling techniques are essential to achieving perfectly even, moist, and light Victoria Sponge Cake layers. Preheating the oven, greasing and lining the pans, and following the right baking time will ensure your layers rise beautifully and remain fluffy. Cooling the cake layers properly is equally important, as it prevents sogginess and ensures the best texture for your cake. With these tips, you’ll achieve perfectly baked, soft, and delicious layers ready to be filled with jam and cream!
Assembling the Cake: Spreading Jam and Cream Between the Layers
Assembling your Victoria Sponge Cake is the final and one of the most exciting steps of the process. This is when the cake comes together, transforming from two simple sponge layers into a delicious, classic British dessert. The key to a perfect Victoria Sponge lies in the careful spreading of jam and cream between the layers. Here are some important tips and techniques to ensure that your assembly is flawless:
1. Choosing the Right Tools for Assembling
Before you start assembling, it’s essential to have the right tools. These help ensure that the layers remain intact and the fillings are applied smoothly.
Spatula or Palette Knife
- Use a flat spatula or a palette knife to spread the jam and cream evenly. A palette knife gives you better control and allows for a smooth and even application, especially when working with delicate sponge layers.
- Ensure the spatula or knife is clean and smooth to prevent any cake crumbs from mixing into the filling, which could cause an uneven or crumbly appearance.
Cake Turntable (Optional)
- If you have a cake turntable, it’s incredibly useful for rotating the cake as you spread the jam and cream. This makes the process quicker and more efficient, helping to keep the layers neat.
2. Preparing the Layers for Assembly
Before you spread the jam and cream, take a few steps to prepare the sponge layers properly. This helps ensure that the fillings go on smoothly and evenly, without damaging the delicate sponge.
Level the Cake Layers
- Once your cake layers have cooled completely, check the top of each layer. Often, the center of the cake may rise higher than the edges, resulting in a slight dome shape.
- Trim the tops of the cakes with a serrated knife to create a flat surface. This is important because flat layers will stack better and prevent the cake from becoming unbalanced when filled. Make sure to trim evenly and avoid cutting off too much.
Flip One Layer Upside Down
- To ensure a neat and smooth surface for the filling, flip one of the cake layers upside down. The bottom of the cake tends to be flatter and more even, making it the perfect base for the jam and cream.
3. Spreading the Jam
The traditional jam filling in a Victoria Sponge is one of its defining features. The sweetness of the jam balances perfectly with the richness of the cream, adding a burst of flavor and moisture to the cake.
Choosing the Jam
- Raspberry jam is the classic choice for a Victoria Sponge, as its tartness complements the sweetness of the sponge and cream. However, strawberry jam or even apricot preserves are also common alternatives that work well with the sponge.
- Make sure to use smooth jam, free from seeds or large chunks of fruit, as it will spread more easily and result in a smoother, more polished appearance.
Spreading the Jam
- Use your spatula to spread a generous but even layer of jam on top of the upside-down layer.
- Start by placing a small dollop of jam in the center, then work your way outwards towards the edges, spreading the jam gently to avoid tearing the cake.
- Leave a small border around the edges to prevent the jam from spilling out once the top layer is placed on top.
How Much Jam to Use
- A thin layer is generally sufficient, but you can adjust the amount depending on your preference for sweetness. Just ensure you don’t use too much, as the jam could ooze out when the layers are stacked and cause a mess.
4. Adding the Cream
After the jam has been spread evenly, the next step is to add the cream. Traditionally, whipped double cream is used, but you can also use clotted cream for a richer, denser filling.
Whipping the Cream
- If you’re using double cream, whip it until it forms soft peaks. It should be thick enough to hold its shape but not overly stiff. Overwhipping the cream can make it grainy or buttery, so stop whipping once it reaches the right consistency.
- If you prefer clotted cream, it’s typically spread as is, since it’s already rich and thick. Clotted cream has a dense texture and naturally buttery flavor, which adds a luxurious feel to the cake.
Spreading the Cream
- Once the cream is ready, spread a generous amount of whipped cream (or clotted cream) evenly over the jam. Again, use your spatula to create an even layer. Start at the center and work your way outwards.
- The cream should cover the jam entirely, creating a smooth, fluffy layer. Be careful not to apply too much cream, as it could spill over when the second layer is added.
Tips for a Neat Cream Filling
- To avoid excess cream spilling out, lightly press the cream into the cake layer with the spatula to set it in place before adding the top layer. This will help the cream stay in position and prevent it from sliding or oozing out.
- If you find that the cream is too runny or soft, you can chill it for a few minutes before spreading it on the cake to firm it up slightly.
5. Placing the Top Layer
Once the jam and cream are spread evenly, it’s time to place the second layer of the sponge on top.
Align the Layers Carefully
- Gently pick up the top layer of cake and align it carefully over the filled layer. Be sure to center it properly so that the cake is symmetrical and balanced.
- If you’ve flipped one layer upside down, the smoother side should be facing up. Gently press the top layer down to ensure the fillings stick to the cake.
Press Gently
- Press down gently on the top layer to allow the jam and cream to stick. Be careful not to press too hard, as it could cause the layers to collapse or become uneven. The cake should settle gently onto the filling.
6. Final Touches: Dusting and Presentation
Once the cake layers are assembled, it’s time to give your Victoria Sponge the final touch to make it look even more inviting.
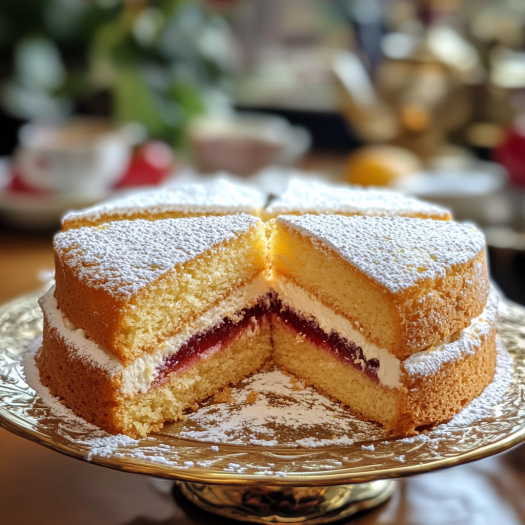
Dusting with Icing Sugar
- Dust the top of the cake with a light sprinkling of icing sugar or powdered sugar for a simple and elegant finish. Use a fine sieve to create an even layer of sugar. This not only adds to the visual appeal but also provides a sweet contrast to the richness of the cream and jam.
Optional Garnishes
- You can also garnish the top with fresh berries, such as raspberries or strawberries, for added color and flavor. These fresh fruits complement the sweetness of the jam and cream and make the cake even more visually appealing.
- For an extra touch of elegance, a few mint leaves can be added to create a fresh contrast to the sweetness of the jam and cream.
7. Serving and Enjoying
Once your Victoria Sponge is assembled and garnished, it’s ready to be served. Slice it carefully using a serrated knife to ensure clean, even slices that highlight the jam and cream filling.
Why Assembly is Key to a Perfect Victoria Sponge
The jam and cream filling is what makes the Victoria Sponge Cake so beloved, and getting this step right is crucial to the overall success of the cake. The balance of sweet jam and rich cream between the soft, airy sponge creates the iconic texture and flavor that has made the Victoria Sponge a favorite for over a century. By following these assembly tips, you’ll ensure that your cake layers are not only visually stunning but also deliciously balanced, making it the perfect treat for any occasion.
Presentation: Finishing Touches Like Dusting with Powdered Sugar
Once your Victoria Sponge Cake is assembled, it’s time to focus on the presentation. The final appearance is just as important as the taste, as it gives your cake that professional, polished look. Even simple finishing touches can elevate the overall aesthetic and make your cake look as good as it tastes. One of the simplest and most classic ways to enhance the presentation is by dusting the top with powdered sugar. Here’s how to perfect the presentation and add those elegant finishing touches.
1. Why Powdered Sugar is Ideal
Dusting your cake with powdered sugar (also known as icing sugar) is a timeless way to finish off a Victoria Sponge. This delicate touch adds a layer of elegance without overwhelming the flavors or textures of the cake. The lightness of powdered sugar complements the fluffiness of the sponge and the richness of the jam and cream, balancing both visually and tastefully.
The Aesthetic Appeal
- Subtle Elegance: The light dusting of sugar creates a soft, ethereal appearance, adding a touch of sophistication to your cake.
- Contrast with the Cake: The white powder contrasts beautifully with the golden sponge and vibrant red jam, creating a visually striking effect. It enhances the look without overshadowing the natural beauty of the layers.
- Final Polish: A dusting of powdered sugar serves as the finishing touch that transforms a simple homemade cake into an impressive dessert worthy of any special occasion.
2. The Proper Technique for Dusting Powdered Sugar
While it might seem like a small detail, how you dust the powdered sugar can make a big difference in the cake’s appearance. Here’s how to get it just right:
Use a Fine Mesh Sieve
- To achieve a light and even coating, always use a fine mesh sieve or sifter to sprinkle the powdered sugar. This prevents clumping and ensures that the sugar is applied evenly across the surface of the cake.
- A sieve allows you to distribute the sugar delicately, creating a soft, airbrushed effect rather than a heavy coating.
Dust from Above
- Hold the sieve about 6–8 inches above the cake, and gently tap it to release the powdered sugar. Start from the center and work your way outward in a circular motion to ensure even coverage.
- Don’t overdo it. A light dusting is all you need for a subtle, refined look. You can always add a little more if needed, but it’s easier to add than to remove excess powdered sugar.
Covering the Cake
- Be mindful of the edges. While you don’t want to cover the sides with sugar (unless you want to), make sure to focus on the top, where the sugar will stand out the most.
- If you want to highlight the top layer of the cake more distinctly, you can even use a stencil. Place a stencil on top of the cake and dust powdered sugar through it to create intricate patterns or a decorative motif on the surface.
3. Additional Finishing Touches for Extra Elegance
While powdered sugar is a classic and beautiful option, there are other finishing touches you can add to elevate your Victoria Sponge’s presentation further. Here are a few creative ways to dress up the cake for special occasions or to simply make it stand out:
Fresh Fruit
- Fresh berries, such as raspberries, strawberries, or blackberries, add not only vibrant color but also a burst of freshness that complements the sweetness of the cake. Arrange a few scattered fruits across the top for an added touch of color and texture.
- Fresh fruit also works beautifully with the jam filling, as it echoes the fruity flavors and adds visual contrast to the creamy filling.
Mint Leaves or Edible Flowers
- For a more sophisticated touch, garnish the cake with a few fresh mint leaves or edible flowers like violets or lavender. These provide a pop of color and a light herbal note that enhances the overall flavor profile of the cake.
- Edible flowers give the cake a whimsical, vintage aesthetic, making it look even more inviting and charming.
Whipped Cream Rosettes
- If you want to add a little more indulgence, consider adding a few decorative whipped cream rosettes on top of the cake. You can use a piping bag fitted with a star nozzle to pipe small rosettes around the edge of the cake or on top of the layers for an elegant finish.
- Whipped cream complements the lightness of the sponge and adds a touch of decadence to the cake.
Shaved Chocolate or Nuts
- For a more decadent twist, you can add a small amount of shaved chocolate or chopped nuts (such as almonds or hazelnuts) on top of the cake. These elements add texture and an extra layer of flavor, especially if you want to give the cake a more festive look.
4. Serving Suggestions
Once your cake is beautifully decorated and dusted with powdered sugar, it’s time to think about how to serve it. Presentation goes hand-in-hand with how you cut and serve the cake:
Serving Plates
- Serve your Victoria Sponge on an elegant cake stand or a simple, neutral-colored plate to allow the cake to be the focal point.
- Cake plates with decorative edges can also add an extra layer of elegance and make your cake look even more impressive.
Cutting the Cake
- When it’s time to cut the cake, make sure to use a serrated knife to slice it cleanly. If you’ve dusted the top with powdered sugar, be extra gentle when cutting to avoid disturbing the sugar.
- For neat slices, you may want to use a cake server to lift each piece out cleanly without disturbing the rest of the cake.
5. Presentation for Special Occasions
For events like afternoon tea, birthdays, or family gatherings, presentation matters even more. Here are some ways to elevate the look for those occasions:
Themed Garnishes
- If you’re serving the cake for a holiday or themed event, consider matching your garnishes to the occasion. For example, red and green fruits for Christmas, pastel flowers for spring celebrations, or heart-shaped decorations for Valentine’s Day.
- Decorative cake toppers like small figurines or a celebratory message written in icing can also add a personal touch for special moments.
Multiple Layered Cakes
- If you’re making a more elaborate version of the Victoria Sponge for a larger crowd, consider making a multi-layered version. For added elegance, stack the layers and decorate them as described above, making sure each layer is beautifully presented for guests.
Why Presentation Matters for the Victoria Sponge Cake
Presentation plays a crucial role in making your Victoria Sponge Cake stand out. A simple yet elegant dusting of powdered sugar, along with additional finishing touches like fresh fruit, mint leaves, or whipped cream rosettes, not only enhances the visual appeal of the cake but also helps set the tone for the occasion. A beautifully presented cake enhances the overall experience of enjoying this classic British dessert, making it as delightful to look at as it is to taste.
Tips and Variations for Your Victoria Sponge

Expert Tips for a Light, Fluffy Sponge
Achieving a light, fluffy Victoria Sponge is the key to creating the perfect version of this classic British cake. The sponge should be airy and soft, with a fine texture that contrasts beautifully with the rich jam and cream filling. However, getting that perfect sponge can sometimes be tricky. To help you get the best results, here are some expert tips to ensure your Victoria Sponge comes out light and fluffy every time:
1. Use the Right Flour: Self-Raising Flour
- The texture of the sponge largely depends on the flour you use. While you can make your own self-raising flour by adding baking powder to plain flour, self-raising flour is the best choice for achieving a fluffy texture.
- Self-raising flour contains a small amount of baking powder already mixed in, which helps the cake rise as it bakes. This eliminates the need for additional leavening agents, ensuring a more consistent rise in your cake.
Tip: If you’re using plain flour, be sure to add the right amount of baking powder (usually about 1½ teaspoons per 120g of flour) to get the same lightness.
2. Proper Creaming of Butter and Sugar
The creaming process is one of the most important steps in baking a light and fluffy sponge. This step involves beating the butter and sugar together until the mixture is light, pale, and fluffy. The goal is to incorporate air into the mixture, which will help the cake rise while baking.
Tip: Start with room temperature butter, as it will cream much more easily than cold butter. Use an electric mixer or stand mixer for best results, as it allows you to achieve the perfect consistency more quickly.
- Beat the butter and sugar together for at least 4–5 minutes until the mixture is light in color and texture. The longer you beat it, the more air you’ll incorporate, which results in a fluffier cake.
3. Don’t Overmix the Batter
Once you’ve added the dry ingredients, be careful not to overmix the batter. Overmixing can cause the gluten in the flour to develop too much, leading to a denser texture.
Tip: Mix the batter only until the dry ingredients are incorporated into the wet ingredients. If you’re using a stand mixer, switch to a lower speed once you add the flour. If mixing by hand, use a gentle folding motion to incorporate the flour.
4. Incorporate Eggs One at a Time
When adding the eggs to your butter and sugar mixture, add them one at a time and beat well after each addition. Adding eggs gradually helps the batter emulsify properly, ensuring a smoother mixture without lumps.
Tip: If your eggs are cold, you might notice the mixture curdling. To prevent this, you can warm the eggs gently in a bowl of warm water for a few minutes before adding them to the mixture.
5. Add a Little Milk or Water for Extra Moisture
While a Victoria Sponge is typically light, it can sometimes dry out if the batter is too stiff. Adding a small amount of milk (or water) can improve the sponge’s texture, keeping it moist without weighing it down.
Tip: Add just a tablespoon or two of milk or water if the batter looks too thick. This ensures that your sponge will rise beautifully and stay light and moist.
6. Sift Dry Ingredients
Sifting the flour, baking powder, and other dry ingredients together is an essential step that should not be skipped. Sifting ensures that the dry ingredients are evenly distributed and that no clumps are present in the batter.
Tip: Sift the flour and baking powder before adding them to the wet ingredients to ensure even distribution. This helps create an even batter, which contributes to the lightness of the finished sponge.
7. Use the Right Oven Temperature
Baking your Victoria Sponge at the correct temperature is crucial for a light texture. A temperature that’s too low can cause the cake to bake unevenly, while too high a temperature can cause the cake to rise too quickly, creating a dense or uneven texture.
Tip: Bake your sponge at 170°C (325°F) for a conventional oven or 150°C (300°F) for a fan-assisted oven. Always preheat your oven thoroughly before placing the cake inside. Avoid opening the oven door in the first 15 minutes to allow the sponge to rise properly without deflating.
8. Check for the “Spring Back” Test
The best way to know if your Victoria Sponge is fully baked is the spring-back test. Once you think the cake is done, press gently on the center of the sponge with your finger. If it springs back and doesn’t leave an indent, the cake is ready. If the indentation remains, bake for a few more minutes and check again.
Tip: If you notice the edges of the cake are starting to pull away from the pan, that’s another indication that it’s likely done.
9. Avoid Overbaking
Overbaking is one of the most common mistakes that can lead to a dry, dense Victoria Sponge. If your sponge is overbaked, it will lose the lightness and fluffiness you’re striving for.
Tip: Always check the cake a few minutes before the suggested baking time is over. If it’s starting to turn golden on top and passes the spring-back test, it’s done. Remember, the cake will continue to cook in the pan for a few minutes after it’s been taken out of the oven, so don’t leave it in the oven for too long.
10. Cool the Cake Properly
How you cool your Victoria Sponge is just as important as how you bake it. Cooling it the right way prevents it from becoming soggy or losing its fluffy texture.
Tip: Allow the cake to cool in the pan for 5 minutes before transferring it to a wire rack. This allows the structure to firm up slightly, making it easier to handle. Once on the rack, cool the cake completely before assembling to avoid the jam and cream from melting or seeping into the sponge.
Why These Tips Matter
Each of these expert tips plays a crucial role in creating a light, airy, and perfectly fluffy Victoria Sponge. By following these methods—such as using self-raising flour, properly creaming the butter and sugar, adding eggs slowly, and not overmixing—you’ll be able to achieve a delicate sponge that rises beautifully and has a melt-in-your-mouth texture. With practice and attention to detail, you’ll be able to bake a Victoria Sponge that not only tastes amazing but also looks like it came from a professional bakery!
How to Adapt the Recipe for Different Dietary Needs (Gluten-Free, Vegan, etc.)
While the traditional Victoria Sponge cake recipe is already delicious, it can easily be adapted to suit a variety of dietary requirements. Whether you’re catering to gluten-free or vegan guests, or if you want a dairy-free or low-sugar version, it’s possible to tweak the ingredients to create a cake that meets specific dietary needs without compromising too much on flavor or texture. Here’s how you can adapt the Victoria Sponge Cake for different dietary needs:
1. Gluten-Free Victoria Sponge
If you or your guests are gluten intolerant, you can make a gluten-free version of the classic Victoria Sponge without losing its light, airy texture. The key is to substitute the regular self-raising flour with a gluten-free flour blend designed for baking.
What You Need to Know:
- Flour Substitution: Use a gluten-free all-purpose flour blend instead of regular flour. Make sure the blend contains a mix of rice flour, potato starch, and a binding agent (like xanthan gum) to give it structure and improve the texture.
- Baking Powder: Ensure your gluten-free flour blend already contains baking powder, or add a gluten-free version of baking powder to ensure the cake rises properly.
- Texture: Gluten-free cakes can sometimes be drier or denser than those made with wheat flour. To combat this, consider adding a bit more liquid (such as almond milk or a dairy-free option) or a tablespoon of ground almonds to keep the sponge moist and fluffy.
Tips for Best Results:
- Add a binder: Gluten-free cakes may need extra binding agents to help with structure. Adding a tablespoon of xanthan gum or guar gum can help provide elasticity and improve texture.
- Check the cake early: Gluten-free cakes tend to bake faster, so check for doneness a few minutes earlier than the original recipe suggests. Use the toothpick test to ensure the center is fully cooked.
2. Vegan Victoria Sponge
A vegan Victoria Sponge omits any animal products, meaning no eggs, dairy, or butter. Fortunately, there are plenty of easy substitutes to ensure your cake is just as light and fluffy as the traditional version.
What You Need to Know:
- Egg Replacement: To replace eggs, use flaxseed meal or chia seeds (1 tablespoon of ground seeds mixed with 3 tablespoons of water equals one egg) or a commercial egg replacer. Apple cider vinegar combined with baking soda can also serve as a leavening agent in place of eggs.
- Butter Substitute: Use vegan butter (made with oils like coconut, olive, or sunflower) or substitute with coconut oil or margarine. Both work well to create a soft, moist sponge.
- Milk Substitute: Any plant-based milk can be used in place of dairy milk, including almond milk, soy milk, oat milk, or coconut milk. Choose an unsweetened version to avoid altering the flavor too much.
Tips for Best Results:
- Use a non-dairy cream: For the cream filling, you can opt for coconut cream, soy whipped cream, or cashew cream to create a rich and creamy filling. Be sure to chill the cream or milk alternative beforehand to help it whip.
- Watch the texture: Vegan cakes sometimes require additional leavening, so use a little extra baking powder or a touch of baking soda to help the cake rise.
3. Dairy-Free Victoria Sponge
For those with a dairy intolerance or for vegan guests, the traditional butter and cream in the Victoria Sponge can be easily substituted with dairy-free options.
What You Need to Know:
- Butter Substitution: Replace regular butter with dairy-free margarine or vegan butter. You can also use coconut oil for a slight coconut flavor or olive oil for a more neutral taste.
- Cream Substitution: For the classic whipped cream filling, use coconut cream or a store-bought dairy-free whipped cream. Make sure the coconut cream is chilled to the point where it can be whipped into a creamy texture.
- Milk Substitution: Use a dairy-free milk like almond milk, coconut milk, soy milk, or oat milk to replace regular milk. These alternatives will add moisture to the sponge and maintain a light texture.
Tips for Best Results:
- Coconut-based filling: If you’re using coconut cream, make sure it’s thick and chilled properly before whipping. A slight coconut flavor can work really well with the jam and cream filling for a unique twist on the classic.
- Fluffier texture: If you want to make your dairy-free sponge extra fluffy, consider adding a tablespoon of apple cider vinegar along with the baking soda. This will help the cake rise while keeping it tender.
4. Low-Sugar or Sugar-Free Victoria Sponge
For those who need to monitor their sugar intake, there are ways to reduce or eliminate sugar from the recipe while still making a delicious cake.
What You Need to Know:
- Sugar Substitution: You can use natural sweeteners like stevia, erythritol, xylitol, or monk fruit as sugar alternatives. These are lower in calories and have minimal impact on blood sugar levels. Alternatively, you can use apple puree, date paste, or honey (for non-vegan options) as natural sweeteners.
- Flour Adjustments: Some sugar substitutes may require changes in the amount of flour or liquid used. For example, stevia may need additional moisture to compensate for its lack of bulk.
Tips for Best Results:
- Adjust the baking time: Sugar alternatives may affect how quickly your cake bakes, so check it a few minutes earlier than the original recipe suggests. Use the spring-back test and a toothpick to ensure doneness.
- Taste test the batter: Since some sugar substitutes are sweeter than regular sugar, taste the batter before baking and adjust the sweetness as needed.
5. Nut-Free Victoria Sponge
For individuals with nut allergies, it’s important to ensure that the recipe is free from nuts, including almond flour or any nut-based milks.
What You Need to Know:
- Nut-Free Flour: Simply use regular self-raising flour or a gluten-free flour blend that does not contain almond flour.
- Milk Substitute: Opt for rice milk, soy milk, or oat milk instead of almond milk or any other nut-based alternatives.
- Avoid Almond Meal: If the recipe calls for ground almonds (used to keep the cake moist), you can use sunflower meal as a replacement, which works similarly to almond meal.
Tips for Best Results:
- If you’re replacing ground almonds with sunflower meal, you may need to add a bit of extra liquid to the cake batter to maintain moisture and ensure the sponge is light and fluffy.
Why Adaptations Matter
Adapting the Victoria Sponge Cake recipe for dietary needs ensures that everyone can enjoy this classic British dessert, no matter their restrictions. By substituting the right ingredients—whether it’s going gluten-free, vegan, dairy-free, low-sugar, or nut-free—you can maintain the cake’s iconic texture and flavor, making it accessible to all guests. With these substitutions, you can continue to enjoy the timeless appeal of the Victoria Sponge without sacrificing your dietary preferences or health concerns.
Creative Variations: Adding Fruits, Flavors, or Fillings
While the classic Victoria Sponge Cake is beloved for its simple yet delightful combination of jam and whipped cream, it offers plenty of opportunities for creative variations. By incorporating different fruits, flavors, and fillings, you can transform the traditional recipe to suit your tastes, or even make it a showstopper for special occasions. Here are some delicious ideas to give your Victoria Sponge a unique twist while preserving its classic essence:
1. Fruit Fillings and Flavors
One of the easiest ways to elevate your Victoria Sponge is by incorporating fresh fruits or fruit jams into the filling. This adds natural sweetness, moisture, and a burst of flavor that pairs wonderfully with the cake’s light sponge. Here are a few popular fruit-based variations:
a. Raspberry Jam & Fresh Berries
- Raspberry jam is a traditional filling for the Victoria Sponge, but you can also add fresh raspberries on top of the jam to add a tart contrast to the sweetness of the cake. The combination of raspberry jam and fresh berries like strawberries, blueberries, or blackberries creates a refreshing and vibrant flavor profile.
- Tip: When adding fresh fruit, consider lightly macerating it with a small amount of sugar to bring out its juices, giving you a luscious fruit filling without excess moisture.
b. Lemon & Blueberry
- For a citrusy twist, you can add lemon zest and lemon juice to your sponge cake batter to infuse it with a fresh, tangy flavor. A lemon-flavored filling, made from lemon curd or a combination of whipped cream and lemon zest, pairs beautifully with blueberries.
- Tip: Layer lemon curd between the sponge layers along with a few handfuls of blueberries. The citrus flavor enhances the sponge’s lightness, and the berries add a touch of sweetness.
c. Strawberry & Cream
- The classic strawberry jam filling is always a crowd-pleaser, but adding fresh strawberries can take it to the next level. A rich, creamy filling made from whipped cream or clotted cream perfectly complements the sweetness of the berries.
- Tip: Slice fresh strawberries and layer them with the jam and whipped cream. You can even add a bit of vanilla extract to the cream to give it a rich flavor that enhances the strawberries’ sweetness.
d. Peach & Apricot
- For a tropical twist, consider using peach jam or apricot jam as your filling, or opt for fresh peach slices layered with cream. These fruits bring a sweet and juicy contrast to the fluffy sponge.
- Tip: Combine peach slices with a little honey or cinnamon for an extra burst of flavor, or serve the cake with a peach compote for a sophisticated twist.
2. Nutty and Chocolate Variations
Nuts and chocolate are perfect additions to a Victoria Sponge, providing rich, indulgent flavors and textures. These variations are perfect for those with a sweet tooth and a love for creamy decadence.
a. Chocolate and Hazelnut
- Chocolate adds a rich, indulgent flavor to the traditionally light and airy sponge. You can incorporate melted dark chocolate into the cake batter or add chocolate ganache or chocolate buttercream as a filling.
- For a nutty addition, consider layering chopped hazelnuts or toasted almonds between the layers for a bit of crunch and extra flavor.
- Tip: Use Nutella as a filling in combination with whipped cream for a creamy, hazelnut-chocolate filling.
b. Almond and Marzipan
- Add almond meal to your cake batter for a subtle nutty flavor, or use marzipan as an alternative to jam. Marzipan is sweet, almond-flavored, and creates a unique, chewy texture in between the layers of sponge.
- Tip: Roll out thin sheets of marzipan and place them between the sponge layers with whipped cream for a decadent, nutty twist.
c. Chocolate Sponge with Ganache
- Make a variation of Victoria Sponge with a chocolate sponge instead of the traditional vanilla one. You can replace part of the flour with cocoa powder to make a rich, chocolatey base. Pair it with a rich chocolate ganache or whipped chocolate cream filling to create a dessert that’s both airy and indulgent.
- Tip: Add a touch of coffee to the ganache or batter to enhance the chocolate flavor and create a mocha-inspired version.
3. Spiced and Exotic Flavors
Introduce exotic spices or flavorings into the sponge cake batter for a sophisticated and unexpected twist on the classic. This is a great option for those who like to experiment with different flavor profiles.
a. Cinnamon and Apple
- Adding cinnamon to the cake batter creates a warm, comforting flavor that pairs perfectly with the sweetness of apples. You can use apple compote or thinly sliced baked apples as the filling, along with a dollop of whipped cream or cream cheese frosting.
- Tip: Dust the top of the cake with cinnamon and powdered sugar for a beautiful finish and a hint of extra flavor.
b. Cardamom and Pistachio
- For an exotic twist, consider adding cardamom to your cake batter, paired with a pistachio cream or crushed pistachio nuts. The warm spice of cardamom complements the rich, earthy flavor of pistachios, making for a fragrant, flavorful cake.
- Tip: For a Middle Eastern-inspired version, you can drizzle a little rose water syrup over the sponge layers for a floral touch.
c. Coconut and Lime
- Coconut and lime make an excellent pairing, adding both tropical sweetness and zesty brightness. Use coconut milk in the cake batter and add lime zest to give the cake a fresh, summery flavor. A coconut-flavored cream filling or coconut flakes between the layers will further enhance the tropical feel.
- Tip: Combine lime curd with coconut cream to create a refreshing and tangy filling.
4. Vegan-Friendly Flavors
If you’re catering to vegan guests, you can still get creative with flavors and fillings by using plant-based alternatives. Vegan versions of whipped cream, butter, and milk open the door to endless possibilities.
a. Coconut and Passionfruit
- Coconut and passionfruit are perfect for a tropical vegan twist. Coconut whipped cream can be paired with passionfruit pulp for a sweet and tangy filling, giving the cake an exotic flair.
- Tip: For an even richer flavor, use coconut milk in the cake batter and add fresh passionfruit seeds as a topping for extra texture.
b. Mixed Berries and Vegan Cream
- A combination of blueberries, strawberries, and blackberries pairs well with vegan whipped cream for a fruity, dairy-free option that still feels indulgent.
- Tip: Consider adding a spoonful of vegan yogurt mixed with a little vanilla extract into the cream for added richness and texture.
Why Creative Variations Matter
These creative variations allow you to experiment with different flavors, fruits, and textures, while still keeping the heart of the Victoria Sponge intact. Whether you opt for traditional jam fillings or explore exotic spices, fruits, and nuts, there’s always room to make this iconic dessert your own. These ideas not only give you new ways to enjoy the Victoria Sponge but also provide a unique twist that can impress guests at any gathering or occasion.
Common Mistakes to Avoid When Baking Victoria Sponge Cake
Baking a perfect Victoria Sponge Cake can seem straightforward, but there are several common pitfalls that can lead to less-than-ideal results. Understanding and avoiding these mistakes will help you achieve a light, fluffy sponge with the perfect texture. Here are some of the most frequent mistakes people make when baking this classic British cake, and tips on how to avoid them:
1. Overmixing the Batter
One of the most common mistakes when making a Victoria Sponge Cake is overmixing the batter. While it’s tempting to beat the mixture vigorously to ensure everything is well combined, doing so can cause the cake to become dense and heavy.
Why This Happens:
- Overmixing incorporates too much air, which, when baked, can cause the cake to collapse. Additionally, it can activate the gluten in the flour too much, resulting in a tough texture instead of a light and airy sponge.
How to Avoid It:
- Mix the ingredients just until they are combined. Once the flour is added, gently fold it into the batter rather than beating it. This will help preserve the lightness of the sponge.
- Use a folding technique rather than a vigorous stirring motion. When incorporating the flour, fold gently with a spatula in a figure-eight motion to avoid deflating the batter.
2. Incorrect Oven Temperature
Baking at the wrong temperature is another frequent mistake. If the oven is too hot, the cake may rise quickly and unevenly, potentially leading to cracks. If the temperature is too low, the cake may take too long to bake and risk becoming soggy or undercooked.
Why This Happens:
- An oven that is too hot can cause the outside of the cake to set before the inside has fully risen, resulting in a dry, dense texture.
- Conversely, baking at too low a temperature won’t allow the cake to rise properly, and it may result in a heavy, flat sponge.
How to Avoid It:
- Preheat the oven thoroughly before putting the cake in. This ensures an even baking environment.
- Use an oven thermometer to check the temperature, as oven temperatures can often be inaccurate. The ideal baking temperature for a Victoria Sponge is around 350°F (175°C).
- Place the cake in the center of the oven to ensure even heat distribution.
3. Using the Wrong Type of Flour
Another mistake is using the wrong type of flour. Traditional Victoria Sponge Cake requires self-raising flour, which contains baking powder to help the cake rise. Using all-purpose flour or plain flour without adding baking powder can result in a dense and flat cake.
Why This Happens:
- If you use the wrong flour or forget to add baking powder, your cake won’t rise properly, and the texture will be heavy and compact.
How to Avoid It:
- Stick to self-raising flour for the lightest and fluffiest sponge.
- If you can’t find self-raising flour, you can make your own by adding 1½ teaspoons of baking powder for every cup of plain or all-purpose flour.
4. Not Measuring Ingredients Correctly
Baking is a precise science, and incorrectly measuring ingredients can throw off the balance of your Victoria Sponge, leading to a variety of issues like a collapsed or overly dense cake.
Why This Happens:
- Using too much flour or sugar can lead to a heavy, dense cake, while too little butter can make the sponge dry.
- Not measuring the ingredients accurately can also affect the texture, moisture level, and rise of the cake.
How to Avoid It:
- Always measure ingredients carefully using proper kitchen scales. For dry ingredients like flour, use the spoon-and-level method (spoon the flour into the measuring cup and level it off with a knife) to avoid packing it too tightly.
- Room temperature ingredients: Make sure your butter, eggs, and cream are at room temperature. Cold ingredients can cause the batter to seize, resulting in a less fluffy texture.
5. Underbaking or Overbaking
Another common mistake is not properly timing the bake. Either underbaking (not allowing the cake to cook long enough) or overbaking (leaving the cake in the oven for too long) can cause a variety of problems.
Why This Happens:
- Underbaking can result in a soggy, uncooked center, especially around the edges.
- Overbaking leads to a dry, crumbly texture and may cause the cake to lose its delicate fluffiness.
How to Avoid It:
- Check the cake a few minutes before the recommended baking time by inserting a toothpick into the center. If it comes out clean, the cake is done. If there’s batter on the toothpick, give it a few more minutes.
- Be mindful of the time and adjust it based on your oven’s temperature and the size of your cake pans.
6. Not Letting the Cake Cool Properly
After baking, the cooling process is just as important as the baking itself. If the cake is not allowed to cool properly before assembling, it can become soggy, and the layers may not set evenly.
Why This Happens:
- As the cake cools too quickly or unevenly, it can collapse or become too wet, especially if you’re adding filling before it’s fully cooled.
How to Avoid It:
- Let the cake layers cool in the pan for 10 minutes, then transfer them to a wire rack to cool completely. This prevents them from becoming too moist on the bottom.
- Allow the sponge to cool completely before adding any filling or frosting. The filling may melt or become too runny if applied while the cake is still warm.
7. Skipping the Greasing and Lining of Pans
It might seem like a small step, but greasing and lining the cake pans is essential to ensure your sponge doesn’t stick to the sides and comes out perfectly every time.
Why This Happens:
- If the pans aren’t properly prepared, the sponge can stick to the sides, causing the layers to tear or break when you try to remove them.
How to Avoid It:
- Grease the cake pans with butter or oil and line them with parchment paper to make it easier to release the cakes once they’re done.
- For added insurance, you can also lightly dust the pans with flour after greasing, or use a non-stick spray designed for baking.
8. Not Leveling the Cake Layers
It’s easy to get excited about the final assembly, but sometimes cake layers can come out uneven or domed, making it difficult to stack them neatly.
Why This Happens:
- If the cake layers are uneven, the top layer can slide off or create a lopsided appearance.
How to Avoid It:
- Once the cake layers have cooled, use a serrated knife to trim any domed or uneven edges. This ensures the layers sit flat and makes it easier to spread the jam and cream filling evenly.
9. Not Choosing the Right Filling or Jam Consistency
The filling is an integral part of the Victoria Sponge, but sometimes the choice of jam or cream can cause issues. Using runny jam or overly thick cream can make the cake soggy or too stiff.
Why This Happens:
- Jam that’s too liquid can seep into the sponge, making it soggy, while overly thick cream can make it difficult to spread evenly.
How to Avoid It:
- Choose a spreadable jam that is thick but not runny. You can also cook down fruit preserves slightly to make them thicker if needed.
- Use whipped cream that’s thick enough to hold its shape but not so stiff that it’s hard to spread.
Avoiding These Mistakes for a Perfect Victoria Sponge Cake
By understanding and avoiding these common mistakes, you can ensure your Victoria Sponge Cake comes out perfectly every time. With practice, attention to detail, and a few simple tips, you’ll be able to create a light, fluffy, and delicious sponge that will wow your guests and make the perfect dessert for any occasion!
Conclusion: The Timeless Appeal of Victoria Sponge Cake
The Victoria Sponge Cake stands as a beloved symbol of British baking tradition, offering a deliciously simple yet rich dessert that has captured hearts for generations. Its light, airy texture, filled with classic jam and cream, makes it the perfect treat for any occasion, particularly for afternoon tea. As we’ve explored, the Victoria Sponge is not just a cake—it’s a slice of history, an enduring classic, and a delight for anyone with a sweet tooth.
Whether you’re a seasoned baker or just getting started, this recipe is easy to master, and we encourage you to put your own spin on it. Experiment with different jams, fillings, or even cake flavors to create a unique version of this timeless dessert that suits your taste.
Now it’s your turn! We’d love to hear about your baking experience. Share your tips, tricks, and any variations you’ve tried in the comments below. Let’s continue celebrating this iconic British cake together!