
Fudge is one of the most indulgent, rich, and satisfying treats you can make at home. Whether you love the classic chocolate version or enjoy experimenting with unique flavors, the 10 best fudge recipes offer a variety of delicious options to suit every taste. With just a few simple ingredients like butter, sugar, and condensed milk, you can create a smooth, creamy, and melt-in-your-mouth dessert.
Perfect for holidays, gifts, or simply satisfying a sweet tooth, fudge is a crowd-pleaser that never goes out of style. From traditional chocolate fudge to peanut butter, caramel swirl, and white chocolate varieties, this list of the 10 best fudge recipes has something for everyone. Whether you’re a beginner or a seasoned baker, these easy and delicious recipes will help you master the art of homemade fudge.
Get ready to explore the best fudge recipes and find your new favorite go-to treat! 🍫✨
What Makes the 10 Best Fudge Recipes So Delicious?
The Key to Creamy, Rich Fudge
1. Butter – The Key to a Smooth Texture
Butter plays a crucial role in creating creamy fudge by adding richness and helping to bind the ingredients together. Using high-quality unsalted butter ensures a smoother, silkier texture. If you prefer a slightly salty contrast to balance the sweetness, you can use salted butter or add a pinch of sea salt.
2. Sweetened Condensed Milk – The Secret to Soft, Non-Grainy Fudge
Unlike traditional fudge recipes that require boiling sugar and milk to the perfect temperature, many easy fudge recipes use sweetened condensed milk as a shortcut. This ingredient provides a thick, creamy consistency and prevents the fudge from becoming grainy. Because it’s already sweetened, it eliminates the need for extra sugar, making the process fail-proof and beginner-friendly.
3. Chocolate – The Heart of the Best Fudge Recipes
Chocolate is the star ingredient in most homemade fudge recipes. Whether you use dark chocolate, milk chocolate, or white chocolate, the quality of the chocolate significantly impacts the final flavor. High-quality chocolate chips or chopped chocolate bars melt smoothly and create a rich, velvety fudge. For a more intense chocolate flavor, opt for dark chocolate with at least 60% cocoa content.
4. Optional Ingredients to Enhance Flavor and Texture
- Vanilla Extract: Enhances the overall sweetness and aroma of fudge.
- Marshmallow Cream or Corn Syrup: Helps prevent sugar crystallization, making the fudge extra smooth.
- Nuts (Walnuts, Pecans, Almonds): Add crunch and contrast to the soft texture.
- Caramel or Peanut Butter: Swirling in caramel or peanut butter creates delicious flavor variations.
Final Tip:
For the creamiest, richest fudge, be sure to stir continuously while melting to prevent burning and allow the fudge to cool slowly at room temperature before cutting. These small steps make a big difference in achieving the perfect homemade fudge recipe every time!
Common Mistakes to Avoid When Making Homemade Fudge Recipes
Even the best fudge recipes can go wrong if you’re not careful with the cooking process. Fudge may turn out too hard, too soft, grainy, or even fail to set properly due to small but crucial mistakes. Here are the most common errors to avoid when making homemade fudge recipes, along with tips on how to fix them.
1. Not Using a Candy Thermometer
One of the biggest mistakes when making traditional fudge is not cooking the mixture to the correct temperature. If the sugar mixture is undercooked (below 234°F / 112°C), the fudge won’t set properly and will remain too soft. On the other hand, if the mixture overcooks (above 240°F / 116°C), the fudge will become dry and crumbly.
To fix this, always use a candy thermometer to ensure you reach the perfect soft-ball stage (234°F-240°F / 112°C-116°C). If you don’t have a thermometer, drop a small amount of the mixture into cold water—if it forms a soft, pliable ball, it’s ready!
2. Stirring Too Much (or Not Enough)
Improper stirring can ruin the texture of fudge. Stirring too much while the fudge is heating can cause sugar crystallization, leading to a grainy or gritty texture. On the other hand, not stirring enough while melting chocolate and butter can result in uneven consistency.
To prevent this, avoid stirring once the sugar mixture starts boiling. Let it cook undisturbed until it reaches the proper temperature, then stir only when adding mix-ins like butter, chocolate, or vanilla extract.
3. Using the Wrong Ingredients
The type and quality of ingredients matter when making the best homemade fudge recipes. Using low-quality chocolate, margarine instead of butter, or evaporated milk instead of sweetened condensed milk can result in less creamy, less flavorful fudge.
To ensure a rich, creamy texture, always use high-quality chocolate and unsalted butter. Sweetened condensed milk is preferred over evaporated milk for easy fudge recipes, as it creates a smoother consistency.
4. Not Allowing the Fudge to Cool Properly
Many people rush the cooling process by placing hot fudge in the refrigerator or freezer. This can cause uneven setting and a crumbly texture. Cooling too fast also affects how sugar crystals form, making the fudge grainy.
For the best results, let the fudge cool at room temperature for 2-3 hours before refrigerating. If possible, allow it to set overnight for the best texture.
5. Cutting the Fudge Too Soon
If you try to cut fudge before it has completely set, you’ll end up with sticky, misshapen, or falling-apart pieces.
To get perfect slices, wait until the fudge is fully firm and set before slicing. Use a sharp knife, and for cleaner cuts, run the blade under hot water and wipe it dry between cuts.
Final Tip:
Perfecting homemade fudge recipes takes a little practice, but avoiding these common mistakes will help you achieve smooth, creamy, and delicious fudge every time!
The Difference Between Classic Fudge vs. Quick & Easy Fudge Recipes
When it comes to making the 10 best fudge recipes, there are two main types: classic fudge and quick & easy fudge. Both versions are delicious, but they differ in ingredients, preparation time, and cooking techniques. Understanding these differences can help you choose the right method based on your skill level, available time, and desired texture.
1. Classic Fudge – Traditional and Time-Tested
Classic fudge follows a more traditional candy-making process, requiring precise temperature control and patience. It has a rich, smooth, and slightly firm texture with a deep, well-balanced sweetness.
Key Characteristics of Classic Fudge:
- Uses granulated sugar, butter, heavy cream (or milk), and chocolate or cocoa powder
- Requires boiling the sugar mixture to the soft-ball stage (234°F-240°F / 112°C-116°C)
- Involves using a candy thermometer to ensure accuracy
- Needs proper cooling and beating to develop the right texture
- Results in a firmer but melt-in-your-mouth consistency
Pros:
Authentic, old-fashioned flavor
Richer texture with a perfect balance of firmness and creaminess
Ideal for gifting and long-term storage
Cons:
Requires precision and patience
More time-consuming
Can be tricky for beginners without a thermometer
2. Quick & Easy Fudge – A Modern, No-Fuss Shortcut
For those who want a simple, fail-proof method, quick and easy fudge recipes are the best option. These recipes rely on sweetened condensed milk instead of boiling sugar, eliminating the need for temperature monitoring and candy thermometers.
Key Characteristics of Quick & Easy Fudge:
- Uses sweetened condensed milk, butter, and chocolate
- No boiling or precise temperature control required
- Typically made using the microwave or stovetop
- Takes just 10-15 minutes of active preparation
- Results in a softer, creamier fudge that sets in the fridge
Pros:
Takes significantly less time to prepare
No need for a candy thermometer or advanced skills
Perfect for last-minute treats or holiday gifts
Cons:
Slightly softer texture than traditional fudge
Less control over the sugar crystallization process
Slightly sweeter and denser than classic fudge
3. Which Fudge Recipe is Right for You?
- If you love authentic, old-fashioned flavors and are comfortable with candy-making techniques, go for classic fudge.
- If you need a quick, easy, and delicious treat without the hassle of boiling sugar, then quick & easy fudge recipes are your best bet.
Final Thoughts:
Both classic and quick fudge recipes have their place in the world of homemade sweets. Classic fudge offers a time-honored, rich experience, while quick fudge provides a convenient and effortless way to enjoy a creamy, chocolatey treat. No matter which one you choose, both are guaranteed to satisfy your sweet tooth!
For more delicious fudge ideas, check out this collection of the best fudge recipes from AllRecipes. You’ll find a variety of irresistible fudge treats to satisfy every craving!
10 Best Fudge Recipes You Must Try
Classic Chocolate Fudge Recipe
Nothing beats the rich, smooth, and decadent taste of classic chocolate fudge. This old-fashioned recipe follows a traditional candy-making process, ensuring a perfect balance of creaminess and firmness. Unlike quick fudge recipes that rely on condensed milk, this classic method uses granulated sugar, butter, milk, and cocoa powder or chocolate, creating an authentic, melt-in-your-mouth experience.
Ingredients for Classic Chocolate Fudge
To make the perfect classic chocolate fudge, you’ll need:
- 2 cups granulated sugar – Provides the sweetness and structure
- ½ cup whole milk – Helps dissolve the sugar and creates a creamy texture
- ½ cup unsalted butter – Adds richness and smoothness
- ¼ cup cocoa powder (or 4 oz semi-sweet chocolate, chopped) – The key to deep chocolate flavor
- 1 teaspoon vanilla extract – Enhances the overall taste
- ¼ teaspoon salt – Balances the sweetness
- Optional: ½ cup chopped nuts (walnuts, pecans, or almonds) – Adds a crunchy texture
Step-by-Step Instructions
1. Prepare Your Equipment:
- Line an 8×8-inch baking dish with parchment paper or lightly grease it with butter.
- Keep a candy thermometer handy to monitor the temperature.
2. Heat the Sugar and Milk:
- In a heavy-bottomed saucepan, combine sugar, milk, butter, and cocoa powder (or chocolate) over medium heat.
- Stir constantly until the mixture comes to a gentle boil.
3. Cook to the Soft-Ball Stage:
- Allow the mixture to boil without stirring until it reaches 234°F-240°F (112°C-116°C) on a candy thermometer.
- This stage ensures the fudge will set properly while maintaining a smooth, non-grainy texture.
4. Remove from Heat and Add Flavorings:
- Once the mixture reaches the desired temperature, remove it from heat.
- Stir in vanilla extract and salt (and nuts if using).
5. Beat the Fudge Mixture:
- Let the mixture cool for 5-10 minutes, then beat it vigorously with a wooden spoon until it thickens and loses its gloss.
- This step helps create the smooth, creamy consistency classic fudge is known for.
6. Pour and Set:
- Quickly pour the mixture into the prepared pan and spread it evenly.
- Let it sit at room temperature for 2-3 hours or refrigerate until firm.
7. Cut and Serve:
- Once fully set, remove from the pan and cut into squares.
- Enjoy your rich, homemade classic chocolate fudge!
Tips for the Best Classic Chocolate Fudge
Use a candy thermometer – Temperature accuracy is key to achieving the perfect texture.
Avoid stirring once it starts boiling – This prevents sugar crystallization, which can make the fudge grainy.
Beat the mixture properly – This step creates a smooth, creamy consistency.
Use high-quality cocoa or chocolate – The better the chocolate, the richer the fudge!
Final Thoughts
Classic chocolate fudge is a timeless, indulgent treat that’s perfect for holidays, gifts, or anytime cravings. With the right technique and ingredients, you can make a batch of perfectly creamy, rich fudge that melts in your mouth every time!
Easy Microwave Fudge Recipe
For those who want to enjoy delicious homemade fudge but lack the time or patience for traditional methods, the Easy Microwave Fudge Recipe is the perfect solution. This quick and simple method is great for beginners or anyone looking for a no-fuss, creamy fudge that’s ready in minutes. With just a few ingredients and your microwave, you can make rich, velvety fudge without worrying about boiling sugar or using a candy thermometer.
Ingredients for Easy Microwave Fudge
- 1 (14 oz) can sweetened condensed milk – Provides sweetness and helps the fudge set without boiling sugar
- 2 cups semi-sweet chocolate chips – The main chocolate flavor, melted to create a smooth base
- 1 tablespoon unsalted butter – Adds a creamy texture and richness
- 1 teaspoon vanilla extract – Enhances the chocolate flavor
- Optional: ½ cup chopped nuts (e.g., walnuts, pecans, or almonds) – Adds a crunchy contrast to the smooth fudge
Step-by-Step Instructions
1. Prepare Your Dish:
- Line an 8×8-inch baking dish or 9×9-inch square pan with parchment paper or grease it with a little butter to prevent sticking.
2. Microwave the Chocolate and Sweetened Condensed Milk:
- In a microwave-safe bowl, combine the chocolate chips, sweetened condensed milk, and butter.
- Microwave on high for 30 seconds, then stir. Continue microwaving in 15-second intervals, stirring in between, until everything is melted and smooth. This process usually takes about 1-2 minutes.
3. Add Vanilla Extract and Stir:
- Once the chocolate mixture is smooth, stir in the vanilla extract. This adds a delicious depth of flavor and enhances the overall taste of your fudge.
4. Optional: Add Nuts or Other Mix-ins:
- If you like, fold in chopped nuts, candies, or dried fruit for extra texture and flavor. This is completely optional but adds a personalized touch to your fudge.
5. Pour and Set:
- Pour the melted fudge mixture into your prepared pan, spreading it out evenly with a spatula.
- Let the fudge cool to room temperature for about 30 minutes, then refrigerate it for at least 1-2 hours until it’s fully set and firm.
6. Cut and Serve:
- Once the fudge has set, lift it out of the pan using the parchment paper (if used) and cut it into squares.
Tips for the Best Easy Microwave Fudge
Use high-quality chocolate chips – The better the chocolate, the better the fudge!
Stir well to avoid lumps – Stir thoroughly after each microwave session to ensure the mixture is fully melted and smooth.
Don’t overheat the mixture – Microwave in short intervals to prevent burning the chocolate and creating a grainy texture.
Chill thoroughly – Make sure the fudge is completely chilled before cutting into squares for the best texture.
Variations to Try:
- Peanut Butter Fudge: Replace half the chocolate chips with peanut butter chips or swirl in some peanut butter after melting.
- Mint Chocolate Fudge: Add mint extract to the melted mixture for a cool minty flavor.
- Marbled Fudge: Pour some white chocolate fudge on top of the chocolate fudge and swirl together for a pretty marbled effect.
- S’mores Fudge: Add mini marshmallows and crushed graham crackers for a fun, s’mores-inspired fudge.
Final Thoughts
The Easy Microwave Fudge Recipe is a game-changer for anyone craving a quick, delicious treat. With just a few simple ingredients and your microwave, you can create smooth, creamy fudge that rivals the traditional method. Plus, it’s a perfect recipe for beginners, busy weeknights, or any time you need a fudge fix in a hurry!
Peanut Butter Fudge Recipe
Peanut butter lovers, rejoice! The Peanut Butter Fudge Recipe combines the rich, creamy texture of peanut butter with the indulgent sweetness of fudge, making it the perfect treat for anyone with a sweet tooth. This no-bake fudge recipe is incredibly simple and requires minimal ingredients, but it still packs a ton of flavor. Whether you’re making it for a party, holiday, or just because, this peanut butter fudge will surely become a favorite.
Ingredients for Peanut Butter Fudge
- 1 cup creamy peanut butter – The star ingredient that gives the fudge its rich, nutty flavor
- ½ cup unsalted butter – Adds a smooth and creamy texture
- 1 (14 oz) can sweetened condensed milk – Helps the fudge set perfectly without the need for a candy thermometer
- 3 cups powdered sugar – Provides the necessary sweetness and helps the fudge firm up
- 1 teaspoon vanilla extract – Enhances the overall flavor and complements the peanut butter
- Optional: ½ cup chopped peanuts – Adds a crunchy texture to the fudge (optional but highly recommended!)
Step-by-Step Instructions
1. Prepare Your Pan:
- Line an 8×8-inch baking dish with parchment paper or lightly grease it with butter. This ensures the fudge doesn’t stick and makes it easier to cut after it sets.
2. Melt Peanut Butter and Butter:
- In a medium saucepan, combine the peanut butter and butter over medium heat. Stir frequently until the mixture is smooth and fully melted.
3. Add Sweetened Condensed Milk:
- Pour in the sweetened condensed milk and stir to combine. Keep stirring until the mixture is well blended and smooth. This helps create the creamy base of your fudge.
4. Stir in Powdered Sugar:
- Gradually add the powdered sugar, stirring it in slowly to avoid lumps. Mix until the sugar is fully incorporated and the mixture thickens into a dough-like consistency.
5. Add Vanilla and Optional Nuts:
- Stir in vanilla extract for extra flavor, and if you want a bit of crunch, fold in chopped peanuts or other nuts of your choice. This gives the fudge a delightful texture contrast.
6. Pour and Set:
- Pour the peanut butter fudge mixture into your prepared pan. Use a spatula to spread it evenly and press it down gently.
- Refrigerate for 1-2 hours or until the fudge is fully set and firm.
7. Cut and Serve:
- Once set, lift the fudge out of the pan using the parchment paper (if used) and cut it into small squares. You can serve immediately or store it in an airtight container.
Tips for the Best Peanut Butter Fudge
✅ Use smooth, creamy peanut butter – Chunky peanut butter can disrupt the creamy texture of the fudge. Stick with smooth peanut butter for the best results.
Gradually add powdered sugar – Adding the sugar slowly helps prevent lumps and ensures a smooth texture.
Chill thoroughly – Make sure the fudge is completely chilled and firm before cutting into squares for the best texture and ease of serving.
For a twist, try different nut butters – Almond butter, cashew butter, or even hazelnut butter can be swapped in for a unique flavor.
Variations to Try:
- Chocolate Peanut Butter Fudge: Add chocolate chips to the mixture for a rich chocolate-peanut butter combo. Melt the chocolate and swirl it through the peanut butter fudge for a marbled effect.
- Peanut Butter Swirl Fudge: Layer chocolate fudge and peanut butter fudge together in a pan, creating a beautiful swirl pattern for an extra indulgent treat.
- Peanut Butter Pretzel Fudge: Add crushed pretzels to the fudge mixture for a salty-sweet combo that’s irresistible.
- Peanut Butter Cup Fudge: For extra peanut butter flavor, mix in chopped mini peanut butter cups into the fudge mixture before setting it.
Final Thoughts
The Peanut Butter Fudge Recipe is an easy, quick, and delicious way to satisfy your sweet and salty cravings. With its smooth texture, rich flavor, and simple ingredients, this fudge is bound to become a favorite in your fudge repertoire. Whether you’re serving it at a party, wrapping it up as a gift, or just enjoying it on your own, this peanut butter fudge is the perfect combination of sweet and nutty indulgence.
White Chocolate Fudge Recipe
White chocolate fudge is the perfect indulgence for anyone with a sweet tooth, especially those who prefer the smooth, creamy texture of white chocolate over traditional dark or milk varieties. This luxurious fudge is incredibly simple to make, with just a few ingredients that create a rich, melt-in-your-mouth treat. Whether you’re making it for the holidays, a special occasion, or as a gift, this white chocolate fudge recipe is sure to be a hit.
Ingredients for White Chocolate Fudge
- 2 cups white chocolate chips – The primary ingredient that gives the fudge its rich, creamy texture and sweet flavor
- 1 (14 oz) can sweetened condensed milk – Adds sweetness and helps the fudge set without any complicated candy-making techniques
- ¼ cup unsalted butter – Makes the fudge extra smooth and adds richness
- 1 teaspoon vanilla extract – Enhances the flavor and balances the sweetness of the white chocolate
- Optional: ½ cup crushed candy canes or sprinkles – Perfect for adding festive flair or extra texture, especially around holidays
Step-by-Step Instructions
1. Prepare Your Pan:
- Line an 8×8-inch baking dish or a similar-sized pan with parchment paper or lightly grease it with butter to ensure the fudge comes out easily once it sets.
2. Melt the White Chocolate and Butter:
- In a medium saucepan, combine the white chocolate chips and unsalted butter over low heat. Stir frequently to prevent burning and ensure the mixture melts evenly.
- Once melted and smooth, remove the saucepan from the heat.
3. Add Sweetened Condensed Milk:
- Stir in the sweetened condensed milk to the melted white chocolate mixture. This will create the creamy base for the fudge. Stir until it’s fully combined and smooth.
4. Stir in Vanilla Extract:
- Add vanilla extract and stir it into the fudge mixture to enhance the overall flavor and add depth.
5. Optional: Add Mix-ins:
- If you like, fold in crushed candy canes for a minty twist or some holiday sprinkles for a fun pop of color. This adds both flavor and visual appeal, making your fudge extra festive. You can also add chopped nuts like macadamia or pistachios for added texture.
6. Pour and Set:
- Pour the fudge mixture into your prepared pan. Spread it out evenly with a spatula, and press it gently to ensure it’s smooth and uniform.
- Refrigerate the fudge for 2 hours or until fully set. The fudge should be firm and easy to cut into squares once chilled.
7. Cut and Serve:
- After the fudge has set, lift it out of the pan using the parchment paper (if used). Cut it into small squares and serve. If you’re gifting it, place it in a box or jar for a sweet homemade present.
Tips for the Best White Chocolate Fudge
✅ Use high-quality white chocolate – Since white chocolate is the main flavor, using a good quality brand will make a huge difference in the taste and texture.
Stir gently to prevent graininess – White chocolate can seize up if overheated, so make sure to melt it on low heat and stir constantly.
Let the fudge cool at room temperature before refrigerating – Cooling it slowly helps prevent condensation from forming on the surface of the fudge.
Customize with flavor variations – Mix in some dried fruit like cranberries, chopped cookies, or even a dash of almond extract for a unique twist on the classic recipe.
Variations to Try:
- Coconut White Chocolate Fudge: Add shredded coconut to the fudge for a tropical twist. The coconut pairs wonderfully with the creamy white chocolate.
- Raspberry Swirl White Chocolate Fudge: Drizzle some raspberry jam or pureed raspberries over the fudge before it sets, then swirl with a toothpick for a beautiful marbled effect.
- White Chocolate Pistachio Fudge: Add chopped pistachios for a bit of crunch and a nutty flavor that complements the smooth white chocolate.
- Matcha White Chocolate Fudge: For a unique flavor, add matcha powder to the white chocolate mixture before setting. This will give your fudge a gorgeous green hue and a delicate earthy flavor.
Final Thoughts
White chocolate fudge is a delightfully creamy and rich treat that’s incredibly easy to make, yet feels special and indulgent. With its subtle sweetness and smooth texture, this fudge is perfect for anyone who enjoys the flavor of white chocolate. It’s an ideal dessert for gifting or serving at holiday gatherings, and it pairs wonderfully with a cup of tea or coffee. With endless variations and possibilities, you can easily adapt this recipe to suit your taste and make it your own!
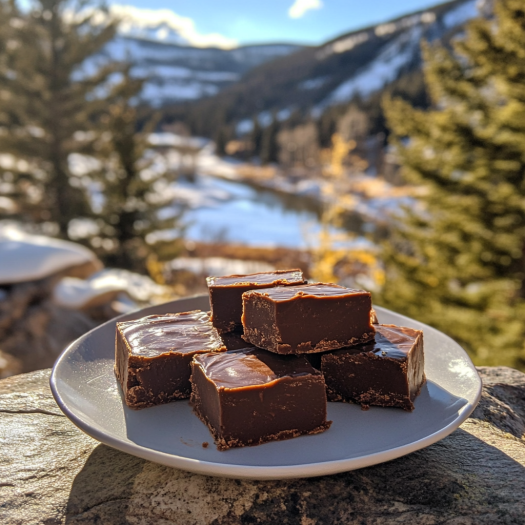
Caramel Swirl Fudge Recipe
Caramel and fudge are a match made in heaven. The Caramel Swirl Fudge Recipe combines the sweet, buttery goodness of caramel with the creamy, rich texture of traditional fudge, creating a dessert that’s irresistible. The subtle depth of the caramel adds a luxurious touch to the classic fudge, and the swirling effect makes it as beautiful as it is delicious. This fudge is perfect for holidays, gifts, or simply when you’re craving something indulgent.
Ingredients for Caramel Swirl Fudge
- 1 (14 oz) can sweetened condensed milk – This ingredient is key for the smooth, creamy base of the fudge.
- 1 cup semi-sweet chocolate chips – Provides the rich, chocolatey flavor that complements the caramel.
- 1 cup caramel sauce – Adds the signature caramel flavor, bringing that golden, sweet richness to the fudge.
- 1/2 cup unsalted butter – Ensures the fudge stays smooth and creamy as it sets.
- 1 teaspoon vanilla extract – Enhances the overall flavor of the fudge.
- 1/4 teaspoon salt – Balances the sweetness and enhances the caramel flavor.
- Optional: Chopped nuts (pecans or walnuts) – Adds texture and pairs wonderfully with both chocolate and caramel.
Step-by-Step Instructions
1. Prepare Your Pan:
- Line an 8×8-inch baking dish with parchment paper or grease it with butter to make removing the fudge easier once it sets.
2. Melt the Fudge Base:
- In a medium saucepan, melt the butter over medium heat. Once melted, add the sweetened condensed milk and semi-sweet chocolate chips. Stir continuously until the chocolate chips are completely melted and the mixture is smooth and creamy.
- Once melted, remove from heat and stir in vanilla extract and salt. Set aside.
3. Make the Caramel Swirl:
- In a separate small saucepan, gently heat the caramel sauce over low heat. You want it to be warm and pourable, but not bubbling. If you’re using store-bought caramel, this should be ready to go.
- If you’re making your own caramel, heat sugar, butter, and a little cream until it turns golden and thickens to a sauce consistency.
4. Swirl the Caramel into the Fudge:
- Pour the melted chocolate fudge mixture into your prepared pan and spread it evenly with a spatula.
- Next, drizzle the warm caramel sauce over the fudge mixture. Using a knife or toothpick, swirl the caramel through the fudge to create a marbled effect. Be careful not to mix too much; you want those beautiful, visible swirls to shine.
5. Refrigerate to Set:
- Place the pan in the refrigerator for at least 2 hours to allow the fudge to fully set and firm up. Once chilled, it should be firm to the touch and easy to cut into squares.
6. Cut and Serve:
- Once set, lift the fudge out of the pan (if using parchment paper) and cut it into squares. You can also sprinkle chopped nuts (pecans or walnuts) on top before chilling for extra texture and flavor. Serve as a decadent treat or give it as a sweet gift.
Tips for the Best Caramel Swirl Fudge
✅ Use high-quality caramel sauce – If you’re using store-bought caramel sauce, choose one that’s thick and smooth. You want the caramel to hold its shape in the fudge and create that beautiful swirl.
Don’t overmix the caramel – When swirling the caramel into the fudge, don’t stir too much. You want distinct caramel ribbons running through the chocolate, so leave it lightly swirled.
Chill thoroughly – Be sure to refrigerate the fudge for long enough to allow it to set completely. This ensures the fudge will hold its shape when you cut it.
Add nuts for extra flavor – Chopped pecans or walnuts complement both the chocolate and caramel flavors perfectly, so don’t hesitate to add them to the mixture before setting the fudge or sprinkle them on top for added crunch.
Variations to Try:
- Chocolate-Covered Caramel Fudge: For an extra layer of indulgence, dip the set fudge squares in melted chocolate and let them cool for a chocolate-covered caramel fudge.
- Sea Salt Caramel Fudge: Add a sprinkle of sea salt on top of the fudge before refrigerating to enhance the caramel flavor with a salty contrast.
- Caramel Pecan Swirl Fudge: Incorporate roasted pecans into the fudge mixture for a rich, nutty texture that complements the caramel perfectly.
- Caramel Mocha Fudge: Add a spoonful of instant coffee or espresso powder to the chocolate mixture to make it a caramel mocha fudge. The coffee adds depth and balances the sweetness of the caramel.
Final Thoughts
The Caramel Swirl Fudge Recipe is the perfect combination of creamy chocolate and buttery caramel, creating a truly irresistible treat. Whether you’re making it for a holiday gathering, a special occasion, or just because you deserve something sweet, this fudge is sure to impress. It’s easy to make and can be customized with your favorite mix-ins for added texture and flavor. The swirls of caramel add an elegant touch that’s sure to make your fudge stand out. Don’t forget to gift it to friends and family for a homemade treat they’ll love!
Pro Tips for Making the 10 Best Fudge Recipes
How to Avoid Grainy Fudge and Achieve the Best Consistency
Grainy fudge is one of the most common issues that can occur when making homemade fudge. This undesirable texture results when the sugar crystals don’t dissolve properly, causing the fudge to feel rough or sandy in your mouth rather than smooth and creamy. Achieving the perfect creamy consistency is one of the keys to making fudge that’s both delicious and visually appealing. Here’s how to ensure your fudge comes out smooth, creamy, and with the best texture every time.
1. Use the Right Ingredients
The quality of your ingredients plays a significant role in the smoothness of your fudge. Opt for high-quality ingredients, including unsalted butter, sweetened condensed milk, and pure chocolate (instead of chocolate chips, which can sometimes have stabilizers). Using fresh and pure ingredients ensures better texture and flavor consistency.
- Butter: Choose unsalted butter for better control over the salt content and to prevent an overly salty fudge.
- Chocolate: Always go for real chocolate (whether dark, milk, or white) rather than chocolate chips, which can have a stabilizing agent that affects the consistency.
2. Monitor Your Cooking Temperature
One of the most crucial factors in avoiding grainy fudge is controlling the cooking temperature. Overheating the sugar or not heating it to the correct temperature can cause the sugar to crystallize and ruin the texture of your fudge.
- Use a candy thermometer to monitor the temperature while cooking. For a smooth and creamy fudge, you want the mixture to reach about 234°F to 240°F (soft-ball stage) for the ideal consistency.
- If you don’t have a candy thermometer, a good test is to drop a little of the hot fudge mixture into a glass of cold water. If it forms a soft ball that can be flattened when pressed between your fingers, it’s ready.
- Cook over low heat to avoid burning the sugar and ensure even melting.
3. Don’t Stir Too Aggressively
Stirring too much or too aggressively can cause the sugar to crystallize, leading to a grainy texture. Instead, stir gently and occasionally, especially after the mixture has melted and combined. Once the sugar has fully dissolved, avoid stirring too much, as excessive agitation can encourage the formation of sugar crystals.
- Stirring too fast can also incorporate too much air into the fudge, leading to a rough texture. Stir just enough to blend the ingredients smoothly.
4. Allow the Fudge to Cool Gradually
After your fudge mixture is cooked and poured into the pan, don’t rush the cooling process. Rapid cooling can lead to crystallization, making the fudge grainy. Instead, let the fudge cool at room temperature, allowing the sugar to settle evenly into the mixture. Once the fudge is at room temperature, transfer it to the fridge to firm up.
- Allow the fudge to cool slowly and evenly to avoid uneven texture.
- Refrigerating the fudge helps it set perfectly without disturbing the smooth consistency.
5. Avoid Overcooking
Overcooking your fudge can cause it to dry out and become grainy. To avoid this, be mindful of the cooking time and temperature. Fudge should reach the correct temperature, and then you should remove it from the heat immediately.
- Timing is crucial: As soon as the fudge reaches the soft-ball stage, remove it from the heat to avoid cooking it too long.
- Don’t wait too long after removing the fudge from the heat to add your mix-ins, as it may start to set prematurely, causing lumps or a grainy texture.
6. Be Patient with Cooling and Setting
Once the fudge has been poured into the pan, resist the urge to rush it. Let it cool completely and set for the best consistency. Cutting the fudge too early can cause it to break or become unevenly set. Be patient; let it rest until it’s firm and fully set before cutting into squares.
- If the fudge hasn’t set properly after several hours, it may need a bit more time to solidify in the fridge.
- Don’t touch the surface of the fudge while it’s cooling to avoid affecting the smooth surface.
7. Use a Reliable Recipe
When making fudge, following a trusted recipe is key to achieving the perfect consistency. Some recipes may include additional steps, like tempering the chocolate or adding an acid like cream of tartar to prevent crystallization. Choose a recipe that has been tested for a smooth result to ensure your fudge comes out with the best texture.
- A recipe with clear instructions on temperatures and methods is crucial for consistent results.
- If you’re using add-ins like nuts, dried fruits, or candy pieces, make sure to fold them in gently once the fudge is properly mixed and smooth.
8. Use a Food Processor for Perfect Fudge Texture
If you’re worried about your fudge turning out too grainy, a food processor can help achieve the perfect texture, especially for chocolate-based fudges. After the fudge mixture has cooled slightly, briefly pulse it in a food processor for 5 to 10 seconds to eliminate any remaining sugar crystals, creating a smoother, creamier fudge.
9. Adding Stabilizers to Help Smoothness
Some fudge recipes use corn syrup or cream of tartar to help prevent sugar crystals from forming, which could otherwise lead to graininess. These stabilizers can help you achieve a perfectly smooth texture, even if your cooking temperature is slightly off. If your recipe suggests using them, don’t skip them.
10. Fixing Grainy Fudge
If, despite all your efforts, your fudge turns out grainy, there’s a simple fix: reheat the fudge gently and add a little more sweetened condensed milk or butter to the mixture. Stir until the mixture smooths out, and then allow it to set again. While this can save a batch of fudge, it’s better to avoid this step by following the proper cooking instructions from the start.
Final Thoughts
Making fudge may seem like a simple task, but achieving the perfect creamy texture requires attention to detail and a few important steps. By following the right cooking temperature, stirring gently, and letting the fudge set properly, you can avoid graininess and enjoy smooth, melt-in-your-mouth fudge every time. Remember, patience and careful control of the cooking process are key to achieving that irresistible, smooth fudge that everyone loves.
Using a Candy Thermometer for Perfect Results
When it comes to making the best homemade fudge, precision is key—and one of the most important tools you can use for precise results is a candy thermometer. The candy thermometer ensures that your fudge reaches the ideal temperature for the perfect texture and consistency. Whether you’re making classic chocolate fudge, peanut butter fudge, or any other variation, using a candy thermometer helps take the guesswork out of the process and eliminates the risk of overcooking or undercooking the sugar mixture.
Here’s everything you need to know about using a candy thermometer to get perfect fudge results every time:
1. Why Use a Candy Thermometer?
Fudge making is all about achieving the correct sugar temperature. The sugar needs to reach a specific point (the soft-ball stage) to ensure the fudge sets with the right texture. Without a candy thermometer, it’s hard to know if the temperature is just right, leading to issues like grainy fudge, too-soft fudge, or fudge that won’t set properly.
- Consistency is key: A candy thermometer helps you consistently make fudge that’s smooth, creamy, and perfectly set every time.
- Eliminates guesswork: With a thermometer, you don’t need to rely on timing or the old-school “drop a bit in cold water” method to check temperatures. It’s a foolproof way to ensure the sugar is cooked to the correct stage.
2. How a Candy Thermometer Works
Candy thermometers are designed to measure high temperatures, making them perfect for boiling sugar syrups and chocolate mixtures. These thermometers typically come in two varieties:
- Analog thermometers: These thermometers have a dial with a temperature range marked on it. You can easily see the temperature as it rises.
- Digital thermometers: These give you a precise digital reading of the temperature. Some even have alarms that go off when the desired temperature is reached.
Most candy thermometers will have markers for different stages of sugar cooking, such as the soft-ball, firm-ball, and hard-crack stages, which are key for various candy and fudge recipes. For fudge, the goal is usually the soft-ball stage (234°F – 240°F or 112°C – 115°C).
3. Proper Placement of the Thermometer
To get accurate readings, it’s essential to place the candy thermometer in the correct position:
- Avoid touching the pan’s bottom: Make sure the thermometer is submerged in the mixture without touching the bottom of the pot. If the thermometer touches the bottom of the pan, it could give you an inaccurate reading because the pan may be hotter than the mixture.
- Avoid contact with air bubbles: Make sure that the thermometer is fully submerged in the liquid but not surrounded by air bubbles. Air bubbles can lead to misleading readings, so make sure the thermometer’s sensor is placed properly in the liquid.
4. The Soft-Ball Stage: The Ideal Temperature for Fudge
The key stage to aim for in most fudge recipes is the soft-ball stage. This is when the sugar has reached the ideal temperature for creating a smooth, creamy texture. The soft-ball stage is typically between 234°F and 240°F (112°C – 115°C). At this point, the syrup will form a soft ball when dropped into cold water.
- Signs to look for: When your fudge mixture reaches the soft-ball stage, it should thicken to a consistency that is just right for setting. At this temperature, the sugar is dissolved enough to give your fudge the smooth consistency you want, but not so much that it will result in a grainy texture.
5. Monitoring the Temperature Closely
Once your mixture starts to heat up, make sure to keep an eye on the thermometer as it climbs. The temperature can rise fairly quickly, especially as you approach the target range, so it’s important to stay close to the stove to prevent overcooking.
- Don’t leave it unattended: It’s tempting to walk away while waiting for the temperature to rise, but leaving the fudge unattended can result in overheating. Stay near the stove and watch the thermometer closely.
- Adjust the heat: If the temperature is rising too quickly, lower the heat to ensure the mixture doesn’t cook too fast or burn. It’s always best to heat the mixture slowly, allowing the sugar to dissolve properly.
6. The Importance of a Consistent Temperature
Consistency is vital for the perfect fudge texture, and a candy thermometer can help maintain that. Once your fudge reaches the correct temperature, remove it from the heat immediately. If the temperature continues to rise, the fudge could become too firm, and you risk overcooking it.
- Avoid overcooking: After your fudge reaches the soft-ball stage, immediately remove it from the heat to stop it from cooking further. Letting it cook past the ideal range will lead to a firmer, less creamy texture.
7. How to Use a Candy Thermometer in Different Fudge Recipes
Different fudge recipes may require slight adjustments in temperature or technique, but most recipes will require that you reach the soft-ball stage for perfect results. Here are some variations:
- Classic chocolate fudge: Follow the traditional soft-ball stage guidelines for a rich and creamy texture.
- Peanut butter fudge: Peanut butter-based fudge typically requires you to boil the sugar mixture to the soft-ball stage before adding the peanut butter for that smooth texture.
- Microwave fudge: Even though microwave fudge may seem like a shortcut, a thermometer can still help. Heat the mixture in the microwave, and check the temperature to ensure it reaches the soft-ball stage. This ensures a creamy consistency when set.
8. Troubleshooting Tips for Candy Thermometer Use
Even with a thermometer, there can be challenges when making fudge. Here are a few troubleshooting tips:
- Thermometer not reading properly: Make sure the thermometer is calibrated. To test, place it in boiling water. It should read around 212°F (100°C) at sea level. If not, it may need calibration or replacement.
- If the fudge is too runny: It may not have reached the soft-ball stage. If it’s too runny and doesn’t set, reheat the mixture and cook it a little longer, checking the temperature again.
- If the fudge is too firm: If your fudge is too firm after cooling, it may have been overcooked and reached a higher temperature than necessary. You can still try to rescue it by melting it down and adding some milk or cream.
9. Conclusion: Why Every Fudge Maker Needs a Candy Thermometer
Using a candy thermometer is one of the most reliable ways to make fudge with perfect consistency. By measuring the temperature accurately, you ensure that the sugar mixture reaches the right stage for that ideal smooth and creamy texture. A candy thermometer helps avoid common pitfalls like grainy fudge, overly soft or firm fudge, and inconsistent results. Whether you’re a beginner or an experienced baker, this tool is an essential part of your kitchen arsenal for perfect fudge every time.
How to Store Homemade Fudge Recipes to Keep Them Fresh Longer
Storing your homemade fudge properly is essential to preserving its delicious flavor, creamy texture, and freshness for as long as possible. Fudge is a treat that can last for several days or even weeks, but how you store it plays a huge role in maintaining its quality. Whether you’re making classic chocolate fudge, peanut butter fudge, or other creative varieties, proper storage ensures that your fudge remains as fresh and flavorful as when you first made it.
Here’s a comprehensive guide on how to store your homemade fudge to keep it fresh for a longer period:
1. Allow the Fudge to Cool Completely
Before storing your homemade fudge, it’s crucial to let it cool completely at room temperature. If you try to store fudge while it’s still warm, condensation can form inside the storage container, leading to sogginess or a soft texture that’s not ideal for fudge.
- How long should you cool it? Typically, 1 to 2 hours at room temperature is sufficient for the fudge to cool down completely. Make sure it has fully set before attempting to store it.
- Avoid rushing the cooling process: Don’t speed up the cooling by placing the fudge in the refrigerator right away. This can cause it to harden unevenly or affect the texture.
2. Proper Container Choices
The container you choose plays an important role in maintaining the freshness and texture of your fudge. Airtight containers are the best option to keep the fudge sealed from air, which can dry it out or cause it to lose its smooth texture.
- Glass jars: Glass jars with tight-fitting lids work well, as they are airtight and prevent air from getting inside.
- Plastic containers: Use plastic storage containers with a secure lid. Make sure there’s no gap in the lid, as any exposure to air can affect the fudge’s freshness.
- Wax paper or parchment paper: If you’re storing multiple pieces of fudge, layer them between sheets of wax paper or parchment paper to prevent them from sticking together. This is especially important if you plan to stack the fudge.
3. Keep Fudge in a Cool, Dry Place
The storage location for fudge is key to ensuring it stays fresh. Store it in a cool, dry place, away from direct sunlight or heat. Heat can cause the sugar in the fudge to melt or become overly soft, which ruins the texture.
- Ideal temperature: The best temperature range for storing fudge is between 60°F and 70°F (15°C – 21°C). This is cool enough to prevent the fudge from melting, yet warm enough to maintain its creamy consistency.
- Avoid high humidity: Humid environments can lead to moisture forming on the fudge, which may cause it to become soggy or lose its texture over time.
4. Storing Fudge in the Refrigerator
If you live in a warmer climate or simply want to extend the shelf life of your fudge, storing it in the refrigerator can be a good option. The fridge will help keep the fudge firm and prevent it from becoming too soft or sticky. However, there are some important things to keep in mind when refrigerating fudge:
- Wrap it properly: Make sure the fudge is wrapped tightly in plastic wrap or stored in an airtight container to avoid it absorbing any unwanted smells or moisture from the fridge.
- Let it sit at room temperature: Before serving, allow the fudge to come to room temperature for the best texture and flavor. Cold fudge can be too firm, so letting it sit for 10–15 minutes before serving is recommended.
- Shelf life: When stored in the refrigerator, fudge can last up to 2–3 weeks. Be sure to check for any signs of moisture or separation before consuming.
5. Freezing Fudge for Long-Term Storage
If you want to store your fudge for longer periods, freezing is an excellent option. Fudge freezes well, and you can enjoy it months later without compromising too much on taste or texture. Here’s how to do it properly:
- Wrap tightly: To prevent freezer burn, wrap the fudge in plastic wrap, followed by a layer of aluminum foil. Alternatively, place it in an airtight freezer-safe container or freezer bag.
- Portion it out: Consider cutting your fudge into smaller portions before freezing it. This way, you can easily thaw only what you need, and it won’t have to sit out and get exposed to air.
- Label it: If you’re freezing multiple batches or flavors, be sure to label the containers with the type of fudge and the date it was made. This helps keep track of the fudge’s age.
- Thawing frozen fudge: To thaw fudge, leave it at room temperature for a few hours. Avoid using the microwave, as it can cause the texture to change. Fudge stored in the freezer can last up to 3 months.
6. Keep Different Flavors Separate
If you’re storing different types of fudge (such as chocolate fudge, peanut butter fudge, and white chocolate fudge), it’s best to store them separately. Different flavors can transfer to each other, especially if they’re not sealed properly. Keeping them in separate containers or wrapping each flavor individually helps maintain the integrity of each one.
7. How to Revive Fudge that Has Become Too Soft or Hard
Even with the best storage methods, fudge can sometimes become too soft or hard over time. Here’s how you can fix it:
- Too soft? If your fudge becomes too soft or sticky, you can chill it in the refrigerator for 30 minutes to help it firm up. Alternatively, you can gently heat it over a double boiler and then re-mold it into the desired shape.
- Too hard? If the fudge becomes too firm, you can reheat it gently with a bit of heavy cream or milk to restore its creamy texture. Be careful not to overheat, as it can affect the fudge’s consistency.
8. How Long Does Fudge Last?
When stored properly, fudge can last for:
- At room temperature: Up to one week in an airtight container.
- In the refrigerator: Up to 2–3 weeks.
- In the freezer: Up to 3 months.
Fudge is a great treat to have on hand, and proper storage will ensure that it stays fresh and delicious for as long as possible.
Conclusion
Proper storage is essential for keeping your homemade fudge fresh and flavorful for as long as possible. By following these storage tips—whether at room temperature, in the refrigerator, or in the freezer—you can enjoy your homemade fudge at its best, even days or weeks after making it. With airtight containers, proper cooling, and the right temperature, your fudge will stay creamy, rich, and delicious.
FAQs About the 10 Best Fudge Recipes
Can I Make Fudge Without Condensed Milk? (Alternatives Like Evaporated Milk)
Condensed milk is a common ingredient in many fudge recipes because it helps achieve the smooth, creamy texture that’s characteristic of this treat. However, you may be wondering if it’s possible to make fudge without condensed milk. Whether you’re out of condensed milk or prefer to use an alternative, the good news is that you can still create delicious, rich fudge using other ingredients, such as evaporated milk or heavy cream. Let’s dive into the best substitutes and how they affect your fudge recipe.
Why Use Condensed Milk in Fudge?
Before exploring alternatives, it’s important to understand why sweetened condensed milk is so commonly used in fudge recipes:
- Sweetness and Creaminess: Condensed milk is both sweetened and creamy, adding both sugar and a smooth texture to the fudge mixture.
- Thickness: The sugar in condensed milk helps the fudge firm up as it cools, providing the right consistency.
- Ease: Condensed milk is a convenient shortcut for making fudge because it requires no further cooking or preparation, unlike traditional fudge recipes that use sugar and butter that need to be melted to a precise temperature.
That said, there are several excellent alternatives if you don’t have condensed milk on hand or prefer a different option.
1. Evaporated Milk
Evaporated milk is one of the most common substitutes for condensed milk in fudge recipes. It’s made by removing about 60% of the water from regular milk, making it thicker and creamier than regular milk, though it lacks the sweetness of condensed milk.
- How to substitute: To replace condensed milk with evaporated milk, you’ll need to add sugar since evaporated milk is not sweetened. A general ratio is to combine 1 can of evaporated milk (12 oz) with 1 ¼ cups of sugar. You can also add vanilla extract or butter to help achieve that smooth, rich texture.
- Effect on texture and flavor: While the flavor may be less sweet compared to using condensed milk, it will still result in a smooth, creamy fudge. The sugar addition makes up for the missing sweetness, so the end result should be very similar to traditional fudge.
2. Heavy Cream
Heavy cream can also be used as an alternative, especially when you’re looking for a luxuriously rich texture. It’s naturally sweeter and creamier than milk, which helps in mimicking the creamy consistency of condensed milk.
- How to substitute: You can replace condensed milk with equal parts heavy cream, though you may need to add a little extra sugar to make it as sweet as condensed milk. Adding a small amount of butter or corn syrup may also help thicken the mixture and improve the texture.
- Effect on texture and flavor: Fudge made with heavy cream will be richer and smoother, with a slightly different taste due to the higher fat content. It’s perfect for making creamy chocolate fudge or indulgent caramel swirl fudge.
3. Coconut Milk or Coconut Cream
For those looking to make dairy-free fudge, coconut milk or coconut cream can be a fantastic substitute for condensed milk. Coconut milk provides a rich, creamy base with a slightly tropical flavor, while coconut cream is thicker and richer, making it ideal for fudge.
- How to substitute: If you’re using coconut milk, you may need to add sugar (about 1 cup of sugar per can of coconut milk) to achieve the sweetness of condensed milk. If using coconut cream, it’s already thicker, so you might not need to adjust the consistency too much.
- Effect on texture and flavor: Coconut milk and cream give your fudge a unique flavor profile, with the coconut providing an additional layer of taste. The texture will be creamy, but you may need to tweak the sugar or thickening agents to get it just right.
4. Greek Yogurt (For a Lighter Option)
If you’re looking to make a healthier, lower-fat version of fudge, you might consider using Greek yogurt as a substitute for condensed milk. Greek yogurt is creamy, tangy, and relatively thick, though it’s not as sweet as condensed milk.
- How to substitute: To replace condensed milk with Greek yogurt, combine the yogurt with sugar, as Greek yogurt on its own isn’t sweet enough. A typical ratio would be 1 cup of Greek yogurt with ½ cup of sugar (adjust to taste). You can also add a little vanilla extract to enhance the flavor.
- Effect on texture and flavor: Fudge made with Greek yogurt will have a slightly tangy taste, which adds a unique twist. The texture will still be creamy, though it might not be quite as smooth and rich as with condensed milk, but it will be a lighter alternative.
5. Sweetened Condensed Coconut Milk
For a vegan alternative, you can use sweetened condensed coconut milk. This is a plant-based product that’s made similarly to regular condensed milk but uses coconut milk as the base.
- How to substitute: Sweetened condensed coconut milk can be used in a 1:1 ratio as a replacement for traditional condensed milk in fudge recipes. Since it’s already sweetened, you won’t need to add extra sugar.
- Effect on texture and flavor: The flavor will have a noticeable coconut element, which can be a delightful addition to fudge, especially when making coconut-themed fudge varieties. The texture is creamy and thick, making it a perfect substitute.
6. Make Your Own Condensed Milk
If you prefer to control the ingredients and avoid store-bought alternatives, you can make your own homemade condensed milk using a few simple ingredients. The recipe typically involves simmering regular milk and sugar to reduce it by about 60% until it thickens.
- How to substitute: You can use your homemade condensed milk in the same way as store-bought condensed milk in any fudge recipe.
- Effect on texture and flavor: Homemade condensed milk will have the same sweetness and consistency as the canned version, making it a perfect one-to-one replacement in any recipe.
Conclusion
While condensed milk is a staple in many fudge recipes, there are several effective alternatives you can use if you prefer or need to avoid it. Evaporated milk, heavy cream, Greek yogurt, and even coconut milk can be excellent substitutes, each contributing unique textures and flavors to your fudge. Whether you’re making dairy-free fudge, looking to cut back on sugar, or simply experimenting with new ingredients, these substitutes allow you to create delicious, rich, and creamy fudge without the need for condensed milk.
Why Is My Fudge Not Setting Properly? (Common Mistakes and Solutions)
One of the most frustrating things that can happen when making fudge is when it doesn’t set properly. You’ve followed the recipe, the ingredients seem fine, but your fudge just won’t firm up as expected. Don’t worry—this is a common issue and can usually be fixed with a few simple adjustments. In this section, we’ll explore some of the most common mistakes that cause fudge to not set, along with solutions to help you achieve that perfect, creamy, and firm consistency.
1. Not Reaching the Right Temperature
One of the biggest reasons why fudge doesn’t set properly is not reaching the right temperature during cooking. Fudge relies on precise heat to create the proper sugar crystallization that gives it the firm texture we all love.
- Mistake: Not cooking the fudge mixture to the right temperature, or overcooking it, can result in fudge that’s either too soft or too hard.
- Solution: Use a candy thermometer to monitor the temperature. For traditional fudge recipes, the mixture needs to reach about 234°F to 240°F (soft-ball stage). If your fudge mixture doesn’t reach this temperature, it won’t set properly. If you overcook it, the fudge can become too hard or grainy.
- Tip: If you don’t have a candy thermometer, test the fudge using the cold water test: drop a small spoonful of the fudge into a bowl of cold water and see if it forms a soft ball that can be squished between your fingers. If it does, the fudge is ready to be poured into your pan.
2. Incorrect Proportions of Ingredients
If the ingredients aren’t balanced properly, it can prevent the fudge from setting. Too much liquid, not enough sugar, or too little fat can all cause problems with the consistency.
- Mistake: Using the wrong proportions of butter, sweetened condensed milk, or sugar can interfere with the fudge’s ability to firm up properly. For example, if you use too much sugar or liquid, the fudge may turn out too runny and won’t set.
- Solution: Stick to the ingredient ratios in the recipe. If you’re experimenting with substitutions or ingredient changes (e.g., swapping sweetened condensed milk for evaporated milk), make sure to adjust other ingredients like sugar and butter accordingly to keep the right balance.
3. Not Cooling the Fudge Properly
The way you cool your fudge is just as important as how you cook it. Improper cooling can prevent the fudge from setting correctly, leaving it soft, sticky, or even grainy.
- Mistake: Trying to cool the fudge too quickly or in an area that’s too warm can cause the texture to become uneven or prevent it from setting. On the other hand, cooling the fudge in a place that’s too cold might cause it to set too quickly, leading to a cracked texture.
- Solution: Allow your fudge to cool at room temperature for about an hour. Then, transfer it to the refrigerator to set completely. Give it at least 2-3 hours to firm up before cutting into it.
- Tip: If your kitchen is warm, consider placing the fudge in a cooler room or near a fan to help the fudge set without overheating.
4. Using the Wrong Type of Chocolate
Not all types of chocolate are the same, and using the wrong kind can lead to fudge that won’t set. Some chocolates contain higher levels of cocoa butter or fat, which can interfere with the setting process.
- Mistake: Using chocolate that’s too high in cocoa butter (like chocolate couverture) can make the fudge soft and not allow it to set as expected.
- Solution: Use standard baking chocolate or chocolate chips that are designed for melting. They contain the right balance of fat and cocoa to set the fudge properly.
- Tip: Avoid using chocolate with a high sugar content (like milk chocolate) unless the recipe specifically calls for it, as it may alter the texture and setting process.
5. Overmixing or Undermixing the Fudge
Mixing is a key step in making fudge, and getting it just right is essential for the texture. If you overmix or undermix the fudge, it may not set properly.
- Mistake: Overmixing the fudge can cause the sugar crystals to break down too much, resulting in grainy fudge that never sets. Conversely, undermixing the fudge can leave clumps of unincorporated ingredients, preventing it from setting evenly.
- Solution: Once the fudge has reached the right temperature, remove it from the heat and stir gently until it’s well combined. Avoid vigorous stirring that can introduce air bubbles or break down the sugar crystals.
- Tip: When mixing in the chocolate or flavorings, be sure to do so off the heat to avoid disrupting the setting process.
6. Not Using the Correct Pan
The size of the pan you use can make a difference in how your fudge sets. If you use a pan that’s too small, your fudge will be too thick, and if it’s too large, it can be too thin and may not set properly.
- Mistake: Using a pan that’s too shallow or too deep can impact how quickly the fudge sets and how thick the texture is.
- Solution: Use a 9×9-inch pan for traditional fudge recipes for the best results. If you want thicker fudge, you can reduce the pan size slightly, but keep in mind that this might require adjusting the cooling time.
- Tip: Line your pan with parchment paper or wax paper to make removing the fudge easier once it has set.
7. Adding Too Much Liquid
Fudge can be very sensitive to moisture. If there’s too much liquid in the mixture, the fudge won’t firm up properly and will stay too soft or runny.
- Mistake: Adding extra liquids (such as cream, milk, or syrup) can cause the fudge to remain too soft and prevent it from setting.
- Solution: Stick to the exact amount of liquid called for in the recipe. If you must adjust for texture, try using small amounts of powdered sugar or cornstarch to help absorb excess moisture without compromising the flavor.
Conclusion
If your fudge isn’t setting properly, don’t give up just yet! By troubleshooting the most common mistakes, such as cooking at the wrong temperature, using incorrect proportions, or mixing improperly, you can usually get your fudge to set perfectly. Whether it’s a matter of adjusting your technique, using the right equipment, or giving it enough time to cool, these solutions will help you achieve that perfect, smooth, and firm fudge you’re craving.
How Long Does Homemade Fudge Last? (Storage Tips)
Homemade fudge is a delightful treat, and one of the best things about it is that you can make a batch ahead of time to enjoy throughout the week or even longer. However, to get the most out of your fudge, proper storage is essential to preserve its taste and texture. So, how long does homemade fudge last, and what are the best ways to store it?
1. Shelf Life of Homemade Fudge
Homemade fudge typically lasts for about 1 to 2 weeks when stored properly at room temperature. This can vary depending on the ingredients used, such as whether it’s a basic chocolate fudge or contains perishable ingredients like cream or butter.
- Fudge with milk or cream (like a cream cheese fudge) might only last for up to 5 days at room temperature, as the dairy content can spoil faster.
- Chocolate and peanut butter fudges, on the other hand, can last a little longer (up to two weeks) due to the higher sugar content, which acts as a preservative.
It’s important to note that fudge is best enjoyed fresh. The longer it sits, the more likely it is to lose its smooth, creamy texture. However, with the right storage methods, you can extend its shelf life and maintain its delicious flavor.
2. Storing Fudge at Room Temperature
The most common way to store fudge is at room temperature, and this method works well if you plan to eat it within a week or two.
- Storage tips:
- Store your fudge in an airtight container to protect it from humidity and external odors. This helps to prevent it from becoming too soft or sticky and ensures it remains fresh.
- If you’ve made a large batch of fudge, you may want to cut it into smaller pieces before storing it. This makes it easier to take out just what you need without exposing the entire batch to air and moisture.
- Keep your fudge in a cool, dry place, away from direct sunlight or heat sources, as heat can cause the fudge to melt or become overly soft.
- Wax paper or parchment paper can be used to separate layers of fudge in the container to prevent them from sticking together.
3. Refrigerating Fudge for Longer Freshness
If you know you won’t be able to eat all your fudge within a week, refrigeration is an excellent option to extend its shelf life. Refrigerating fudge helps to preserve its texture and flavor for up to 3 weeks.
- Storage tips:
- Place your fudge in an airtight container to prevent it from absorbing moisture from the refrigerator, which could affect its consistency.
- For added protection, wrap the fudge in plastic wrap before placing it in the container to help it stay fresh longer.
- If you live in a particularly humid environment, refrigeration will help prevent your fudge from becoming too sticky or losing its firmness.
While refrigeration is great for prolonging the shelf life of your fudge, it may cause the fudge to become firmer, and it may lose some of its smooth, melt-in-your-mouth texture. To restore it to its original consistency, you can let it sit at room temperature for 15-20 minutes before enjoying.
4. Freezing Fudge for Long-Term Storage
If you’ve made a huge batch of fudge or just want to store it for a few months, freezing is your best bet. Properly frozen fudge can last for up to 3 months, allowing you to enjoy it long after you’ve made it.
- Storage tips:
- Wrap each piece of fudge in plastic wrap or aluminum foil to create an airtight seal. This will protect the fudge from freezer burn.
- Then place the wrapped fudge in a freezer-safe container or resealable freezer bag. Label it with the date so you know how long it has been stored.
- If you’ve made a large batch of fudge, consider freezing it in smaller portions to avoid thawing and refreezing, which can affect its texture.
- To thaw frozen fudge, simply remove it from the freezer and let it sit at room temperature for a few hours. Avoid microwaving it directly from the freezer, as it could change the texture.
5. Signs That Fudge Has Gone Bad
While fudge is a treat that typically lasts well with proper storage, there are some signs that your fudge may have gone bad:
- Change in texture: If the fudge becomes excessively sticky, grainy, or hard, it might have absorbed moisture or been exposed to heat, making it unappetizing.
- Off taste: If the fudge develops a sour or rancid flavor, it’s a sign that the fats or dairy ingredients have spoiled.
- Discoloration: If you notice any mold growth, discoloration, or strange spots, it’s time to discard the fudge.
Always use your best judgment when storing and consuming fudge. If it looks, smells, or tastes off, it’s best to throw it away.
Conclusion
Homemade fudge is a rich and indulgent treat that can last anywhere from a few days to several weeks depending on how it’s stored. To make the most out of your batch, keep it in an airtight container, and for longer freshness, consider refrigerating or freezing it. Whether you’re making fudge for a special occasion or as a simple sweet snack, these storage tips will help you keep your fudge fresh and delicious for as long as possible.
Can I Freeze Fudge for Later? (Best Practices for Freezing)
Freezing fudge is an excellent way to preserve it for longer periods, allowing you to enjoy your homemade treat well after it’s been made. Whether you’ve made a large batch, want to save some for later, or simply want to prepare fudge ahead of time for a special occasion, freezing is an effective solution. However, there are key considerations to ensure your fudge remains fresh and delicious after being frozen. Here’s everything you need to know about freezing fudge and the best practices to follow for optimal results.
1. Why Freeze Fudge?
Freezing fudge allows you to extend its shelf life significantly. While fudge can last up to 2 weeks at room temperature or up to 3 weeks in the refrigerator, freezing can preserve it for up to 3 months. This is particularly useful when you’ve made more fudge than you can consume within a short time or when you’re preparing it ahead of a busy holiday season, party, or gifting occasion.
Freezing fudge also means you can enjoy a homemade treat whenever you want without needing to make a new batch each time.
2. Best Practices for Freezing Fudge
To ensure your fudge freezes well and retains its smooth texture and flavor, follow these best practices:
- Cool the Fudge Completely: Before freezing, make sure the fudge is fully cooled and set. Placing warm or hot fudge directly in the freezer can lead to condensation, which will cause the fudge to become sticky or lose its texture. Allow the fudge to sit at room temperature for at least 2 hours or until it has completely hardened.
- Cut Fudge into Pieces: If you’ve made a large batch of fudge, consider cutting it into smaller, individual pieces before freezing. This makes it easier to thaw only the amount you need and prevents you from having to thaw the entire batch. Additionally, smaller pieces freeze and thaw more evenly.
- Wrap Fudge Properly: To prevent freezer burn and preserve the flavor, wrap each piece of fudge tightly in plastic wrap or wax paper. If you prefer, you can use aluminum foil as well. Be sure that the fudge is completely sealed, with no exposed edges. If you have a large batch, you can group the pieces together and wrap them in layers for added protection.
Use Airtight Containers or Freezer Bags:
After wrapping the fudge, place the wrapped pieces in a freezer-safe container or resealable freezer bag. Remove as much air as possible from the container or bag to avoid freezer burn and preserve the fudge’s texture. If you are using a freezer bag, you can flatten the bag to help save space and make it easier to stack in your freezer.
- Label and Date: It’s always a good idea to label the container or bag with the date the fudge was made or frozen. This way, you can keep track of how long it’s been in the freezer and avoid keeping it beyond the recommended 3-month freezing period.
3. Thawing Frozen Fudge
When you’re ready to enjoy your frozen fudge, it’s important to thaw it properly to preserve its smooth texture and rich flavor. Here’s how to thaw it:
- Thaw in the Refrigerator: The best way to thaw fudge is to transfer it from the freezer to the refrigerator. Let it sit in the fridge for several hours or overnight. This gradual thawing process helps prevent the fudge from becoming too soft or losing its consistency.
- Thaw at Room Temperature: If you need your fudge more quickly, you can let it thaw at room temperature. Simply take it out of the freezer and allow it to sit for about 15-20 minutes. However, be sure to avoid leaving it out for extended periods, as the fudge may become too soft and lose its texture.
- Avoid Using the Microwave: It’s best to avoid microwaving frozen fudge, as the high heat can cause it to melt unevenly and lose its creamy consistency. Thawing in the fridge or at room temperature is the safest option to preserve its quality.
4. Does Freezing Affect Fudge’s Texture and Taste?
Freezing can slightly alter the texture of some fudges, but if done correctly, the changes will be minimal. Fudge made with chocolate, peanut butter, or white chocolate tends to freeze and thaw the best, maintaining a similar texture. However, if your fudge contains ingredients that may be sensitive to freezing, like marshmallow fluff or certain creams, it may become a little softer after freezing and thawing.
While freezing won’t significantly change the flavor of your fudge, it is essential to ensure that your fudge is properly wrapped and stored to avoid freezer burn, which can negatively impact its taste. The richer the fudge (like those made with sweetened condensed milk or caramel), the better it typically freezes.
5. Can You Refreeze Fudge?
It’s generally not recommended to refreeze fudge once it has been thawed. The process of freezing and thawing can cause changes in texture, leading to graininess or an unpleasant consistency when refrozen. It’s best to only freeze the fudge once to maintain its creamy and smooth texture.
6. Freezing Special Fudge Variations
Some fudge recipes freeze better than others. For example:
- Chocolate Fudge: This classic fudge freezes very well and retains its texture after thawing.
- Peanut Butter Fudge: Peanut butter fudge is another type of fudge that freezes well and does not lose its consistency after freezing and thawing.
- White Chocolate Fudge: White chocolate fudge freezes well, but it can sometimes become a little softer after being thawed. Be mindful when handling.
- Caramel Fudge: Caramel-based fudge is a bit trickier, as it can become overly sticky or lose its firmness. Make sure it’s well-wrapped and properly stored.
Conclusion
Freezing fudge is an excellent way to preserve it for future enjoyment, allowing you to make a batch and store it for up to 3 months. By following proper wrapping and storage practices, you can ensure that your fudge stays fresh and delicious, ready to be enjoyed whenever you want a sweet treat. Whether you’re preparing ahead of time or just need to freeze leftovers, these best practices will help you freeze fudge successfully and maintain its mouthwatering taste.
Final Thoughts on the 10 Best Fudge Recipes

Recap of the 10 Best Fudge Recipes Covered
As we’ve explored in this post, there’s a fudge recipe for every taste, occasion, and level of cooking experience. Whether you’re a beginner looking to make a simple treat or an experienced baker seeking new flavor combinations, these 10 fudge recipes have something for everyone. Let’s recap each one and highlight the key features that make them special.
1. Classic Chocolate Fudge Recipe
This timeless recipe is the foundation of all fudge-making. Using simple ingredients like chocolate, butter, and condensed milk, this classic chocolate fudge offers a creamy, melt-in-your-mouth texture and rich chocolate flavor. Perfect for any occasion, it’s the go-to recipe when you’re craving something sweet, familiar, and delicious.
2. Easy Microwave Fudge Recipe
If you’re short on time or don’t have much experience in the kitchen, this easy microwave fudge recipe is a game-changer. By using the microwave to melt your ingredients, you can whip up a batch of fudge in just a few minutes. With the same rich and creamy consistency as stovetop recipes, this microwave fudge is perfect for busy weeknights or last-minute treats.
3. Peanut Butter Fudge Recipe
Peanut butter lovers will adore this smooth and creamy peanut butter fudge. Made with peanut butter, butter, and powdered sugar, it’s a perfect balance of sweet and savory. This recipe offers a delightful, nutty flavor that pairs wonderfully with chocolate, or you can enjoy it on its own for a truly satisfying treat.
4. White Chocolate Fudge Recipe
For those who prefer a more delicate, creamy fudge, white chocolate fudge is the way to go. White chocolate’s smooth texture and sweet flavor make it a standout option. You can also customize it with add-ins like nuts, dried fruits, or even a touch of vanilla extract for added depth.
5. Caramel Swirl Fudge Recipe
Caramel swirl fudge combines the richness of caramel with the classic texture of chocolate fudge, creating a deliciously indulgent treat. Swirling the caramel into the fudge adds a beautiful visual appeal and a deeper flavor that elevates this recipe to something special. It’s a crowd-pleaser for any party or event.
6. Mint Chocolate Fudge Recipe
Mint chocolate fudge offers a refreshing twist on the classic chocolate fudge. With a minty filling layered between rich chocolate, this fudge is both refreshing and indulgent. It’s perfect for holidays like Christmas, or anytime you want a fresh, minty dessert.
7. Rocky Road Fudge Recipe
Rocky road fudge is a fun and textural variation, combining marshmallows, nuts, and chocolate in a delightful, chewy treat. This is an excellent option for anyone who loves variety in their desserts. The combination of soft, crunchy, and chewy textures makes it incredibly satisfying.
8. Cookies and Cream Fudge Recipe
For Oreo lovers, the cookies and cream fudge is an absolute must-try. Crushed Oreo cookies add texture and a familiar flavor to creamy fudge, making it the perfect dessert for both kids and adults. The contrast of the rich chocolate fudge and the crunchy cookies creates a mouthwatering combination.
9. Salted Caramel Fudge Recipe
For those who enjoy a salty-sweet contrast, salted caramel fudge is a perfect match. The creamy caramel and the hit of sea salt balance each other out, creating an irresistible treat. This recipe is a great choice if you’re looking to impress guests with a sophisticated flavor profile that’s both decadent and unique.
10. Butterscotch Fudge Recipe
Butterscotch fudge is a rich, buttery version of traditional fudge that’s sweet, smooth, and incredibly satisfying. The flavor of brown sugar and butter shines through, creating a melt-in-your-mouth experience. It’s a fantastic choice for those who love the deep, caramelized taste of butterscotch.
Why These Recipes Stand Out
Each of these 10 best fudge recipes brings something unique to the table. From classic flavors like chocolate and peanut butter to more inventive variations like mint, rocky road, and butterscotch, these recipes cater to a wide range of tastes. Whether you’re making a batch for a holiday, gift-giving, or simply satisfying a sweet tooth, these fudges offer rich, creamy, and indulgent results every time.
By mastering these recipes, you’ll be able to impress friends and family with your candy-making skills and ensure there’s always a delicious treat on hand for any occasion. And with the tips and techniques provided throughout this post, you’ll be ready to take on any fudge-making challenge, whether you’re an experienced baker or a first-time fudge creator.
Now that you’ve got the 10 best fudge recipes under your belt, it’s time to get into the kitchen and start making your favorite— or perhaps, try them all!
note ;
Indulge in the ultimate dessert experience with our Ultimate Fudge Cake Recipe. This rich, decadent cake is perfectly moist, chocolatey, and utterly irresistible—ideal for any occasion or when you’re craving something sweet. Whether you’re a chocolate lover or just looking for a show-stopping treat, this fudgy cake is sure to impress!
Conclusion
Homemade fudge is the perfect treat for anyone who loves indulgent, rich, and sweet desserts. Whether you’re looking to stick with classic chocolate or venture into unique flavor combinations like salted caramel or peanut butter, the 10 best fudge recipes covered in this post offer something for every taste. The beauty of fudge is its versatility—whether you prefer easy microwave recipes or intricate layered versions, the possibilities are endless.
By following a few simple tips, such as using the right ingredients, experimenting with flavors, and avoiding common mistakes, you’ll be able to create the perfect fudge every time. And don’t forget, homemade fudge makes an excellent gift for friends and family, especially when paired with personalized flavors or festive designs.
So, gather your ingredients, unleash your creativity, and enjoy the sweet satisfaction of making and sharing your very own homemade fudge. Whether it’s for a special occasion, a holiday, or simply to satisfy a sweet tooth, you can’t go wrong with these 10 best fudge recipes. Happy fudge-making!